Wednesday, May 14, 2014

Me Made (Maternity) May: Halfway Roundup

You guys, thank you so much for the outpouring of congratulations and excitement on my behalf regarding my coming SHB! Walnut is less sure than you all, though, about his feelings on the matter...

Me Made May, days 1, 2, 4-6: black chiffon top, Come to Feather dress, A New Hope dress (for May the Fourth!), Ariadne tunic, and casual Gatsby dress.

It's been interesting seeing how pregnancy has been affecting my body, and therefore my sewing and wearing of me-made clothing. I think those of us who sew are probably more aware of our bodies than the average shopper; after all, we're trying to make garments that perfectly fit our bodies. This is good, because we end up with items that are tailored to our specific measurements, but the flip side is that when those measurements change, those perfectly fitted items really don't fit!

This was exactly the case with basically half my closet -- all those very fitted top, flared skirt dresses? Unwearable, and almost immediately*! While I pretty much expected that to be the case, what surprised me was the reason why they didn't fit. I thought my expanding waistline would be the problem, but instead, it was my expanding bust. Somehow, I missed the memo about growing almost two cup sizes while pregnant. It's been really weird for me; I always thought I'd be thrilled to have a larger bust, but now that it's happened, I feel almost as if I don't know myself anymore. Okay, maybe that's a little melodramatic, but stay with me here: all my life I've identified as a small-busted lady, and I've made the best of that by making a lot of dartless bodices that really only work if one is fairly small. Throw in society's messed-up evaluation of a woman based on her chest size, and even if I don't subscribe to it, it still gets in your head, you know? And now that I suddenly have cleavage, I'm all mixed up about my style because my signature items don't fit anymore. I was going to wear my beaded Gatsby dress (the quintessential gamine, flat-chested look!) to a fancy dinner two months ago and I couldn't get the slip on! Can I have a fashion-based nervous breakdown without sounding totally shallow?

*My Star Wars dress was the last fitted dress I was able to wear, and only because it had originally been quite loose. Even then, it was a tight squeeze. I'm pretty sure May 4th was literally the last day I could have zipped it up and still been able to sit down and breathe!

Days 7, 8, 10, and 11: Golden Oatmeal dress, It's Hip to Be a Square maxi dress, unblogged tee refashion, and Japanese dress. Notice how these are all knit garments. 

My fabulous Ursula bustier that I spent so long working on? A week after I took the photos, it didn't fit anymore...at the bust. I could still fasten the waist stay, but it wouldn't zip all the way up. I wanted to cry because it just seemed so unfair. Of course, once I hit month four, my waist did start slowly growing, so the bustier really didn't fit at all. I had to pack it away inside my costume trunk and hope that one day I'll be able to wear it again. Man, it's a good thing I have so many elastic-waisted, knit garments in my closet. The SHB is now the size of a pomegranate, so you can definitely tell from the side now. From the front, things still look fairly normal, or so I tell myself. My waist has always been my favorite feature, so I find myself alternating between denial and mourning as it slowly disappears...

Days 12-14: Travel to Work dress, granny dress to maxi skirt refashion, Dulcie dress. Hurrah for elastic waists and belts! 

All this to say, MMM14 has been a bit of an adventure, and I've had a couple of weekends of emergency sewing (I know, exactly what we're not supposed to do!) as I try to make more maternity-suitable clothing. I don't think I'm mentally adjusted to my changing body yet, though, so most of those makes have just been loose, swingy tops that aren't actual maternity tops. More on those to come!

Other sewing moms, how did you make the mental and emotional adjustment to your changing pregnant body? I'd appreciate any tips you have to share!

Friday, May 9, 2014

Mother Gothel Cosplay for Mother's Day

I don't know why I love Disney villains so much...they just seem so much more interesting than the princesses, although I do still have a soft spot in my heart for Belle (because she reads!). I love it when people try to come up with backstories that explain their motivation (e.g. Ursula was actually King Triton's older sister who was denied the throne simply because she was a female, hence her desire to become Queen of Atlantica). We don't get much from Disney's Tangled's Mother Gothel, other than her vain desire to stay young and beautiful, but one of my favorite fairy tale novel adaptations is Donna Jo Napoli's Zel. In this version, the evil witch is just an infertile woman who longs for a daughter, so much so that she goes to unspeakable lengths to keep her adopted daughter with her. That doesn't excuse her actions by any means, but it does make her a much more nuanced character.

Why are villain costumes always so much better, too? I'm way more into jewel tones than pastels. 

Anyway, I had some nine+ yards of this stretch panne velvet in burgundy (picked up for free from someone else's stash at school!), plus leftover gold trim from my shieldmaiden costume, so like with Ursula, I decided on a whim that the stash practically demanded another random costume. I also wanted to see if I could redeem this most abhorred of fabrics (polyester! stretch! not really velvet! so very costumey! and not in a good way!).

I had just enough trim leftover to encircle the neckline. I ended up having a 1.5" scrap left at the end. *whew* That was close!

I found this website very helpful in planning my costume; even though I wasn't interested in screen accuracy, I did still want it to be recognizable as Mother Gothel. It was pretty easy to sew up the body of the dress from my knit block (I just extended the side seams down and out to make a full skirt), but figuring out the sleeves took some doing. The problem with making costumes based on animated designs is that animators don't always consider things like, oh, seams have to go somewhere, and fabric needs to be cut on some kind of grain to get a certain drape. Mother Gothel's sleeves are very fitted at the top, then they suddenly bell out around the elbow to make that trumpet shape. There's just the one underarm seam and that's it! It took me about eight tries to get the sleeve shape more or less right (a lot of other costumes I've seen have the fullest part of the sleeve hanging from the wrong place, or the sleeves are full all the way through), but thank goodness I had plenty of (free) fabric! I think I might have used about 1.5 yards of fabric just making trial sleeves. In the end, the sleeve shape was not anything I would ever have predicted.

Wtf, amirite?

I lined the inside of the sleeve with some random black scraps I had, added the gold bias binding, and called it a day. No hemming or seam finishes -- it's a costume, after all, and I don't even have anywhere to wear it to! I just wanted to sew it up for the sake of using up as much of this fabric as possible. I finished it in time for April's Vibrant Color Stashbusting challenge, but since I didn't blog it until now, I suppose it also counts as May's Knit Stashbusting? I mean, it's stretchy, even if it's not what one typically considers a knit.

Now, my wig wardrobe is not particularly deep. I've got the short white one (mad scientist and Ursula) and then I've got my old Bellatrix one. Neither is an exact match for Mother Gothel, but obviously the Bellatrix one works better. So excuse the not-quite-right black curls, but here goes!

The lighting in my apartment also makes the fabric look more red and less burgundy.

I didn't think to look at what exactly her pose was before taking these pictures. Oops. 
I'm really in love with these sleeves. 
This is what the back looks like. You can kind of see where my underarm seam ended up. 
I'm sorry I don't have any full length pictures showing the full sweep of the gown's skirt. 
That's because once we start getting zooming out too much, inappropriate things start showing up in the frame, like this ridiculously cute (and decidedly non-villainous) elephant humidifier. 

Summary:
Fabric: 7 yards or so of 54" wide burgundy stretch panne velvet, 1/2 yard of black stretchy mesh (leftover from Ursula's skirt), a strip of burgundy sheet (leftover from Ballister's cape) for the belt.
Notions: Less than 1 yard each of gold braided trim and gold bias tape, both from the stash, and 2 yards of gold trim leftover from my Regency ballgown. That's a lot of stashbusting right there!
Hours: Maybe two for the actual sewing, but another three for the sleeve trials.
Will you make it again? I'm a sucker for vaguely-medieval swooshy maxi dresses, so I'm pretty sure I will at some point.
Total cost: I'm just going to say it was free, since it was all made from stash!
Final thoughts: I feel a little sheepish making a costume for a character from a movie I've only seen once (and don't entirely remember, TBH), but I certainly enjoyed the making and wearing of this one. It's really quite comfortable too (thanks to the stretch factor), albeit warm, but that's panne velvet for you. I just need to find an appropriate convention to swan about at!

I've even got a convenient dagger in my costume trunk. I got it over a decade ago in Taiwan, managed to get it back through customs, never used it for anything, but still somehow managed to save it until now. 
I'm all ready to go after Rapunzel for her hair!
Okay, so maybe I got a little carried away...
Okay, let's get serious about killing our adopted daughter, like in this screenshot. 

Now, I don't know if you noticed this in these pictures, but the last time I made a magenta maxi dress, I was quite a bit leaner. Now, I could say that it's just because the velvet adds a bit of thickness, or that this dress is cut looser, or even that I've been indulging too much in the start of summer berry season...but it's really because my Mother Gothel is, well, going to actually be a mother.

Is this the world's weirdest bump pic or what? Oh well, it's not like I'm exactly conventional in my "normal" clothing either.
Is it wrong to dress up as a notoriously un-maternal character when one is preparing to be a mother? Let's just say I enjoyed the irony of it.

I'm so thrilled to be able to finally share this with you all (and to be able to finally reveal my biggest excuse for the lack of blogging this spring!). Our SHB is due at the end of September, and I'm both excited and petrified that I'm already more than halfway there! And for those of you are thinking it's been a while since we saw Walnut on the blog, this was what we used as our announcement photo:

He's been super affectionate lately, following me around and sitting very close in the evenings, but I can't say he was a fan of taking the announcement photo. He seems to find ultrasound picture paper extremely tasty, so he kept trying the chew on the corner! 

Wanna see a really creepy ultrasound shot? I went in for the 20 week anatomy scan and the tech snapped this picture of SHB's head:

I added a skull diagram in case you're having a hard time identifying the eye socket and jaw. When I showed this picture to my students, one kid asked, "Wait, does your baby have any skin?!?" Yes, it does, child. At least I certainly hope so!


Anyway, happy Mother's Day to all the amazing sewing mamas that I've had the pleasure to "meet" through blogging! You ladies are seriously inspiring to me as I see how you sew with, around, and for your SHBs. Here's to hoping I can do the same!

Thursday, May 8, 2014

Experimenting With the Ralph Pink Neck Corset Pattern

In case you thought that the bustier was the end of corsetry projects for the time being, you were wrong.


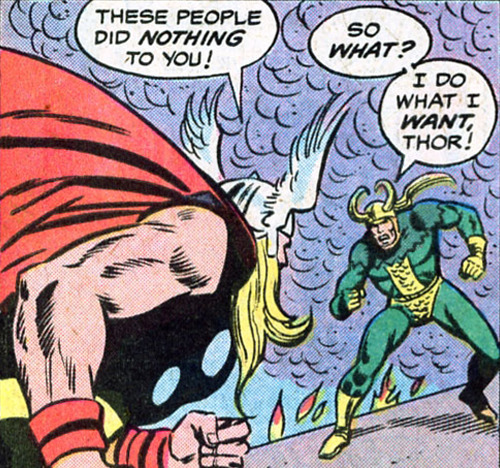
After finishing my Ursula costume, I still had a little bit of the black silk taffeta left, so I decided to give the mysterious Ralph Pink neck corset pattern a try. I've heard his name tossed around and seen his free downloads for historical corsets, but nobody seems to have actually tried any of his patterns and given them a real review, so I had no idea if they worked or not. To be perfectly honest, I was inclined to be skeptical because his grammar/proofreading on his website is terrible, and I'll be the first to admit that I can be a snob about that (despite not always following the rules myself! but this is my blog and I DO WHAT I WANT, THOR). Also he has no pictures of actual samples of this corset, which also makes me suspicious about how they look/fit on real people.

Anyway, his construction directions were a bit difficult to understand, so I basically ignored them and did what I wanted (Thor), which worked out okay. Instead of making it three layers and using two coutil layers to sandwich the boning, I opted to do a modified version of Lynda's bustier directions (taffeta underlined with flannel for the outer layer, boning channels sewn to a "strength" layer of ticking). After all, a neck corset is really more of a neck bustier (if that makes any sense!) since there is no reduction necessary. Unless, of course, you're looking to self-asphyxiate, in which case we've got bigger problems than incomprehensible sewing instructions...


The edges flip up a little bit, which makes me wish I used a darker lining fabric. 

The pattern itself has some cool lines (which I emphasized with topstitching) and is fairly quick to put together. It comes with 1/4" seam allowances, which I increased to 5/8" since my fabrics frayed like the dickens. I must admit I wasn't very careful in doing so, which resulted in some of my markings not matching up, but that was probably my fault. I also futzed around with the bone placement. The final corset ended up a bit tall for my neck, but that's easily remedied, should there be a next time. I would also want the neck-to-shoulder junction to be more curved (it's a bit wrinkly right now since the angle isn't quite right for my body), but I have no idea how to begin modifying the pattern for something like that!


Confession: I actually finished this project over a month ago, but the thought of getting all dressed up in the bustier and and neck corset and then doing a photo shoot was just too much. In light of Polka Dot Overload's comments about removing barriers (in this case, barriers to blogging, not sewing), I decided to just throw it on (well, as much as one can throw on something that involves lacing) and take pictures without bothering to find a cool background or what have you. Also I was worried that if I didn't blog it soon, I would forget about everything that went into making it. As it is, I'm already fuzzy on some of the details...

This is the only in-progress photo I thought to take. You can see the striped twill I used for the inside lining and the stitch lines from the channels. I used almost all the pins I have in prepping the bias binding!

Another barrier to taking photos: it's also ridiculously hard to take pictures when you don't have any large mirrors in your house that also have good lighting, and you can't really turn your head or crane your neck or else it'll make things sit lopsided. 
And it really does get lopsided easily! If I cared more, I'd add ribbon ties to secure it under the arm or something, but I don't care enough. 

Summary:
Fabric: about 1/4 yard each of black silk taffeta, cotton flannel, and cotton ticking.
Notions: spiral steel boning with heat-shrink tubing tips, cheap two-piece craft grommets (since again, this wasn't meant for heavy duty wear), 4 yards of ribbon for lacing.

I couldn't see the back to check if my lacing was even or lined up at all...
This was before I tied the ribbon, obviously. 

Hours used: This is where I get fuzzy since it was so long ago...about 15? The pieces are small, but there are a lot of seams and the curves get tricky to put together, and then there was all the time spent cutting and tipping boning and setting grommets.
Will you make it again? Ummm, how many neck corsets does one need? I don't foresee making another one in the near future, but if I do, I'll make it shorter for less of a strangly-feeling. And it will probably be for another costume.
Total cost: Less than $10 for materials, since the taffeta was leftover, the length of boning was so little, and the grommets and ribbon I've had for ages. The pattern cost me about $5 since I bought it on sale. Not super expensive as trials go, but also fairly frivolous considering I don't know that I would ever wear this.
Final thoughts: Like I said above, a fun but useless experiment. And now I have an idea of how I feel about Ralph Pink patterns? There's potential there, but I wouldn't pay full price for his patterns. Also, corsetry is really fun. I like the physicality of cutting and tipping boning and stuffing it into channels, even if it does get tedious and tiring. Every time I finish a corset I want to make another one, even if they're fairly non-useful as garments go!


I have one more impractical, frivolous costume item to blog, and then I promise it'll be back to real clothing sewing for a while! I've built up this ridiculous backlog of finished garments that I've been wearing, but just never got around to taking pictures of or blogging. It's nice to be back, though!

Tuesday, May 6, 2014

More Excuses and the MBU

Another Sewing Scientist reminded me of Tanit-Isis' term "Minimum Bloggable Unit,"which is a pretty apt description for this mishmash of 1) sad excuses, 2) random crowing and 3) a belated Me-Made-May 2014 commitment.

1) Sad Excuses: I've been such a bad blogger this school year! Once again, I play the "but I'm both teaching and taking classes" card, and on top of that I play two bonus school-related cards: we just finished up accreditation in the beginning of April and then I had mad AP exam prep for the rest of the month. Thankfully, both of my classes' exams were on the first day of AP testing, so now I've finally got room to breathe. And blog. In that order.


2) Random Crowing: Remember Elaine's wedding dress? Well, her wedding was featured in Offbeat Bride's book-themed wedding week! I was glued to that site when I was planning my own science-themed wedding, so to have my work appear there was an honor.


3) MMM14: I didn't officially take part in the last me-made month challenge, but now that I have a smartphone and an Instagram account, I figured I'd join in the fun! I won't be posting roundups here on the blog, but I'll post my daily outfit photos on my IG. I'm going lite this year and only pledging to wear something me-made to work, leaving the weekends optional depending on how I feel.


It seems like there are a handful of people interested in a bustier-along, so once school lets out I'll figure out how that's going to work and let you know how to participate!

Tuesday, March 25, 2014

And Now, the Construction Post

Now that I've finished Lynda's bustier class, I alternate between thinking 1) my goodness, it's a small miracle that Elaine's wedding dress turned out as well as it did, because I didn't know what the heck I was doing, and 2) go me, because I actually made up something that wasn't too far off from what it was supposed to be! I learned so much from taking an "official" class, which makes me wonder what else I'm missing as a self-taught seamstress. Anyway, I thought some of you might be interested in seeing more of what went on to make this deceptively simple-looking little black top.


I left off with fitting the coutil/lining inside in my last (and only) construction post. This inner layer was just the pattern pieces cut in both coutil and a cotton quilting fabric for underlining, and then sewn together. I decided to keep things simple and just do boning channels over the seams. These channels were made from bias strips of coutil, 1.25" wide, which is enough to accommodate two 3/8" wide channels for 1/4" bones. I got my bones pre-tipped at Lacis in Berkeley, where they cost anywhere from $0.40-$1.00 each, depending on length. I've got a whole roll of spiral steel leftover from making Elaine's corset, but frankly, I didn't feel like dealing with cutting and tipping all twenty-plus bones myself. I really need to get me some steel cable cutters to make the process easier on my hands!

Lynda had us sew the inner layer with 1" seam allowances, so when I sewed my boning channels on, there was no awkward flapping of seam allowances underneath to get caught up in the boning. 
Zoomed out a bit, so that you can see how densely this thing is boned! According to Lynda no more than 3" should go by without there being bones. Because mine was a fairly small size with narrow panels, I could get away with only boning over the seams, and then one more set in the widest back panel. 

After sewing on the boning channels, I added the grosgrain waist stay, stitching it on only at strategic points. This waist stay is sewn to the inside and remains hidden, and only exits close to the zipper through two buttonholes. Lynda recommended a 1.5" wide ribbon, which is larger than my buttonhole foot can handle, so I had to improvise with a tiny zigzag stitch. To secure the waist stay, I went with my usual swimsuit bra hook instead of hooks and eyes. Whenever I have hooks and eyes at my back, they dig in uncomfortably and make me itchy. At this point, I also sewed in my zipper. It's a heavier duty 12" separating zipper, but still plastic.

Pretty good free-hand buttonhole, right? Except that the two sides don't quite match up...shhh!

Since the largest swimsuit hook I had was 5/8", it wouldn't quite fit on the 1.5" waist stay, so I had to add a tinier piece of petersham ribbon at the ends to make it work. 

After all the hardware that went into the inner layer, it was almost a relief to make the outer fashion fabric layer. Like the inner layer, it's two pieces of fabric: my black silk dupioni, underlined with flannel. The flannel provides some cushioning for the thin silk, so that all the boning channels and such don't show through. Lynda wouldn't allow us to clip the coutil seam allowances at all since it would create weak points, but with the outer layer, since it's not taking any of the strain, I notched away. Unfortunately, I had never learned that one should never notch at the same point on either side of the seam (it creates a hinge point), but now I know and I will never do it again! The most time-consuming step was then hand-stitching down all the seam allowances so that they would stay nice inside the garment.

You can see at the top of the picture the start of my shameful clipping :(

The final step was to put the two layers together. I don't know why, but I found this seriously nerve-wracking! With previous corsets, I've always sewn them wrong sides together and then bound the top, but this time I decided to go with a new-to-me method and sew the top and bottom right sides together, then flip it all right side out (this was tricky with all the bones in...good thing spiral steel is flexible!). This method creates a clean edge without having to fuss with binding, but it does create a lot of thickness due to the four layers of seam allowance + four layers of fabric! My machine was a trooper, though, and I only had to hand-wheel through some parts. The real last step was to topstitch all the way around, being especially careful at the zipper since there was a bone right next to the stitch line.

The only thing worse than trying to photograph black or red is trying to photograph black and red. You all know what topstitching looks like though, so I think you get the picture. 
All done! Much red! So cats! Very polka dot! Wow!

Summary:
Pattern: Simplicity 5006
Fabric: 1 yard black silk dupioni, 1 yard purple houndstooth print flannel, 1 yard coutil, 1 yard quilting cotton
Notions: black plastic 12" separating zipper meant for jackets, less than 1 yard 1.5" wide black grosgrain ribbon, one 5/8" swimsuit bra hook, lots of spiral steel boning
Hours: At least sixty, spread out over a month and half. That includes fitting, multiple muslins, cutting and sewing four layers, lots of hand sewing, and lots of wibbling.
Will you make it again? Elaine went to Thailand and brought back lots of yummy silk in both her colors and my colors, so I think that means yes. I think new makes will take much less time, though, now that I know what I'm doing and have patterns already fitted.
Total cost: The fabrics listed above were $15, $8, $30, and free, respectively, the spiral steel was $13, and the rest of the notions were about $5. So we're looking at a $70 garment here, and that's just for the materials. No wonder why custom corsetry is so expensive!
Final thoughts: Um, I love it? It looks and feels amazing, if I do say so myself, and in black silk, it feels very versatile. If I pair it with a nice (normal) skirt, it makes for lovely formalwear, and black is a good base for many villain/superhero costumes. I want to do a Maleficent costume with this, even if I'm dubious about the upcoming movie. Mr. Cation was pretty thrilled about the Ursula costume too, so that was a plus!

Because nothing says Ursula like a satellite dish in the background, amirite?

So that brings me to my big question: would anyone be down for a bustier sewalong? I learned so much from this class, and while I had some idea of what I was getting into because of Elaine's corset, I have to say that a bustier/corset top is one of those things where it looks impressively scary, but is actually not that hard to sew when you break it down. Obviously, I'm not nearly as knowledgeable as Lynda, but I think it'd be fun to share the process in more detail with other seamstresses who might have always wanted to make one, but thought it was too intimidating. If people are interested, I'm thinking of running the sewalong during the summer, when I've got more bandwidth than the during school year. Let me know in the comments if you'd be interested!

Sunday, March 23, 2014

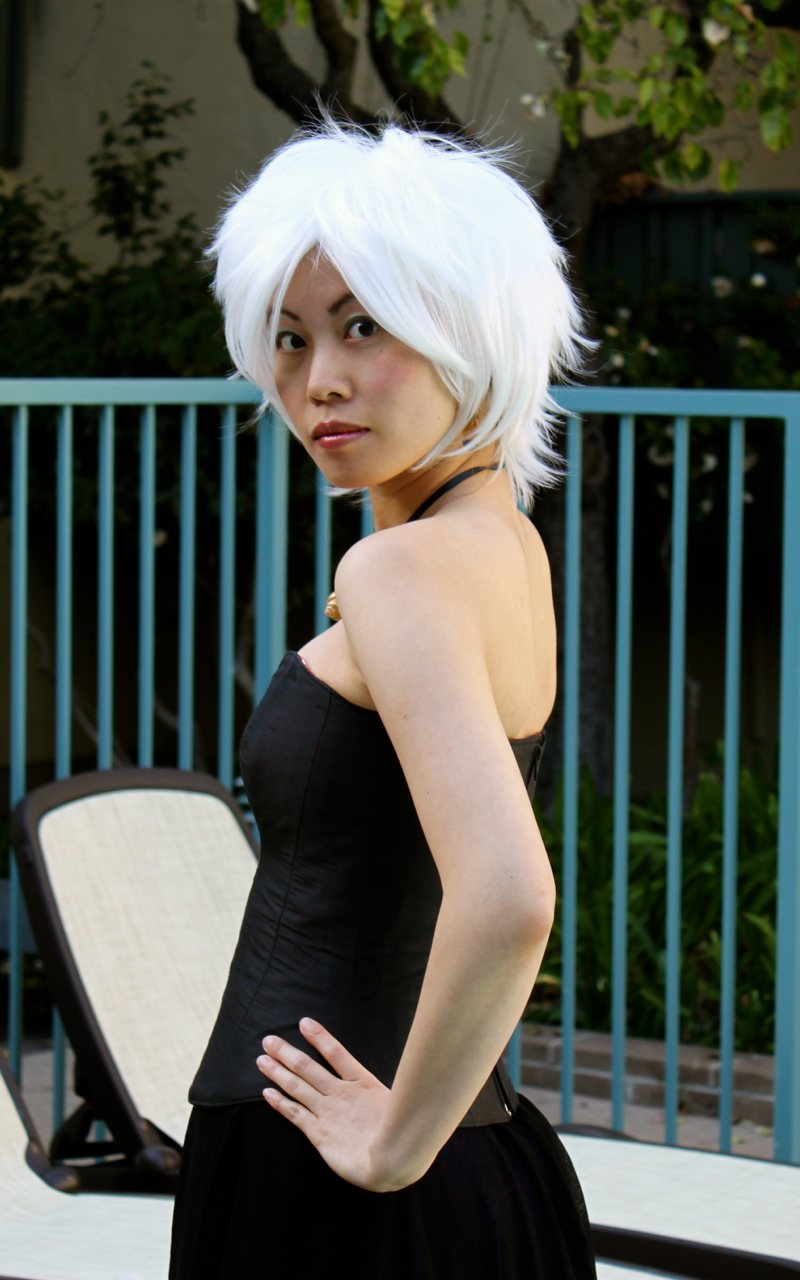
"Spur of the Moment" Ursula Costume

*taps mic* So...ummm, anyone out there tonight?

I know, I know it's been a shamefully long time since I last updated to say that I was in the middle of making my bustier. I guess I was being a little optimistic in that assessment, since there turned out to be a lot of "finishing" steps. What with school busyness and only having an hour here and there to sew, I ended up not being able to finish it before class ended. Thankfully, Lynda gave everyone an extension. And then even after I finished it on the ides of March, I decided that before I could write up a blog post about it, I had to make something to wear it with. If you give a mouse a cookie costume geek a plain black bustier, she's going to want to make a matching skirt. And once she makes a matching skirt, she'll realize that she needs a necklace as well. Necklace in hand, she'll finally get around to a blog post only after a sufficiently sunny day where Mr. Cation is also around to take pictures of the whole get-up. I think it was worth it, though...


I had to really play around with the lighting on these shots in order to be able to show any detail at all on the bustier. Black is so danged hard to photograph! And of course I would be wearing a white wig. 
It's not perfect by any means, but I'm still pretty pleased with how it turned out!
"Don't even underestimate the power of body language!"
Back view. It was ridiculously hard to find a 12-inch separating zipper that would be sturdy enough.

I mean, I guess I could've just taken pictures wearing the bustier with jeans or something, but that just wouldn't seem right, you know? Besides, I had nine yards of black and purple stretch mesh that was burning a hole in my stash. I've had it set aside for an Ursula costume since April of last year, but it just didn't happen until now. I guess it doesn't really fit the "wardrobe building" March theme, although it definitely fits February's "make something that represents something you love" theme -- I love dressing up! -- so it still counts.


I used Simplicity 9172, a vintage half-circle skirt pattern, to make three layers of skirt -- black, purple, and then black again -- and since it was stretchy material, I just went with the easiest method and attached it all to a piece of wide black elastic for a no fuss, closure-less pull-on skirt. Then I went to town on the top black layer, snipping it away to make a nod to Ursula's tentacles. At that point, the skirt was nicely full, but still missing a certain je ne sais quoi, so after some brainstorming and remembering how floofy standard ballroom dance skirts are, I used Julia Bobbin's helpful fishing line tutorial to hem the skirts. It was really remarkably easy (but tedious to do for two layers of full-length half-circle skirt), and my 50-lb. fishing line more than adequately swirled up the hem of the skirts. It helps hold out the skirts so that they look fuller and make walking without tripping easier, which is a definite plus!

Now, it's the little things that pull a costume like this together, so besides making the skirt (which took a whole day -- thank goodness for Spring Break!), I had to make the iconic golden shell necklace that Ursula uses to hold Ariel's voice:

In my stash of craft supplies, I managed to unearth this seashell that I've been holding onto for eight(!) years...I just painted it gold and hot-glued a loop of wire to the back so that I could thread a ribbon through. 

And of course the finishing touch was the short white wig, which I already had from my Dr. Blitzmeyer costume. Even though I just wore this to our apartment complex's pool for pictures, it was so fun to put this outfit together. Sometimes you just have to make things that make you happy, even if there's nowhere to wear it! Maybe one day I'll get to cosplay Ursula at a con, but until then I'll settle for twirling around the pool.


I still intend to write about all the steps that had to happen to make the bustier, but I'll save that for a separate construction post, since this one is already glutted with pictures.