Showing posts with label Stashbusting Sewalong. Show all posts

Tuesday, May 27, 2014

By Hand London Polly Top #1


When the ladies at By Hand London put out the free Polly top sewing pattern, I was vaguely intrigued. Maybe it would be the perfect shell pattern that I was looking for, since the Colette Sorbetto didn't really work out for me. I downloaded it and promptly forgot about it until Jungle January rolled around. I had a scrap leftover from my previous Jungle January make, and it was just big enough for the front insert and a few scraps of bias tape. Is it a sewcialist faux pas to make two Jungle January garments from the same fabric? Oh well.


I used a random black knit remnant from my stash for the rest of the top (I know it's supposed to be a woven top, but I figured this is a very stable knit), and aside from some tricky pattern laying out to make everything fit, things went very quickly. The only modification I made was to shorten the straps considerably. It's such a flattering, easy to wear top, and I wear it every almost every laundry cycle, but somehow I never got around to taking proper pictures and blogging it until now, four months later! Oops.

Confession: I wore it a few times with the armholes still unbound, since it was January and it would be under a cardigan anyway. It took me a good month to get around to binding them!

Summary:
Fabric: 2/3 yard piece of mystery-content black knit with excellent recovery, so I'm guessing it has a lot of lycra. The insert and bias bindings were made from a scrap of rayon challis.
Notions: None
Hours: Three? It was a while ago.
Will you make it again? Already did, and already planning another one!
Total cost: Free, since it was all from scraps/leftovers!
Final thoughts: I like how it's fitted on top, but widens and skims the belly at the bottom...perfect for covering the bump! This was crucial during that first trimester when I had crazy bloating, but wasn't ready to announce yet. And of course, the insert adds a little bit of fun to an otherwise normal shell.

See, you can't really tell there's a bump, right? 

Sunday, May 18, 2014

How Long Can I Get Away With This?

I'm still spending some of my time in that major Egyptian river regarding my slowly changing body, but it's been really helpful reading all of your encouraging comments about viewing such changes positively. I'll be honest, I'm scared of never being able to wear my geeky dresses or fun costumes again, especially after spending hours of my life getting them to fit right. Is that superficial or what? Then again, my style has really become part of my identity, and even more so as a science teacher. Have you seen this article about gaining status by wearing non-conformist clothing? I feel like that's what I do in my Ms. Frizzle-esque teacher persona, enough so that students actually mentioned it in their year-end evaluations. A loss of that part of me (even if it's just an outward part! inwardly I'm still just as much of a dork as ever), coupled with trying to decide if I should return to school after the standard three months of maternity leave (lose my career identity to motherhood too??), and I've had lots of thinking and processing to do lately.

In the midst of all of that, I've still had to get dressed every day. I quickly discovered that the downside to having sewn tops that perfectly fit my small bust meant that about half of my me-made tops immediately became unwearable (unless I was purposely going for the bursting-out-of-my-blouse look). I had to have an emergency sewing weekend where I just churned out several quick tops that worked, and would continue to work as my body changes. Thankfully, loose, slouchy, or swingy tops are in right now, and of course I've no shortage of stash fabric!

Day 9 of Me Made May.

Anyway, almost exactly two years ago I made a version of Simplicity 8986; that top ended up being donated even after fixing the facing issue, just because the boxiness + polyester wasn't worth dealing with. I pulled it out again to make View D, which despite its very 90s envelope art is perfect for a no-fuss, kimono sleeve, trendily shapeless top. I wanted to add some visual interest, though, so I modified the pattern to include a contrast panel in front. Joining the bias-cut woven rayon to the stretchy knit rayon resulted in some weird drapiness at the seams, and the knit neckband got wonky at the join, but frankly I've seen a lot worse in RTW tops and I'm just glad to have a wearable top. It got a lot of positive comments when I wore it to school, and as we all know, teenagers have no qualms about telling you exactly what they think, so I think I'm good. Also, I discovered after having made it that it's pretty much just like this top-rated Modcloth tee, so that's nice.

It's really just a giant tee shirt with a trapezoid in the middle!

Summary:
Fabric: 2/3 yard of white mystery knit (feels like rayon with a healthy amount of lycra, since it's got decent recovery) and a remnant from this dress, both from the stash.
Notions: Just thread.
Hours: Less than two, from cut to finish. I love how knits require no seam finishing (I did pink and topstitch the rayon portions to control fraying), and kimono sleeves require no setting in, and I can do knit neckbands in my sleep now. How's that for instant gratification?


Will you make it again? I don't have anymore rayon scraps large enough to do this exact look, but I do like the idea of mixing prints with solids in simple tops!
Total cost: Less than a dollar, since the knit was original purchased in bulk from Michael Levine Loft, and the rayon was a remnant.
Final thoughts: I'm pleasantly surprised that mint is still in two years later because I love this top, despite its being not at all quirky. I think it's because I like to be able to prove that despite wearing odd-ish me-made clothing most of the time, I am still capable of identifying what's in fashion. It has no mental baggage attached since it was so easy to make, and it's gratifyingly attractive to wear while being loose enough to accommodate quite a bit more potential belly.

Seriously, how is this fabric still trendy even though I bought it two years ago specifically because it was trendy then?
And yet it is. Not that I'm complaining. 

I'm going to try to hold out as long as I can before conceding to actual, "official" maternity tops. I've got at least a few more non-maternity garments that I've made recently and been wearing...I hope they'll last for at least another couple of months!

Friday, May 9, 2014

Mother Gothel Cosplay for Mother's Day

I don't know why I love Disney villains so much...they just seem so much more interesting than the princesses, although I do still have a soft spot in my heart for Belle (because she reads!). I love it when people try to come up with backstories that explain their motivation (e.g. Ursula was actually King Triton's older sister who was denied the throne simply because she was a female, hence her desire to become Queen of Atlantica). We don't get much from Disney's Tangled's Mother Gothel, other than her vain desire to stay young and beautiful, but one of my favorite fairy tale novel adaptations is Donna Jo Napoli's Zel. In this version, the evil witch is just an infertile woman who longs for a daughter, so much so that she goes to unspeakable lengths to keep her adopted daughter with her. That doesn't excuse her actions by any means, but it does make her a much more nuanced character.

Why are villain costumes always so much better, too? I'm way more into jewel tones than pastels. 

Anyway, I had some nine+ yards of this stretch panne velvet in burgundy (picked up for free from someone else's stash at school!), plus leftover gold trim from my shieldmaiden costume, so like with Ursula, I decided on a whim that the stash practically demanded another random costume. I also wanted to see if I could redeem this most abhorred of fabrics (polyester! stretch! not really velvet! so very costumey! and not in a good way!).

I had just enough trim leftover to encircle the neckline. I ended up having a 1.5" scrap left at the end. *whew* That was close!

I found this website very helpful in planning my costume; even though I wasn't interested in screen accuracy, I did still want it to be recognizable as Mother Gothel. It was pretty easy to sew up the body of the dress from my knit block (I just extended the side seams down and out to make a full skirt), but figuring out the sleeves took some doing. The problem with making costumes based on animated designs is that animators don't always consider things like, oh, seams have to go somewhere, and fabric needs to be cut on some kind of grain to get a certain drape. Mother Gothel's sleeves are very fitted at the top, then they suddenly bell out around the elbow to make that trumpet shape. There's just the one underarm seam and that's it! It took me about eight tries to get the sleeve shape more or less right (a lot of other costumes I've seen have the fullest part of the sleeve hanging from the wrong place, or the sleeves are full all the way through), but thank goodness I had plenty of (free) fabric! I think I might have used about 1.5 yards of fabric just making trial sleeves. In the end, the sleeve shape was not anything I would ever have predicted.

Wtf, amirite?

I lined the inside of the sleeve with some random black scraps I had, added the gold bias binding, and called it a day. No hemming or seam finishes -- it's a costume, after all, and I don't even have anywhere to wear it to! I just wanted to sew it up for the sake of using up as much of this fabric as possible. I finished it in time for April's Vibrant Color Stashbusting challenge, but since I didn't blog it until now, I suppose it also counts as May's Knit Stashbusting? I mean, it's stretchy, even if it's not what one typically considers a knit.

Now, my wig wardrobe is not particularly deep. I've got the short white one (mad scientist and Ursula) and then I've got my old Bellatrix one. Neither is an exact match for Mother Gothel, but obviously the Bellatrix one works better. So excuse the not-quite-right black curls, but here goes!

The lighting in my apartment also makes the fabric look more red and less burgundy.

I didn't think to look at what exactly her pose was before taking these pictures. Oops. 
I'm really in love with these sleeves. 
This is what the back looks like. You can kind of see where my underarm seam ended up. 
I'm sorry I don't have any full length pictures showing the full sweep of the gown's skirt. 
That's because once we start getting zooming out too much, inappropriate things start showing up in the frame, like this ridiculously cute (and decidedly non-villainous) elephant humidifier. 

Summary:
Fabric: 7 yards or so of 54" wide burgundy stretch panne velvet, 1/2 yard of black stretchy mesh (leftover from Ursula's skirt), a strip of burgundy sheet (leftover from Ballister's cape) for the belt.
Notions: Less than 1 yard each of gold braided trim and gold bias tape, both from the stash, and 2 yards of gold trim leftover from my Regency ballgown. That's a lot of stashbusting right there!
Hours: Maybe two for the actual sewing, but another three for the sleeve trials.
Will you make it again? I'm a sucker for vaguely-medieval swooshy maxi dresses, so I'm pretty sure I will at some point.
Total cost: I'm just going to say it was free, since it was all made from stash!
Final thoughts: I feel a little sheepish making a costume for a character from a movie I've only seen once (and don't entirely remember, TBH), but I certainly enjoyed the making and wearing of this one. It's really quite comfortable too (thanks to the stretch factor), albeit warm, but that's panne velvet for you. I just need to find an appropriate convention to swan about at!

I've even got a convenient dagger in my costume trunk. I got it over a decade ago in Taiwan, managed to get it back through customs, never used it for anything, but still somehow managed to save it until now. 
I'm all ready to go after Rapunzel for her hair!
Okay, so maybe I got a little carried away...
Okay, let's get serious about killing our adopted daughter, like in this screenshot

Now, I don't know if you noticed this in these pictures, but the last time I made a magenta maxi dress, I was quite a bit leaner. Now, I could say that it's just because the velvet adds a bit of thickness, or that this dress is cut looser, or even that I've been indulging too much in the start of summer berry season...but it's really because my Mother Gothel is, well, going to actually be a mother.

Is this the world's weirdest bump pic or what? Oh well, it's not like I'm exactly conventional in my "normal" clothing either.
Is it wrong to dress up as a notoriously un-maternal character when one is preparing to be a mother? Let's just say I enjoyed the irony of it.

I'm so thrilled to be able to finally share this with you all (and to be able to finally reveal my biggest excuse for the lack of blogging this spring!). Our SHB is due at the end of September, and I'm both excited and petrified that I'm already more than halfway there! And for those of you are thinking it's been a while since we saw Walnut on the blog, this was what we used as our announcement photo:

He's been super affectionate lately, following me around and sitting very close in the evenings, but I can't say he was a fan of taking the announcement photo. He seems to find ultrasound picture paper extremely tasty, so he kept trying the chew on the corner! 

Wanna see a really creepy ultrasound shot? I went in for the 20 week anatomy scan and the tech snapped this picture of SHB's head:

I added a skull diagram in case you're having a hard time identifying the eye socket and jaw. When I showed this picture to my students, one kid asked, "Wait, does your baby have any skin?!?" Yes, it does, child. At least I certainly hope so!


Anyway, happy Mother's Day to all the amazing sewing mamas that I've had the pleasure to "meet" through blogging! You ladies are seriously inspiring to me as I see how you sew with, around, and for your SHBs. Here's to hoping I can do the same!

Sunday, March 23, 2014

"Spur of the Moment" Ursula Costume

*taps mic* So...ummm, anyone out there tonight?

I know, I know it's been a shamefully long time since I last updated to say that I was in the middle of making my bustier. I guess I was being a little optimistic in that assessment, since there turned out to be a lot of "finishing" steps. What with school busyness and only having an hour here and there to sew, I ended up not being able to finish it before class ended. Thankfully, Lynda gave everyone an extension. And then even after I finished it on the ides of March, I decided that before I could write up a blog post about it, I had to make something to wear it with. If you give a mouse a cookie costume geek a plain black bustier, she's going to want to make a matching skirt. And once she makes a matching skirt, she'll realize that she needs a necklace as well. Necklace in hand, she'll finally get around to a blog post only after a sufficiently sunny day where Mr. Cation is also around to take pictures of the whole get-up. I think it was worth it, though...


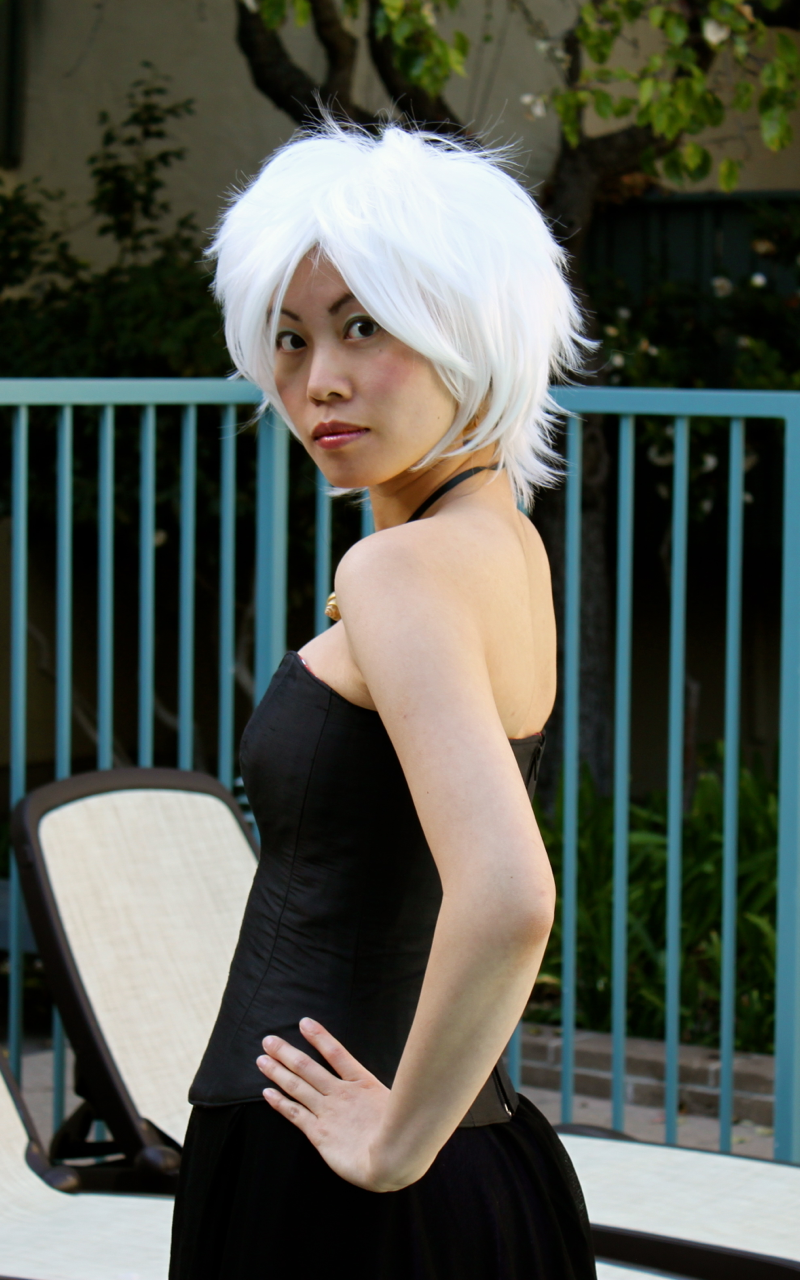
I had to really play around with the lighting on these shots in order to be able to show any detail at all on the bustier. Black is so danged hard to photograph! And of course I would be wearing a white wig. 
It's not perfect by any means, but I'm still pretty pleased with how it turned out!
"Don't even underestimate the power of body language!"
Back view. It was ridiculously hard to find a 12-inch separating zipper that would be sturdy enough.

I mean, I guess I could've just taken pictures wearing the bustier with jeans or something, but that just wouldn't seem right, you know? Besides, I had nine yards of black and purple stretch mesh that was burning a hole in my stash. I've had it set aside for an Ursula costume since April of last year, but it just didn't happen until now. I guess it doesn't really fit the "wardrobe building" March theme, although it definitely fits February's "make something that represents something you love" theme -- I love dressing up! -- so it still counts.


I used Simplicity 9172, a vintage half-circle skirt pattern, to make three layers of skirt -- black, purple, and then black again -- and since it was stretchy material, I just went with the easiest method and attached it all to a piece of wide black elastic for a no fuss, closure-less pull-on skirt. Then I went to town on the top black layer, snipping it away to make a nod to Ursula's tentacles. At that point, the skirt was nicely full, but still missing a certain je ne sais quoi, so after some brainstorming and remembering how floofy standard ballroom dance skirts are, I used Julia Bobbin's helpful fishing line tutorial to hem the skirts. It was really remarkably easy (but tedious to do for two layers of full-length half-circle skirt), and my 50-lb. fishing line more than adequately swirled up the hem of the skirts. It helps hold out the skirts so that they look fuller and make walking without tripping easier, which is a definite plus!

Now, it's the little things that pull a costume like this together, so besides making the skirt (which took a whole day -- thank goodness for Spring Break!), I had to make the iconic golden shell necklace that Ursula uses to hold Ariel's voice:

In my stash of craft supplies, I managed to unearth this seashell that I've been holding onto for eight(!) years...I just painted it gold and hot-glued a loop of wire to the back so that I could thread a ribbon through. 

And of course the finishing touch was the short white wig, which I already had from my Dr. Blitzmeyer costume. Even though I just wore this to our apartment complex's pool for pictures, it was so fun to put this outfit together. Sometimes you just have to make things that make you happy, even if there's nowhere to wear it! Maybe one day I'll get to cosplay Ursula at a con, but until then I'll settle for twirling around the pool.


I still intend to write about all the steps that had to happen to make the bustier, but I'll save that for a separate construction post, since this one is already glutted with pictures.


Wednesday, February 5, 2014

It's My Turn Now

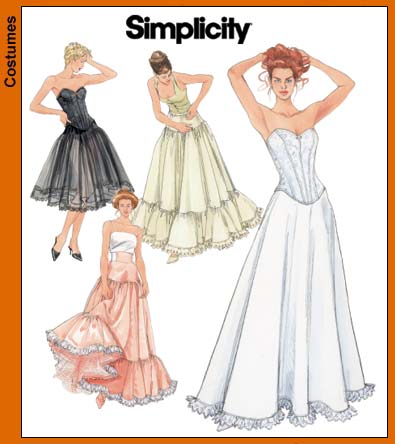
Last year, my biggest accomplishment was sewing a wedding dress for my best friend Elaine. To do so, I used Simplicity 5006, a lingerie pattern that included a corset and a petticoat. It was a long process and I learned a lot, and out of it came a beautiful outfit. I must confess, though, that at the end of it I wished ever so slightly that I had put all that work into something for me. Now before you get all up in arms and call me selfish, let me say that I don't begrudge a single bit of the time I spent on her wedding dress -- after all, it's my favorite make of 2013 -- but I did wish I had an excuse to make an equally elaborate thing for myself. Well, now I have that chance!


One of my classes this semester at Canada College is Bustier Construction with Lynda Maynard, and the pattern we base our garment off of is...Simplicity 5006! So now I have the excuse I need to make myself a piece of gorgeous formalwear: oh, it's for class. That pricey coutil? Oh, it's for class. All the time spent perfecting the fit? Oh, it's for class. All the trips to Lacis in Berkeley? Oh, it's for class. You guys, I'm super excited to have this opportunity! And like the pants-making class last semester, I'm already learning tons. For example, the final garment has four layers of fabric: each piece of coutil is underlined with an actual lining fabric, and each fashion fabric piece is underlined in flannel; the pieces are then sewn together to make two "complete" garments, then sewn right sides together and flipped.

This is my lining+coutil piece. You can kind of see where Lynda drew in boning channel markings. 
It's a little wrinkly without any boning. I also need to take it in more in the chestal area. Of course. I really do like the sweetheart neckline though!
I extended the height of the back by a couple of inches to prevent the hideous back muffin top. 

Class has been in session for a few weeks now, so we've made muslins, fit them, made second muslins, corrected our patterns, and now we've made up the inner lining+coutil part of the garment. In the spirit of stashbusting, I've chosen to line my bustier with this adorable cat-print quilting cotton that I got two summers ago in an exchange with Handmade Jane. It was a scant half meter of fabric, so I'd been saving it for a small but special project...I think this counts! Even so, I didn't have quite enough fabric so the last panel is cut from another small quilting cotton remnant that I actually inherited from another friend's stash. Although I'm posting this in February, I did sew it up while it was still January, so that totally counts for the Itty Bits theme, right?

Tiny polka dots and cats! Does it get any better than that?

I'm pretty sure that I'll end up choosing a black fashion fabric for the outside shell. I thought about making something more fancy or elaborate, but in the end decided that black would be the most versatile. Besides, then I can use it for the Ursula and Maleficent cosplays that I'd like to do eventually. Any suggestions for an actual fabric type though? I don't want it to be super-shiny, but I want it to still be dressy. Help!

Monday, January 13, 2014

January Stashbusting: Nimona Cats

Those of you who saw my ridiculous series of posts about Party King Thranduil may already know about my love for webcomic artist Noelle Stevenson, aka Gingerhaze. Besides LOTR/Hobbit, Avengers, and Hunger Games doodles, she also draws an absolutely fantastic webcomic, Nimona, about a shapeshifting girl in a medieval/futuristic alternative universe. Seriously guys, if you haven't heard of it before, go check it out -- it's won a whole bunch of awards and is simultaneously funny and poignant and thoughtful. Anyway, at one point Nimona turns into a red cat sleeping on Ballister's shoulders.

Pretty sure this isn't giving away any major plot points. [picture source]

I have all these red fleece scraps in my stash leftover from Squidney, and as you know, fleece takes up a lot of room, so following in my own footsteps from last year, I made another fleece thing:

Curled up sleeping cat!

Quick snap proving I can carry the Nimona cat around my shoulders and a hood, like in the comic. This was actually taken before I ripped out some of the stitches in the face to make it cuter. 

And then I made this other cat, based on this panel (not including it here since there are vague spoilers):

This guy was made with an elongated version of my all-purpose plushie pattern, and with a different face, of course. I think I prefer the look of general concern to the original snooty expression. 

I'm glad that January stashbusting always starts out small and easy; somehow it's easier to think about using up scraps than those giant 3+ yard pieces I've got hiding under the guest bed. Each of these cats took about an hour from conception to finish -- much better than the 30+ hours that a full on costume would require. Of course, I only used up one of the seventy pledged yards of stash...

So cat! Much red! Wow! (Is it wrong to use doge-speak to describe felines?)

And of course, no post about cat plushies would be complete without some obligatory Walnut photos!

I couldn't resist; they were both in such similar positions!

Okay, seriously, Mom? You interrupted my nap for this?! Dude doesn't even have a proper mouth. 


If you're wondering about what possible practical purpose all of these plushies could have...well, my sister and I are going to be cosplaying two of the characters from Nimona at the Animation on Display convention in a couple of weeks. Anyone else in the Bay Area going? It's family-friendly anime, video game, and comic-centric; if you're interested in a meetup, let me know!

Thursday, January 9, 2014

Things I've Learned From A Year of Stashbusting


Can you believe it? We've not only survived a whole year of stashbusting, but (at least for some of us) a whole year of fabric-buying moratorium as well! Even though I stopped being able to follow along with the monthly themes by the end, I'm still pretty pleased with the fact that I used over seventy yards of stash fabric and saved myself over $200. Of course, such a prolonged project is going to lead to some lessons, so I thought I'd share some of those thoughts with you:
  • You don't really need that piece of fabric. There were many times last year when I found myself thinking that there was no way I could pass up a particular piece of fabric, only to find that now, I can't even remember what those pieces were, or what was so great about them. There will always be deals on great pieces of fabric, and with limited time on my hands, there's no way I'm going to sew up every idea I ever have, so it's okay to just let that piece go. Ms. McCall of Brown Paper Pattern helpfully put it this way on one of our trips to the Fabric District in LA: think of buying fabric as buying sewing hours instead; that is, think about how many hours it would take to make whatever you have in mind for that yardage. For someone whose limiting reactant is hours in a day (and not necessarily cost of fabric or space required to store it), this really helps to put things in perspective. I'm not buying six yards of silver brocade at only $1/yd -- I'm buying fifty hours of work to turn it into the fantasy gown in my head. Yikes! Suddenly it becomes a lot easier to put it down! 
  • When you know you have to actually sew up your stash fabrics, it becomes a lot easier to be selective when fabric shopping. I know, I know, that might sound obvious, but hear me out. When I lived in TCOCC, just fifteen minutes away from all sorts of great fabric stores, it became really easy to buy stuff that I only sort of liked, just because it was a good deal. This dress and this top that I feel ambivalent about as clothing now? I felt only a shade more positive about them when they were just fabric...but I bought it because I thought that rayon or embroidered cotton at such prices were too good to ignore. Throw in a pattern I'm not crazy about, and that's a recipe for garments that are for laundry emergencies only. So even after we moved up to CV and I was technically allowed to buy fabric again, I was much more picky about what I would let into the stash. 
  • If you have to stash, be real with yourself. Even though I'm drawn to ridiculous prints, there's really only so many loud dresses one can wear in a given laundry cycle. For a more practical stash, it makes much more sense to buy solids that pair well with existing items in one's wardrobe. I think that's called SWAP, or sewing (stashing!) with a plan...
  • Don't feel boxed in by previous decisions. There were a lot of pieces in my stash that had been bought with a specific garment in mind, but when I felt like I *had* to make what I had originally intended, I would sometimes feel stressed because it didn't fit anymore with my current wardrobe needs. It's okay to switch plans, including the original stashbusting plans! I didn't sew up most of what I had pledged to, but I decided to stop feeling guilty about not making that one thing that's been stewing for three years. I mean, it's been sitting for that long; it can sit a little longer, right? Instead, I went with what I felt inspired to sew, and that worked a lot better. Similarly, I had big plans for some of my larger pieces, but decided it was okay to axe them and use the fabric for multiple smaller projects. Better to use some than to keep saving it for the humongous project that would realistically not happen for another few years!
  • Along similar lines of letting go -- it's okay to just give up on a piece of stash fabric. There have been some nice pieces that I gave away or swapped this year because they no longer fit my current wardrobe vision. I'd rather give them a chance at new life, instead of trying to hold on because "it was such a good deal!" or "it has so much potential!" Then there were the failed projects: in the end I decided to chalk it up to a lesson learned and just throw it out, or cut it up for stuffing/rags instead of stashing it in hopes that I'd come back and fix it someday.  
This year, instead of specifying what pieces I'm going to use up, I think I'll settle for saying I'd like to use up the same number of yards of fabric. I won't say no to buying new fabric (especially for very specific projects with deadlines, like for class or a costume event), but I'll definitely be much more careful about choosing what I let into my stash. So without further ado:

I, Cation Designs, commit to sewing up at least seventy yards of stash fabric in 2014. I also commit to not buying any fabric unless it is for a specific project that has a deadline, or it is required to turn a piece of stash fabric into a completed project. 

Good golly, seventy yards sounds so scary written out like that, even though I used about that much last year. We'll see how it goes...in the meantime, if you'd like some more community interaction for your stashbusting, take a gander at our Stashbusting Facebook Group! We're going to try moving to FB instead of Flickr so that we can have more conversations and such, and you can post to specific albums for specific challenges. Also, TBH, I spend more time hanging out on FB than Flickr, so if you join and post stuff, I'll be pleasantly distracted at work while waiting for kids to finish tests and such! 

Aside from stashbusting, this year I'd like to continue taking part in Sewcialist and Historical Sew Fortnightly sewing projects when I can, but I won't feel guilty if I can't. I definitely want to participate in March of the Shieldmaidens, though -- I've got plans for a Lady Sif costume

Although I'm partial to the stashbusting sewasaurus button, I gotta say, I love that the shieldmaiden is saying "hwaet!" It's one of the few things I remember from reading Beowulf in high school.

What about you? Are there any cool sewalongs you're planning on joining that I should know about? What have you learned while stashbusting (or not)?