Showing posts with label IKEA. Show all posts

Friday, July 31, 2015

Put Moar Cats on It!

A few years ago, putting birds on things was all the rage, thanks to a ridiculous sketch by Portlandia's geniuses. I like birds just fine but am really more into cats, so I did a brief holiday series where I put cats on things instead. The other thing that happened a few years ago was I potato-printed cats onto some scraps of IKEA sheet I had leftover from another project. Well, now that SHB has taken over my sewing room, I need to go through my stash and actually use stuff, like, for reals now. Maybe by the time he's ready to move to a big kid bed, I'll finally have all the boxes of fabric out of his room...hah! Like the stash will ever be used up! Anyway, I finally sewed up the cat fabric into something more useful for work than the original plan of hipster scarves.


Because the lengths of fabric were so long and narrow (about 16"x50"), I didn't have enough to do the entire blouse in one fabric. I chose the more sedate-looking seated cats for the front, and saved the slightly more "frolicky" cats for the back and the bow. Business in front, party in the back, right? The narrow length also meant that I couldn't fit the entire back pattern piece onto the fabric, so I cut it out as two pieces by adding seam allowance back to the center line. I also hate sewing fisheye darts, so I eliminated them and carved out the difference at the center back line since I was putting a seam there anyway. 

The pink line shows my new stitching line. 
I didn't even bother trying to match the print. And now that I look at the picture, I would lower the back neckline a bit.

Another problem with my limited fabric was the inability to make a bias-cut collar/bow. I was originally going to leave it off entirely and just make it a sleeveless faux-Colette-Aster, but it just looked like it was missing something. Remembering this blouse that I loved, but doesn't fit anymore, I took the remaining scraps and made two ties on the length-wise grain and just attached them above the button band. I think I like this version of the pussy bow blouse better because I hate having extra fabric around my neck. This way, I still get the bow but can keep the neckline clean. 


Summary:
Pattern: Simplicity 1779
Fabric: 100% cotton IKEA sheet remnants, printed with Tulip fabric paint cats. Sheets are usually quite stiff but this one is very loosely woven, so it actually drapes quite nicely while still retaining just enough body for a blouse like this.
Notions: Interfacing for the button band, bias tape for the neck and armholes, six 1/2" gray buttons (the pattern calls for 5, but I would've had gaping at the bust with that arrangement)
Hours: About five? This happened over the course of two weeks, so I don't really remember/know anymore. 
Will you make it again? Possibly? This is definitely a good basic work blouse. 
Total cost: This was a remnant of a sheet from the as-is section, and the buttons were a dollar, so I'm guessing maybe $3. 
Final thoughts: Since the blouse is sleeveless, it will fit under cardigans better for work, and the fact that it opens in the front makes it nursing accessible. And let's get serious now, what's not to love about a pussy-bow blouse with self-printed cats? I've often lamented the lack of apparel-appropriate cat fabric, so I guess it's time I took matters into my own hands and made my own! 

Moar cats is always better! 

Monday, August 6, 2012

PROMABALLOONA Dress Reveal!

Simplicity 4257 dress made from IKEA curtains


I thought of so many names for this dress: the Marimo Ball Dress (look, it's also my late inspired-by-nature Sew Weekly challenge! Because the fuzzy green patches look a little like algae, and also prom is kind of like a ball, right? get it get it get it???), the Scarlett O'Hara Dress (it's made from plush green curtains!), the Aggressively Green Like Seattle Dress (for obvious reasons), or Lowest Ratio of Professional Finish to Time Invested Dress (for having used so many couture techniques, the execution is remarkably sloppy). I'll leave you to pick your favorite, or maybe even come up with your own title. At any rate, having dreamed about, planned, and worked on this frock for so long, I'm mentally exhausted enough to just ignore the messy bits for now. Maybe at some future point I'll go back and finish the last two seams, but I just can't stomach the thought at this moment in time.

You can really see the bubbliness of the curtain fabric on the bodice from this angle. Even though I stitched down the middles of all the darts, as per usual for underlined bodices, but they still didn't come out very well.

Close-up of the front of the bodice. You can see how incredibly nylon the sheer net is...its iridescence did not agree with my camera. Also the ostentatiously large locket that my mom said was the sad best of my necklace choices.
The skirt is quite delightfully swishy and full (it makes a splendid rustling like the sound of angels' wings, thanks to all the stiff artificial fibers), which sort of makes up for how much trouble it gave me in the gathering and hemming.


Friends, I really had such high hopes for my Promaballoona dress, but lo! how the mighty have fallen! It started so well: my muslin only required a few adjustments, and I purchased my curtains for a mere quarter at a garage sale a block away. Then it all went to pieces: my lining fabric was fraytastically awful (never let me be bewitched again by $3/yd "habotai" from sketchy Chinese discount fabric stores), I discovered that it was impossible to press the seams on my already warped "fashion fabric" (velvet on the thinnest nylon = ironing nightmare, as the plush would flatten and the nylon bubble and melt), Gummy took a nap and drooled on the skirt lining, and the full, gathered skirt was impossibly puffy. I persevered, though, and more or less completed the dress, even though I'll confess I hated it more and more as I worked on it.

The back is the worst. This is where the lining was the rippliest, the fashion fabric the most heat-damaged,
and my hand-stitching the laziest. But hey, there are pockets!

Since my curtain panel was so sheer, I had to underline it with the aforementioned polyester habotai. It was ridiculously slippery and probably slightly off-grain; this, combined with the bubbly, unpressable sheer piece means that none of my pieces quite matched and honestly, the whole dress looks like sh*t. Friends, I don't like using strong language at all (in case you couldn't tell from the fact that I just called that strong language!), but I have never felt so strongly the need to let loose with some choice invectives. Especially tragic was the discovery that my painstakingly-hand-blind-catch-stitched-horsehair-braid hem looked terrible and needed to be all picked out and and redone without the braid. Thank goodness there were Olympics to watch! I'm not even going to bother showing you the insides of this thing because frankly, they're downright appalling (think: four colors of seam binding, Pochacco fabric facings, the center back seam allowances untrimmed and unfinished, and gathering threads left in because the thought of picking them all out of the velvet was too daunting).

This face pretty much sums up my feelings about the dress. Also, you
can see a hint of my lavender seam binding peeking out at the hem.
Summary:
Fabric: One panel of an IKEA curtain, sheer green nylon net with plush starbursts, that had already been somewhat abused by the previous owner's dryer, as it was all bubbly and weird to begin with; three yards of thin, misbehaving polyester lining.
Notions: 18" kiwi green zipper, grosgrain ribbon, hooks and eyes, seam binding
Techniques used: Center back lapped zipper, waist stay, underlining, catchstitching the facings and hem, patience
Hours: Please don't make me count. If I have to figure out how much time I wasted on this dress that I will probably never wear, I will cry. I really will. I could've made so many other (wearable) things in the same amount of time!
Will you make this again? This pattern, yes (thank you, Jane!). I actually quite like the fit on the bodice. This mistake of using cheap artificial fiber material for a dress? NO.
Total cost: $13. Ugh. That could've been four sheets right there.
Final thoughts: If you're thinking of protesting that it looks just fine in the pictures, let me just say that it's a six foot dress. You know how in kindergarten they teach you about six inch voices? Where you talk just loud enough that you can only be heard from six inches away? Well, this dress only looks normal from six feet (or more) away. If I ever have to make a speech on a dimly-lit stage, I'll wear this dress. Otherwise, people would be able to see my bubbly seams, rippled underlining, unevenly distributed gathers (gathering through the velvet parts was extremely taxing), and weirdo hem. And the tears streaming down my face. Just kidding. I mean, I guess it's not all that bad, and I learned a lot, but gosh, it feels so disappointing to spend so much time making something I don't like very much. I guess I could've stopped and not finished it, but I had already invested in the lining and because Promaballoona guys...I couldn't just show up to Oona's bash with nothing to wear! Oona, consider this a testament to how much I adore you that I powered through on this dress.

A congratulatory twirl for the birthday girl! I know, I know, I should refer to grown female adults as women, but there isn't a good rhyme for woman. And the shadows here make it look like I'm wearing leggings under my dress.

All of these photos were taken near my husband's childhood home in the lovely East Bay hills.
The view there *almost* rivals the view at the reservoir near my home.

I kind of want to wear this dress and go back to the house where I bought the curtains and be like, hey, remember these? Only I don't remember the exact house and I'm afraid that I'll end up standing there awkwardly while the homeowner stares at me and tries to figure out why this girl is standing on their steps in a vaguely formal dress.

Monday, April 16, 2012

A Look at an Edwardian Lingerie Dress and Some Other Random Pictures

I've been out of the sewing room for over five days, and boy does it feel weird! I never thought sewing would be such a big part of my life; I'm pretty sure the last time I did an activity almost every day for such a long period of time was play piano, and that was waaaaay back in high school. The reasons for the sewing hiatus were mostly good ones, though: my dear friends Ryan and Jeanine, of our-Hunger-Games-photo-shoot-fame, got married on Saturday. I must say, I don't think I've teared up so many times in one day for a very long time -- all the speeches were poignant and heartfelt without being too sappy, and maybe it's the teacher in me, but I just don't have a lot of patience for drawn-out talking without a clear point, so these toasts were all really excellent. Anyway, since this was our very own fake Katpee getting married, I went so far as to draw them a personalized card, instead of just picking up some generic greeting card from Target.

The inside of the card says "Haymitch applauds your kiss and finds it worthy of the sponsors' parachutes. Happy Hunger Games Wedding!" I know, teens killing each other is a terrible theme for a wedding card. So sue me.

Besides the wedding, I've also been having some bizarre pain/extreme soreness in my dominant (right) shoulder, so I've been doing a lot of sitting around on the couch reading the LOTR Appendices instead of wrestling with the iron and hand-cranking through the multi-layered parts of my latest sewing project. Since I don't have any of my sewing to show, have some photos of an authentic Edwardian-ish-era lingerie dress with lots of pintucks and lace insertion! I took these at an antique mall in historic Orange, where I also found some other sewing goodies that I'll be sharing later.

Apologies about the lighting and quality...I was using my iPhone in a basement.


Pintucks in the skirt portion.

Closeup of the lace chevrons and the pintucks.

With flash, but you can see how silky the material was and the sleeve cuff's details.

I'm hoping to get my hands on a nice blouse pattern from the VPLL 1912 project so that I can work on my own lace-inserting and pintucking, but that's going to need to wait for after this weekend's wedding and the Ren Faire the following weekend. And just in case you're wondering, I wore my not-so-little LBD to the wedding this past weekend, but managed to get no good pictures of me wearing it. So instead, have a picture of me at IKEA wearing my IKEA hippos dress. I was a little surprised that no one said anything about my dress; I think I felt slightly (and inexplicably) offended that nobody, not even the employees, found it comment-worthy that I was wearing a dress sprinkled with extremely IKEA-y hippos all over it, in IKEA.  Come on, people, I'm a walking advertisement for your textiles section! 

IKEA red Barnslig hippo dress
It was actually my husband's suggestion that I take a picture with this couch. People, this is why I love that man.

Tuesday, March 27, 2012

A Little Too Successful: My Take on Mad Men's Peggy

Peggy dreams of being the head of her own advertising agency with a huge office building.

Remember how I decided on Peggy's boring, drably-colored dresses, with little girl collars and bows at the neckline as my inspiration for the Mad Men challenge? Yeah, well, I think I succeeded; my finished dress is just a little too bland, gray, cutesy-but-not-cute for my taste. I thought I could transform all those elements into a workable working girl look, instead of Peggy's frumpy schoolgirl look, but I don't think it really worked. Only the fact that this dress is sleeveless saved it from being exactly like Peggy's all-covered-up-prudester work outfits. And I can't even pinpoint exactly what's wrong with it; I like all the individual parts, but the whole leaves me slightly dissatisfied.

Side view.
Front of the bodice. I am not actually that tan in real life; the sun was setting.

Back of the bodice. I went so far as to switch thread colors for the bodice and skirt when topstitching the zipper.

But let's rewind a bit. I knew I wanted drab neutral colors, and I also wanted to avoid buying any new fabric, so I pulled out this gray leaf-patterned IKEA fabric from a few years ago and paired it with a black thrifted bedsheet. I also wanted to finally try out a Peter Pan collar, as it is on my Check the Technique list. Also, I was inspired by Neeno of Sew Me Love's absolutely smashing red PP-collared dress. I doubt mine will be landing in any newspapers, though! The actual collar drafting process was pretty painless, although I had to modify Gertie's instructions a bit and use a manila folder over the carpet due to the lack of a cardboard cutting mat.

I used parchment paper instead of real tracing paper. *shrugs* It was what I had. Otherwise, I followed Gertie's directions.

Except that Gertie's directions never say when to pull the adorable sleeping cat off of your fabric.

There's not much else to say about this dress; the bodice is from McCall's 5927 and the skirt is just a normal A-line cut on the bias for better draping and movement, plus knife pleats in the back that line up (mostly) with the back darts. I added my standard pockets, did my standard baby hem, pinked the skirt seams, and followed my standard lining procedure. So standard...and boring. Just like my perception of Peggy's wardrobe! The saving graces of this dress are the collar (in a cute dotted white cotton), tiny bow (gotta have the neckline bow -- it's so classic Peggy!), and the fact that I took the time to slipstitch the lining to the dress to make the insides prettier. Still not as pretty as Neeno's insides, but better than my usual.

Love the tiny bias tape bow and the tiny dots on the collar!

Wrinkly muslin lining, but otherwise neat attachment to the zipper.

And now, let me raise my hand and make a solemn promise: NO MORE SLEEVELESS DRESSES. Especially not if they have a fitted bodice and flared/full skirt. Good golly, how many does a girl need?! I said at the beginning of the year I wouldn't make any more when even Shayna's mom noticed it was all I seemed to make, but what did I do? Turn around and make seven more of the same! I need to make something with sleeves. Or something fitted on the bottom. I do solemnly swear. And if I do not fulfill my oath, I will be doomed to haunt the path to my sewing machine, unable to rest forevermore. These are the Paths of the Sleeved Dresses. The Sleeved Dresses keep it and do not suffer the sleeveless to pass. The way of the sleeveless is shut. *shakes self out of prophetic mode* My apologies.

I see you thinking about more sleeveless dresses. You stop it. Stop. Right now.

Back view. I am so glad I added those pleats in the back.
Also, a something flew by right at this moment.
Summary:
Fabric: 100% cotton for everything (gray IKEA leaf print from 2008 for bodice shell, thrifted black sheet for the skirt, muslin for the bodice lining, gifted white dotted fabric for the collar)
Notions: black 22" zipper, black narrow double-fold bias tape for the bow
Techniques: Drafting a Peter Pan collar, slip-stitching the lining to the zipper/waist-seam
Hours used: My standard five; the dressmaking went quickly, but drafting the collar and slipstitching by hand took at least an extra hour.
Will you make this again? I like the bodice of M5927 because it fits relatively well for having only two huge darts in front; not marking and pinning and sewing the extra four darts from M5845 really saves a lot of time, so I'm pretty sure I'll utilize this pattern again when I want a quickie project. I also really like the PP-collar look, and now that I have the collar drafted it will go much quicker next time. But next time I make this, I'm definitely using drapier fabric and a fuller or more fitted skirt; this A-line is too stiff and in-between for my taste.
Total cost: All of these fabrics have been in the stash so long, I count them as free. But for the sake of accuracy, I probably spent about $4 on them at the time, plus the $2 zipper, so let's say $6 total. Gosh, that might almost be a Mad Men-era price!
Final thoughts: I don't think I captured any aspect of the 1960s at all in this dress. And I captured all the right parts of Peggy's look in the wrong way. All in all, a decent summer dress that I can't complain much about, but totally redundant for my wardrobe and not my favorite.

I look a lot like the old pictures of my mom here. That's about the only retro thing going on here.

Mad Men Challenge: accepted. Mad Men Challenge: failed.

Thursday, December 22, 2011

Anthropologie Inspired: Hooray for Hippos Dress!

How many hippos can you count on this dress?

Really, Anthro? Really?
Anthropologie has been putting out all sorts of clothing with animal-print fabric. First it was tiny elephants. Then it was camels. Not content with large mammals, they delved into an aviary with flamingos and penguins, then got even weirder with creepy-crawlies like ants and snails. When did animals on clothing become hip? Why didn't I get a memo? Good thing Shayna and I stopped at an Anthro recently and saw the mini zoo they have there! And good thing I've been saving this hippo-print fabric from IKEA since 2009. And best of all, this week's Sew Weekly theme is "Anything Goes," and if crazy hippos all over a dress isn't anything goes, then I don't know what is.

Also, this is another dress to go in my husband's "sigh, I need to walk next to this lady" category. But hey, Anthro, the ultimate arbiter of hipster cool, says that animals on clothes are okay! Although they probably didn't have in mind kids' bed sheet prints from large Swedish furniture manufacturers.

I was in a hurry to clean up the apartment before we left for the Bay Area, so I told my husband to just quickly snap some pictures while I did the vacuuming. As a result, the pictures aren't the best, but this week, anything goes, right?

Being all 1950s housewife and vacuuming in heels.


I used my trusty New Look 6723 pattern, a vaguely Breakfast At Tiffany's-esque princess-seamed bodice with a deceptively full looking skirt (but it actually uses less than three yards of 45" fabric). To pay homage to the crazy pleating on the Cirque-A-Line dress, I added pintucks to the bodice. I also added pockets, because a dress with pockets is so much more practical. And lowered the back neckline a little bit.

Look! Pocketses! Also, crazy tulle "belt" to add to the festive look. I will not wear it this way for real.
Lowered back neckline, with a crazy six-legged hippo at the top!

Summary:
Fabric: 100% cotton from the IKEA kids' collection in 2009, aka "Barnsling" by Eva Lundgreen
Notions: Grosgrain ribbon & swimsuit hook for the waist stay, white 22" zipper, hook and eye
Techniques used: Pintucks! Which have been on my list of things to try, and it's not that bad. Mine aren't entirely centered or even, but that's because I was just folding and ironing and sewing as I eyeballed it.

There's also the handpicked zipper and grosgrain waist stay, which by now have become so normal in my dress-making that I wouldn't bother bringing them up anymore, except that I wanted to point out that my handpicking has gotten much, much neater. And the grosgrain ribbon is green to go with the red of the dress, making it that much more holiday-appropriate. Even if nobody knows it except me.


My stitches have gotten much tinier and more even.

Hours: My standard five hours...wasn't a complicated dress, but I had to go slow on the princess seams to make sure that it didn't get wrinkly. Also the pintucks took a while, running back and forth between the sewing machine and the ironing board. The handpicking, though, went a lot faster after having done so much embroidery in the past week.
Will you make this again? I've used New Look 6723 so many times in the past, I'm pretty sure I'll make it again. Maybe with sleeves next time.
Total cost: I don't remember how much I paid for the fabric two years ago, but I'm almost positive it was less than $10.
Final thoughts: I don't know what's more appropriate for the season than a red and white dress (with a secret green ribbon inside), especially since the hippo tails look like little sparkly stars. This dress makes me feel giddy inside to wear it, because the hippos are just so cheerful! Never mind that I'm much, much closer to thirty than twenty. I'll wear hippos for as long as I feel like it, dagnabbit!

Trying to look like a composed, serious, mature adult, even if I am wearing a hippo dress.

Sunday, November 6, 2011

IKEA Ottoman Cover Turned Messenger Bag

A bit of a departure from the usual.
After some craziness with the collar, facing, and shoulders of my pin-up-inspired dress, I needed to take a break from making things that are supposed to fit 3D curves (although given the size of my bust area, it's more like 2.6D curves...which, as a science person, I know makes no sense). Anyway, I told myself I would make something nice and simple, straight lines and rectangles only. Like a pillow. Or something. I decided that I needed to make a messenger bag big enough to fit my laptop; my current laptop bag is the same grodilated free one which I got when I first started teaching. The straps are about to die, and it's big enough to fit a 17" monster as well as the monster's accessories. My laptop is a nice little compact 14" Macbook, so it was swimming in that bag. Not to mention embarrassed by its unstylishness. Because, you know, Apple products are all about the pretty.

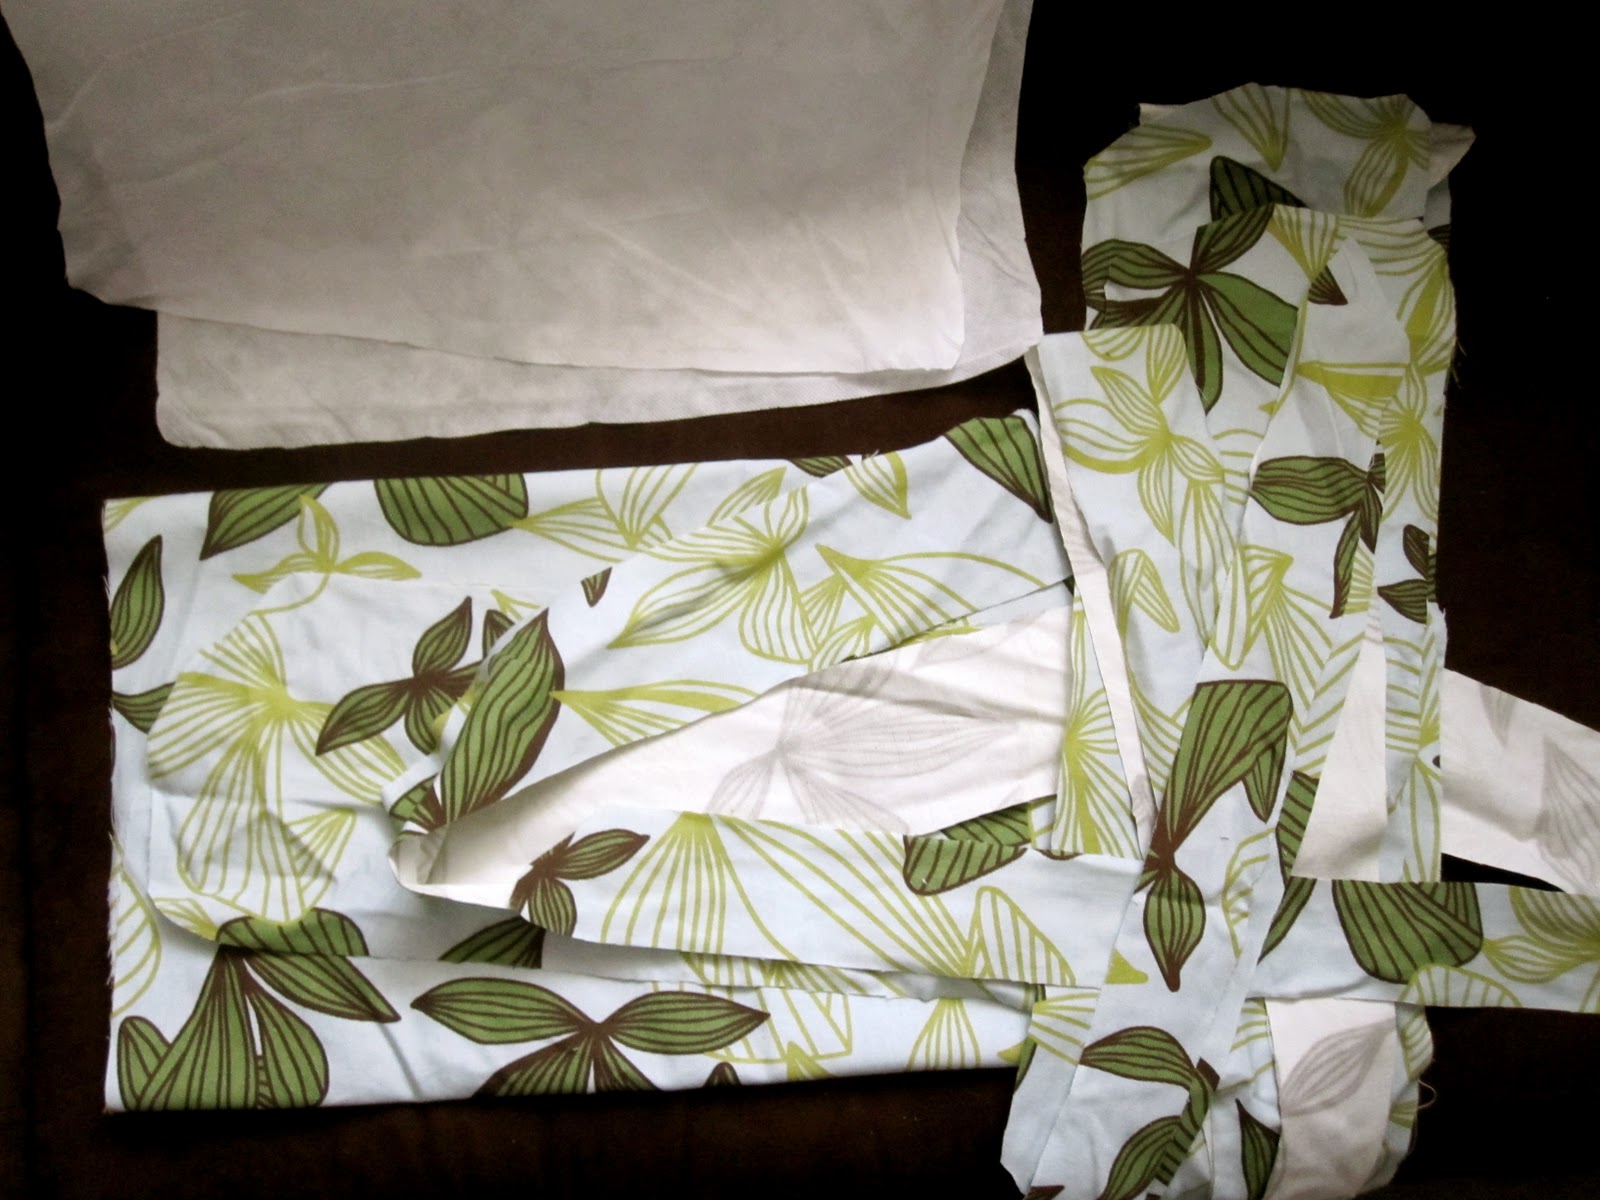
I decided that this project was perfect for some stash-busting, because when am I going to use canvas-type material in garment making? I had an old IKEA ottoman cover (possibly from the EKTORP BROMMA?) that I picked up for $5 from the As Is section at last two years ago. Can I just say that I love IKEA textiles? They always have the best designs, and every time I go to IKEA I want to take home all the fabric, bedding, and pillows. I cut out all the fabric I could salvage, leaving the zipper and velcro and serged seams:
The fabric harvest.
The remains.

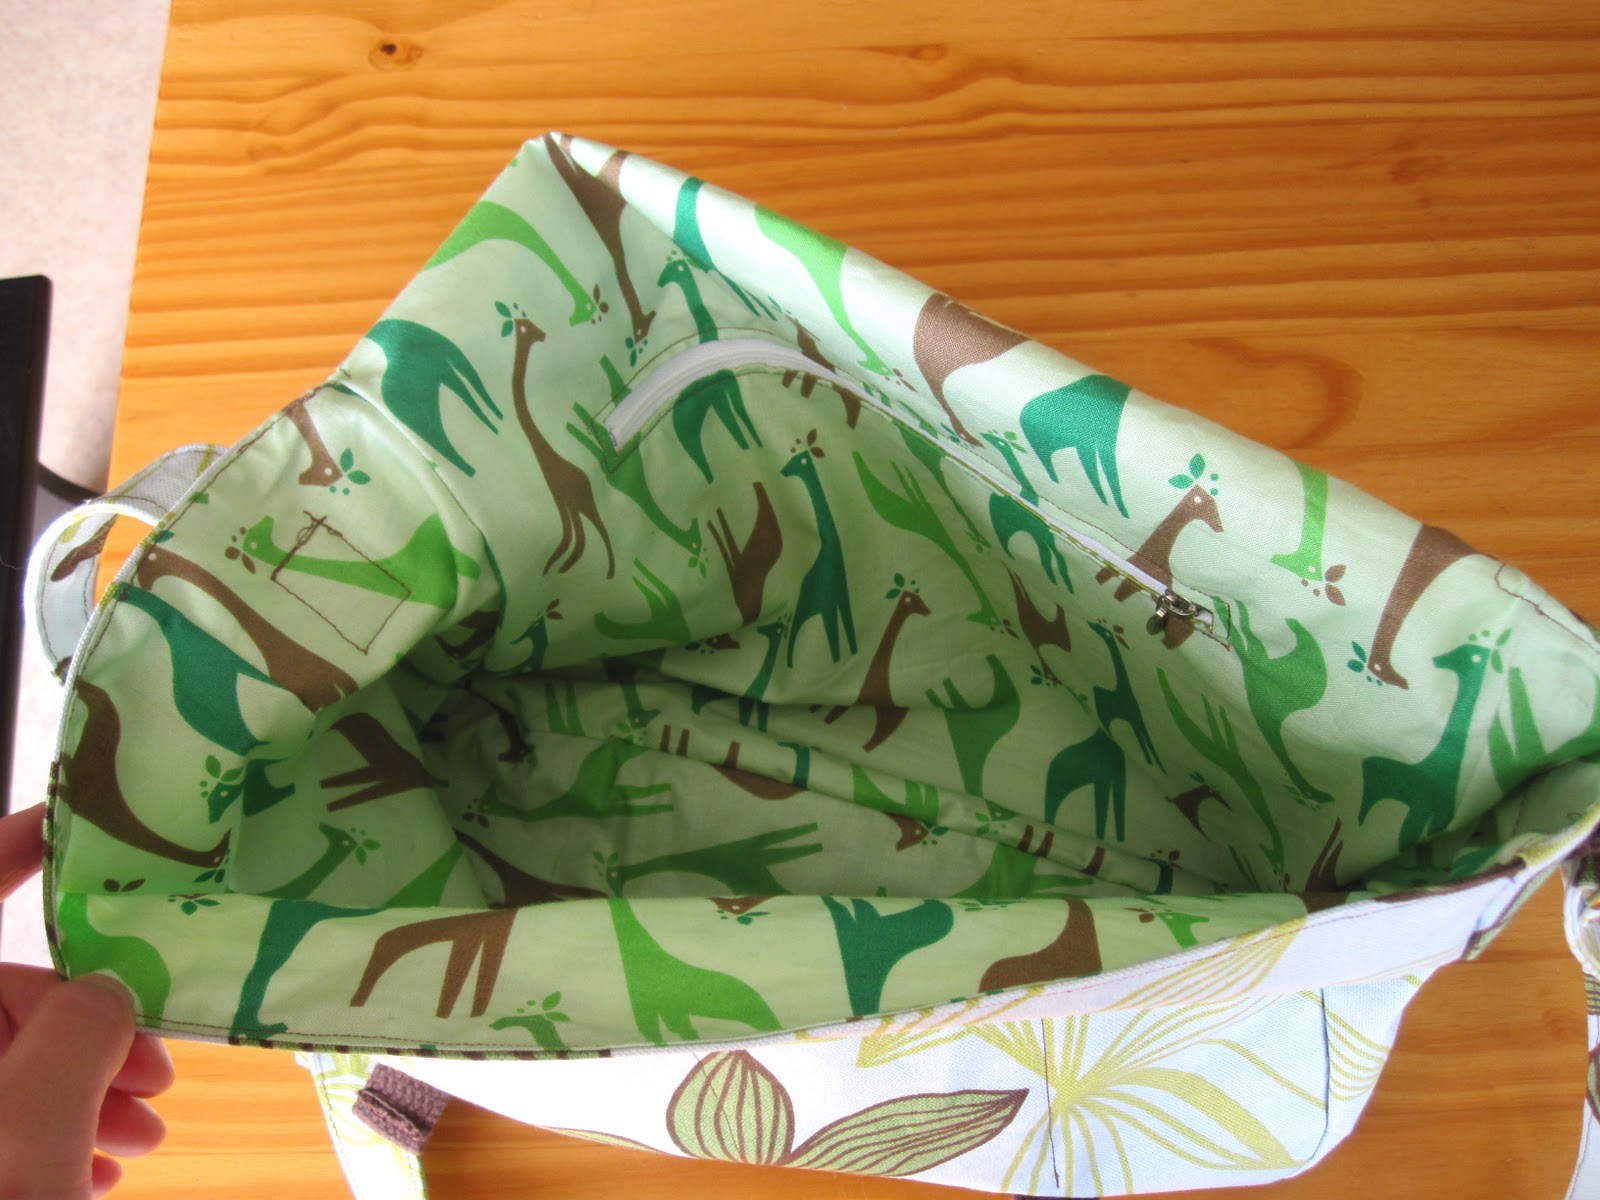
For the lining, I used a super-cute giraffe print quilting cotton from Sew Modern, a little fabric store near where I live. They have the cutest prints and I'm always tempted to do what the Selfish Seamstress says not to do and make dresses out of quilting fabric. Unfortunately, when I got home, I realized that the green of the giraffes didn't quite go with the green of the leaves of the ottoman cover. Urgh.

On Thursday afternoon, when I had secured my fabrics, as well as magnetic snaps, square rings, and brown webbing, it was still going to be something nice and simple, much like LiEr of ikatbag's school satchels. You know, just a shell and some lining and webbing and done! This was supposed to be an easy project, after all. But noooo, I had to complicate it by putting pockets all over, making a fabric strap, and making webbing straps to close it. And somehow, in the process, neglecting to think about stiffening it up with fusible interfacing or fleece.

Fast-forward through lots of seam-ripping, turning an incredibly stiff five-foot long canvas tube, top-stitching issues, and 16 episodes of Nickolodeon's Avatar: The Last Airbender: it's Saturday night and I have an incredibly floppy, but mostly functional, new messenger bag big enough for my laptop. Why is it that I can never leave well-enough alone and just go the simple route?

Stuffed with oven mitts to plump it up.

Magnetic snaps to close, and pockets on the front under the flap!

Another pocket, zippered, with more non-matching green fabric, for feminine unmentionables.

The back has another, giant pocket, which closes with a giant button.

Adjustable strap!

The underside of the magnetic clasps. I figured I don't need to worry about the clasp ripping through the webbing.
Summary:
Fabric: IKEA ottoman cover, 100% cotton, canvas-type material ($5), giraffe print cotton lining ($6)
Notions: ~1 yard brown cotton webbing ($2), magnetic snaps ($1.25), square rings ($7), zipper (stash)
Hours: Errr, 15 twenty-minute episodes and one hour-long special of Avatar plus extra time here and there, about eight hours. Gaaah. Granted, at least an hour of it was turning that loooong strap, and another hour of seam-ripping because I forgot to put on the pockets and other ridiculousness.
Techniques used: Using pliers to put on magnetic snaps? An inner zippered pocket, and an adjustable strap.
Will you make this again? Yes, one day when I've forgotten everything I learned while making this one. Definitely interfaced, though, and with a plain fabric.
Total cost: $22...not bad, I guess.
Final thoughts: As with most projects, I realized that it's simultaneously harder and easier than I thought to make ______. The sewing wasn't difficult, but the planning of steps (sew the pockets on first before attaching the gusset! Oh and sew the buttonhole and button before attaching the pocket!) was the tricky part on this bag. Also, every time I make a bag/purse I realize belatedly that I should have interfaced if I don't want a floppy mess.

Linked here and here.

Now that I've had a foray into bag-making (and I totally want to make another one, a better one), I'm ready to return to my dress. I'm also getting mentally ahead of myself and getting excited about using this awesome sheet I found last week from Goodwill:

"You know, some people have to walk next to you."

My husband thinks I'm crazy for wanting to make a dress out of Superman sheets, but I say that it'll be cool and quirky. Like if Ms. Frizzle taught at Professor Xavier's School for Gifted Youngsters. And yes, I know I'm mixing different comic universes. But wouldn't this be so cool to wear to Comic-Con?