When I was in high school, I really loved the gothy witch look. I thought it was so cool and dramatic and just the perfect emo romance aesthetic, which, because I was in high school, seemed like the height of fashion. But I was also a teenager with little control over my life, and I knew my ultra-conservative parents would freak out if I showed any signs of wanting to dress this way (after all, they forbid me to read Harry Potter when I was a junior in high school, because WITCHCRAFT, and what if I decide to WORSHIP SATAN after reading it?!?? :P). Even in college, I would longingly look through the racks at Hot Topic, but then regretfully mentally shelve the idea for someday.
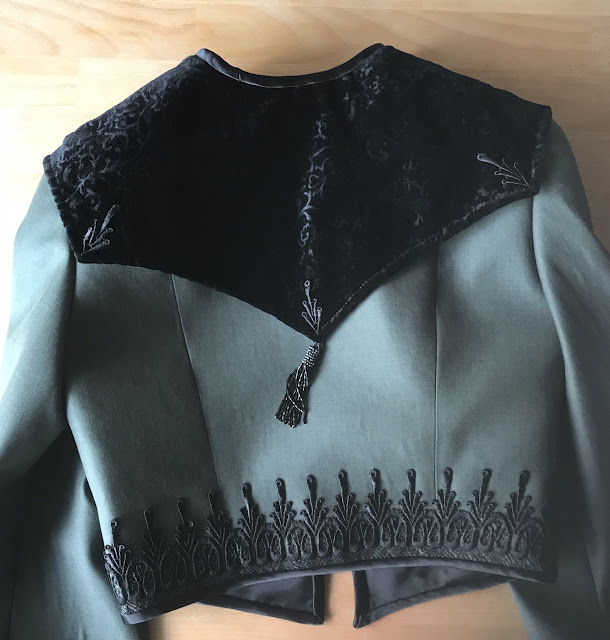
Well, that day is this day, because I have finally made the witchy little cropped jacket of my high school dreams! As I said in my last blog post, I'm taking Advanced Tailoring this semester, and we are required to make two jackets/coats. After going floor-length drama on my previous coat, I went the opposite direction with this one and made a little 1903-ish bolero. I wanted to make something to match the skirt I made in Flat Pattern class (which I have yet to blog about). I was inspired by all the trimmed-out jackets with bell sleeves that I saw in fashion illustrations from the early Edwardian era.
 |
| 1902-03 fashion plates. |
 |
| Basically the same, right? :D |
Since my pirate coat was so involved and I was coming up on the end of the semester, I wanted this jacket to be fast and simple: no notched collar, no pad-stitching, few seams, no closure. Since the front didn't close and didn't need to hug the body, I was able to get away with no darts or seams at all in the front pattern piece. The collar was inspired the batwing lapel on @dressingprincelee's waistcoat, but to keep things easier, rather than having the thick seam allowance (suiting+interfacing, cotton back stay, velvet+lining) turned under and having a facing, I decided to just baste the lining to the shell, wrong sides together, trim down the seam allowance, and bind the edge with more of the satin. This worked wonderfully and the binding adds another neat trim detail.
Other than the satin edge binding, I decorated the jacket with some Venise lace trim from the stash, and cut up some of the motifs to add to the collar. The crowning detail was this little handmade beaded tassel that I added to the back collar point. It was a tedious 2+ hour project, making that tassel, but it's just the perfect extra touch!
 |
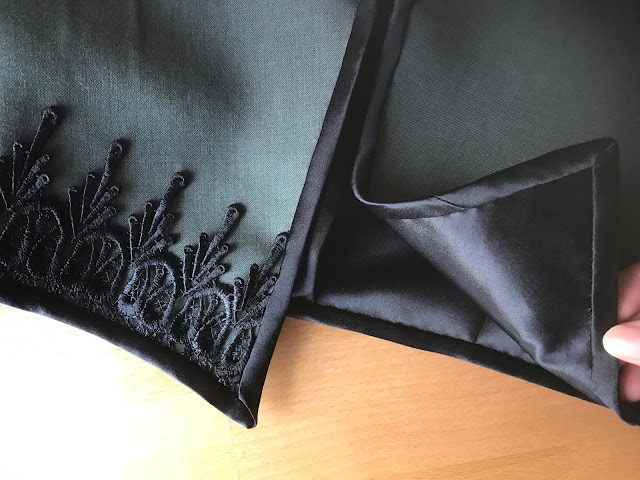
| If you look carefully, you see where the fabric is bubbling because of the poor fusing. |
Summary
Pattern: Self-drafted
Fabric: 1.5 yards of 58" polyester suiting with a weird texture on the wrong side, from somebody's destash? I don't know, I've had it for years and have forgotten where it's from. The collar and cuff detail is more of this polyester velvet tablecloth that just keeps on giving somehow. I still have a few more scraps of it, so at this point it's pretty much the best $10 I've ever spent on a secondhand textile. The lining is a fairly hefty black poly satin for the body, and black rayon Bemberg for the sleeves. Both of those were from the stash as well, although they were originally purchased new.
Notions: More Armo-Weft fusible interfacing, which I sorely regret using, as it did not fuse well with the weird texture on the suiting. And because the suiting's surface is so smooth, the bubbling is really obvious, and the whole combination is weirdly stiff. Well, I've learned my lesson and will be using fusibles with caution in the future. I also used stash batting scraps to make shoulder pads, fleece for sleeve cap easing/sleeve heads, and more sheet fabric for a back stay.
Techniques: Beaded tassel, setting in tailored sleeves
Hours: 38 over the course of a month, mostly at night after the kids were asleep. A lot of this was spent on fussy hand sewing, which I used to scorn, but have now recognized as not only necessary, but enjoyable. The velvet collar and cuffs required so much hand basting, and I tacked down all the braided trim and lace points by hand, and the binding all had to be slipstitched, and of course there was the beaded tassel.
Total Cost: $30 of materials, and then if I pay myself $15/hour, then $600 total.
Final Thoughts: I'm really angry at myself for falling into the laziness trap of fusible interfacing, because other than that huge glaring error, this jacket would be perfect. I think I'll still wear it, though, since I'm telling myself that that's something only other sewists would notice, and there's enough going on with the collar and trim to distract from the surface texture. I still need to get my act together to take pictures with all the components of my now-completed 1903 Slytherin outfit, but in the meantime, it works nicely with modern clothes too. You know, for when we actually go out in real clothes again, as opposed to staying home in sweats.
 |
| Recognize those pants? They're also the product of a Canada College class! |


