Showing posts with label Stash-busting. Show all posts

Thursday, December 17, 2020

Historybounding to Thrill My High School Self

When I was in high school, I really loved the gothy witch look. I thought it was so cool and dramatic and just the perfect emo romance aesthetic, which, because I was in high school, seemed like the height of fashion. But I was also a teenager with little control over my life, and I knew my ultra-conservative parents would freak out if I showed any signs of wanting to dress this way (after all, they forbid me to read Harry Potter when I was a junior in high school, because WITCHCRAFT, and what if I decide to WORSHIP SATAN after reading it?!?? :P). Even in college, I would longingly look through the racks at Hot Topic, but then regretfully mentally shelve the idea for someday


Well, that day is this day, because I have finally made the witchy little cropped jacket of my high school dreams! As I said in my last blog post, I'm taking Advanced Tailoring this semester, and we are required to make two jackets/coats. After going floor-length drama on my previous coat, I went the opposite direction with this one and made a little 1903-ish bolero. I wanted to make something to match the skirt I made in Flat Pattern class (which I have yet to blog about). I was inspired by all the trimmed-out jackets with bell sleeves that I saw in fashion illustrations from the early Edwardian era. 

1902-03 fashion plates.

Basically the same, right? :D

Since my pirate coat was so involved and I was coming up on the end of the semester, I wanted this jacket to be fast and simple: no notched collar, no pad-stitching, few seams, no closure. Since the front didn't close and didn't need to hug the body, I was able to get away with no darts or seams at all in the front pattern piece. The collar was inspired the batwing lapel on @dressingprincelee's waistcoat, but to keep things easier, rather than having the thick seam allowance (suiting+interfacing, cotton back stay, velvet+lining) turned under and having a facing, I decided to just baste the lining to the shell, wrong sides together, trim down the seam allowance, and bind the edge with more of the satin. This worked wonderfully and the binding adds another neat trim detail. 


Other than the satin edge binding, I decorated the jacket with some Venise lace trim from the stash, and  cut up some of the motifs to add to the collar. The crowning detail was this little handmade beaded tassel that I added to the back collar point. It was a tedious 2+ hour project, making that tassel, but it's just the perfect extra touch!


If you look carefully, you see where the fabric is bubbling because of the poor fusing.


Summary

Pattern: Self-drafted

Fabric: 1.5 yards of 58" polyester suiting with a weird texture on the wrong side, from somebody's destash? I don't know, I've had it for years and have forgotten where it's from. The collar and cuff detail is more of this polyester velvet tablecloth that just keeps on giving somehow. I still have a few more scraps of it, so at this point it's pretty much the best $10 I've ever spent on a secondhand textile. The lining is a fairly hefty black poly satin for the body, and black rayon Bemberg for the sleeves. Both of those were from the stash as well, although they were originally purchased new. 

Notions: More Armo-Weft fusible interfacing, which I sorely regret using, as it did not fuse well with the weird texture on the suiting. And because the suiting's surface is so smooth, the bubbling is really obvious, and the whole combination is weirdly stiff. Well, I've learned my lesson and will be using fusibles with caution in the future. I also used stash batting scraps to make shoulder pads, fleece for sleeve cap easing/sleeve heads, and more sheet fabric for a back stay. 

Techniques: Beaded tassel, setting in tailored sleeves

Hours: 38 over the course of a month, mostly at night after the kids were asleep. A lot of this was spent on fussy hand sewing, which I used to scorn, but have now recognized as not only necessary, but enjoyable. The velvet collar and cuffs required so much hand basting, and I tacked down all the braided trim and lace points by hand, and the binding all had to be slipstitched, and of course there was the beaded tassel. 

Total Cost: $30 of materials, and then if I pay myself $15/hour, then $600 total.

Final Thoughts: I'm really angry at myself for falling into the laziness trap of fusible interfacing, because other than that huge glaring error, this jacket would be perfect. I think I'll still wear it, though, since I'm telling myself that that's something only other sewists would notice, and there's enough going on with the collar and trim to distract from the surface texture. I still need to get my act together to take pictures with all the components of my now-completed 1903 Slytherin outfit, but in the meantime, it works nicely with modern clothes too. You know, for when we actually go out in real clothes again, as opposed to staying home in sweats. 

Recognize those pants? They're also the product of a Canada College class

Wednesday, November 25, 2020

Why yes, I do buckle all my own swashes!

Er, swash all my own buckles? Either way, I'm just happy to have finally made the fantastic pirate coat I've always wanted! 


I bought these red and gold damask curtains at a thrift store years ago and knew that I wanted to make them into some kind of fabulous floor length coat. I also knew that my skills then weren't quite up to the task, so I put them in my stash and waited. After making a shapeless coat that basically only had three pattern pieces in the Beginning Tailoring class at CaƱada College last winter, I was ready to move onto something more complicated. I figured that this would be the perfect chance to have the guidance of an expert while making my dream coat. Unfortunately, coronavirus had other plans for the world, and it turned out that instead of working alongside classmates with an instructor at the giant cutting tables at the college, I was going to be googling a lot of things and essentially learning to tailor on my own. Thank goodness for YouTube (cue the Schuyler sisters singing "How lucky we are to be alive right now!"). 


I really appreciated that this class made us document every step of our work; usually I just sort of make things up as I go along and then attempt to recall how long it took and what I did. It's ironic that even though I'm a science teacher and meticulous details are supposed to be my thing, I tend to be more loosey-goosey in my sewing. Anyway, our professor required us to write up a list of steps, then document all the time we spent on each step. We also had to do a sketch (beforehand, so that we could check how well our final garment matched up...as opposed to my usual method, which is to make the garment first and then sketch what it looks like), write up a list of all materials and costs, and even record the sewing machine settings and thread type/color. 


The first step our professor required was a paper fitting, just to make sure there weren't any glaring issues with our patterns. Since mine was a frankenpattern of three different Big 4 patterns, I begrudgingly did this step (even though I thought it was silly in the previous tailoring class), then moved on quickly to the muslin. I know I'm very fortunate to be almost exactly the measurements of a Big 4 size 10 in the torso, so there wasn't much I needed to change. I made my typical pattern corrections: wider shoulders, longer sleeves, SBA, swayback adjustment, narrow back...but I wish I'd narrowed the waist and back a little more, since it's not as fitted as I would like, even though it is meant to be outerwear. 


We are required to make one hand-padstitched collar for this class. Normally we would get to see our professor demo this in class, but instead I watched Bernadette Banner's video tutorial featuring Royal Black Couture to learn how to do this. It took a little bit of doing to get used to the rhythm of all the diagonal stitches, and my stitches still aren't the neatest, but after steaming it I'm really pleased with how well it holds its shape. 


It's really incredible how much goes into making a structured coat or jacket. I used fusible Armo-Weft interfacing on all my fashion fabric pieces to add some body to the floppy curtain fabric, and this also helped prevent some of the fraying that this weave is prone to. In order to help the garment hang better and strengthen the back during movement, I added a back stay. And since this is a pirate coat, what better fabric to use than this (100% cotton, tightly woven and washed multiple times) map-print bed sheet? Secret treasure maps hidden in one's clothing for the win! In the front, I cut out a piece of horsehair canvas and basted on a couple layers of batting to make a chest piece. This fills in the hollow that can occur between the shoulder, arm, lapel, and bust area and helps the whole garment lie more smoothly. To help stabilize the edge of the lapel, I also hand-stitched 1/4" wide cotton twill tape butting up against the stitching line. In hindsight, I'm not sure that this was necessary since my lapel isn't cut on the bias (the way a typical blazer lapel would be), and the whole thing was topstitched anyway. 


I used to only set in sleeves with the two-rows-of-gathering-stitches method, but that never worked really well for me and I always got weird puckers. This time, I tried the method of gathering the sleeve cap with a piece of stretched-out fleece, and it worked beautifully! The thickness of the fleece keeps the fashion fabric from making actual puckers, and then once it's set in, you can just push the fleece into the sleeve cap to act as a sleeve head instead of having to sew one in by hand. SO NEAT. I love all-in-one steps. Gertie's video demonstrates the whole process here, but instead of using mohair or lambswool, I just used a strip of scrap polar fleece, which is obviously cheaper and easier to find. After setting in the sleeve, I also put in a handmade shoulder pad (just three layers of thin cotton batting basted together). I remember the first time our professor talked about shoulder pads, I was so skeptical; I just kept thinking of the massive 1980s shoulder pads. The nice thing about handmade ones, though, is you can use as many layers of batting as you want to make it thinner or thicker, and it really does help the whole garment hang more nicely. Consider me a shoulder pad convert!


For the skirt of the coat, I waffled a bit about whether I really wanted to make it floor-length. A floor-length half-circle skirted coat would definitely allow for the most dramatic flouncing and swanning about, but it would also be impractical and take forever to hem by hand. But then I realized that I had enough fabric to make it floor length, so in the interest of not leaving a bunch of unnecessary extra fabric in the stash, I decided to just go for the floor length version. To visually break up the expanse of red and gold fabric, I put some welt pockets with flaps in. The last time I made a pirate coat, my pocket flaps were fake, and I regret not having functional pockets. Not making the same mistake this time! Since I had a waist seam, I decided to go for another trick I learned from Bernadette Banner: I added a twill tape stay from the top of the pocket bag to the waist seam. This will help support the pocket and keep it from sagging when I put things in. 


The rest of the construction was pretty straightforward, if tedious. Lots of topstitching to help hold the velveteen facing, upper collar, cuffs, and pocket flaps in place, since I didn't want to press it too much, then all the hand sewing: I catch-stitched the hem of the skirt and sleeves, then slipstitched the lining to create a jump hem. 


I had originally entertained ideas of having the front lapel be "reversible," so that it could flip closed to be a double breasted coat, or stay buttoned back to show the velveteen facing. I even took a hand-sewn buttonhole class with that in mind, but in the end my samples were still too messy and the idea of doing twelve of them was just...no. Besides, I like the contrast of the red velveteen; without that showing, the front of the coat is just too much damask and the collar and cuffs look a little out of place. So rather than make ugly buttonholes, I just permanently sewed on the buttons. To close the coat, I just used a giant hook and eye. Joann's only carried white ones, so I used a combination of red Sharpie and brown fabric marker to color it dark red to (somewhat) match the fabric. 


Summary:
Pattern: I used the collar from Simplicity 2333, the cuffed sleeve from Butterick 6602, and the skirt from McCalls 6819, then frankenpatterned the last two together to make a shoulder-princess-seam bodice, that I then extended past the center front so that it could flip back to make the lapel. The slant welt pocket with a flap was modeled after the one in this very helpful Waffle Patterns tutorial, but just rotated to be more horizontal than vertical. 
Fabric: The main fashion fabric was curtains that I thrifted at least four years ago, a surprisingly nice 60/40 poly-cotton red and gold damask. Once I picked apart the seams, I ended up with three 40"x88" panels. The red cotton velveteen (I used about 1/3 yard) was from the college's free shelf, a place where students can pick up other people's destashed fabrics. The lining was two different secondhand sheets; the torso was a microfiber with a faint swirl pattern, and the skirt was a cotton sateen. 
Notions: Armo-Weft fusible interfacing from The Sewing Place, then the cotton twill tape, horsehair canvas, and metal buttons were all already in my stash. 
Total cost: $20 for the curtains + $4 for the sheet + $18 for the interfacing (but with lots leftover) + $6 for the patterns + $5 for the bulk bag of buttons ages ago + $3 for thread = $53 total. Of course, once you factor in the 57 hours, even if I paid myself a measly only-slightly-more-than-CA-minimum-wage $15/hr, this coat is worth almost $1000. And this is why bespoke clothing made at a living wage is so expensive. Good thing sewing is my superpower?
Would you make this again? No, because I don't need two pirate coats. TBH, I'm not sure I needed *one* pirate coat, but hey, it's 2020, treat yo'self. 
First worn: Just to take pictures, because we aren't going anywhere, since, you know, global pandemic. 
Final thoughts: When I think back to when I first started sewing, I was pretty much allergic to anything involving hand-sewing and would avoid it at all costs. Thankfully, I got over that, and now I actually enjoy the process of slowly and methodically catching mere threads at a time as I invisibly stitch hems. That, and the whole fussy tailoring process, was actually really fun and you can't argue with the results. I can see how people get addicted to tailoring and/or jacket-making. Unfortunately, I don't see myself indulging in this process too often, as I have too many demands on my time and projects on my bucket list to allow for such slow sewing. Still, I'm really glad to have finally checked off one of those projects on the list, as well as moved some fabrics out of the stash!


When I had Mr. Cation take pictures for me, I of course had to wear my over-the-top tricorn with the coat, since it's all trimmed in red and gold. Then, to my chagrin, he said that the hat+coat combo made me look just like Captain Morgan. I had no idea that he was even a thing, but once I got over the fact that I accidentally cosplayed a cheap rum mascot, I of course had to do a pose with my foot up on one of our barrel planters. 


Friday, May 1, 2020

Flat Pattern Class


In this unprecedented time of #canceleverything, I am grateful for the things that have not been canceled. I've missed out on a historical dance, a historical tea, and a cookie exchange with historical costuming friends, as well as several birthday parties. My school's play, A Little Princess, for which I was doing historical costumes (sense a theme here?), was also canceled. What *is* still happening, though, is the Flat Pattern Class I'm taking at Canada College. Of course, it's been moved online, but I'm glad that I happened to be taking a class more suited to distance learning than say, tailoring or fashion illustration. Our professor is still showing how to do pattern manipulations on Zoom, and we are emailing pictures of our patterns and garments. Obviously, we don't all have mannequins on which to display or test our garments, but it's working fairly well, all things considered.


But back up a little: if you don't know what flat pattern manipulation is, it's where you take a basic sloper pattern (plain fitted bodice + sleeve + straight skirt with darts in "standard" places) and by shifting darts around, adding fullness, and contouring, can totally change the pattern pieces to make anything you want. I realized after the class started that I'd basically already been doing this to a lot of my TNT patterns in order to get the style lines I wanted for various costumes, but it was nice to learn it "officially" so that I could pick up on the little tidbits of information I missed as a self-taught sewist. Things like the industry standard for how far to back dart tips off from the apex (instead of my usual "ehh, that looks about right!"), or the proper way to add fullness (slashing and spreading at multiple points, then truing the stitch line, instead of my haphazard scooting the pattern piece over until it looked right...are you sensing a theme here, too?). I confess I do get a little impatient sometimes about the pace of the class, because I feel like all these manipulations are obvious, but then I have to remind myself to take a deep breath because not everyone taking the class has been doing this for years. Teachers really do make the worst students sometimes.


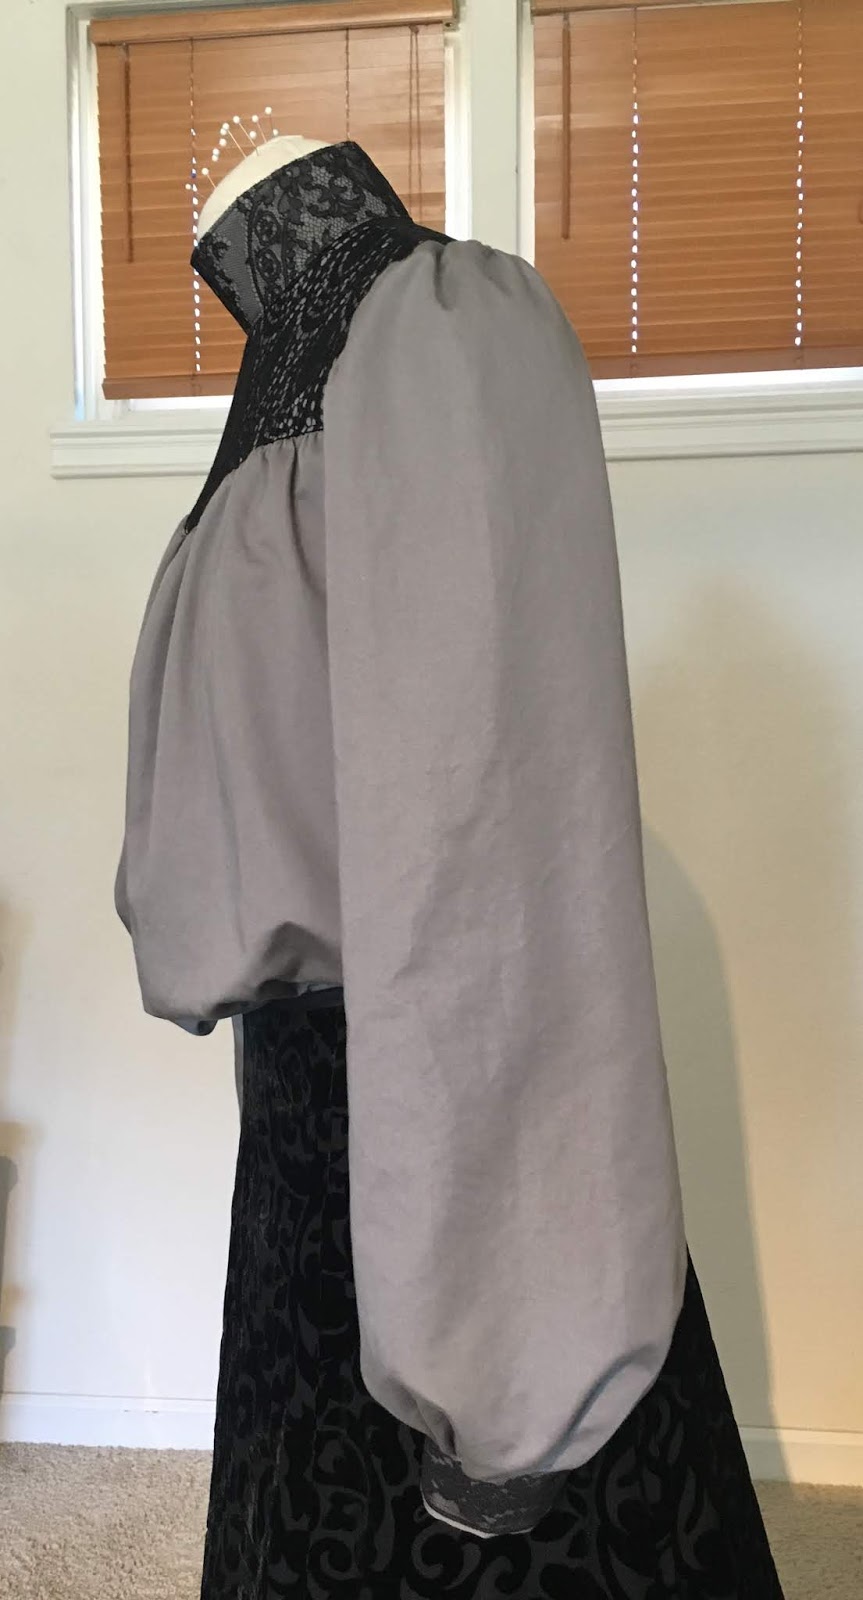
Anyway, so one of our assignments was to make a top with a sleeve of some kind and a collar that had a closure, and show the pattern manipulation work that went into it. I didn't want to make some variation of a cutesy Peter Pan collar on a button up shirt with puff sleeves, which which is what a lot of people went with. So I started brainstorming...and coming off of my mourning for the Victorian costumes that I made for A Little Princess that would never be worn, I decided that I was going to make a turn of the century, early 1900s-style blouse, with a high stand collar, bishop sleeves, and a full gathered front, pouter-pigeon look. And as I looked at the fabrics available to me in my stash (lots of gray, green, and black), I decided that I was going to go all in and make myself a historical Slytherin costume. The final garments for this class have to include a top and a skirt (or an entire dress...basically it has to cover a dress form so that it's dressed "decently"), and if I made a top for this assignment, then I could just make a skirt to complete the final outfit. Was I making a lot of extra work for myself, drafting such a complicated outfit? The answer is yes. Did I care? No. I'm using all my Canada College classes as an excuse to indulge in my love for historical fashion (see Exhibit A, Fashion Illustration classes, and Exhibit B, Tailoring Class).


Here's what my quarter scale work looked like. We're supposed to work out our designs in quarter scale first so that the professor can check our work, then we make the full-scale pattern and mock it up. I didn't bother with a mock-up and just went straight for fashion fabric, because 1) we're designing for a standard size 8 mannequin, which is basically my size so I have a fairly good idea how things should look/fit, and 2) my fashion fabric is thrifted sheets, so no big loss if it doesn't work out. I did dress it up more with some stash lace, which was so shifty that I had to hand baste it all in place before I could start sewing, so that was also obviously an excellent time-saving decision in this time of extra work due to home-schooling.

I'm pretty pleased with how centered I got the lace motifs!

I think the side profile has the right kind of poofy pigeon-breast look. 

Oops, Cecily's skirt, my stand-in until I make the real one, is slightly off-center. It's a thrift store find that used to be a too big, 90s-tastic, empire-waisted, tea-length, burnout-velvet dress, so I cut off the top portion and redid the top edge with a petersham ribbon facing to make it into a floor-length skirt.


The back closes with hooks and bars, as do the sleeve cuffs, mostly because I had lots of them leftover from our anniversary trip to the UK, where I found a vintage pack of a hundred at a charity shop. I've gotten a lot better/faster at sewing them on now, but I still don't like doing it and mine aren't particularly neat. But they're all hidden, and black on black is hard to see, so I think ultimately the pragmatic Slytherin thing to do is to get them done functionally and save all the agonizing over perfection for when Voldemort is actually watching the parts that are actually showing.

More Slytherin secrets: the inside seams aren't finished. 

I had to look up how to finish the sleeve placket because I haven't done one in oh, at least five years. 


Summary

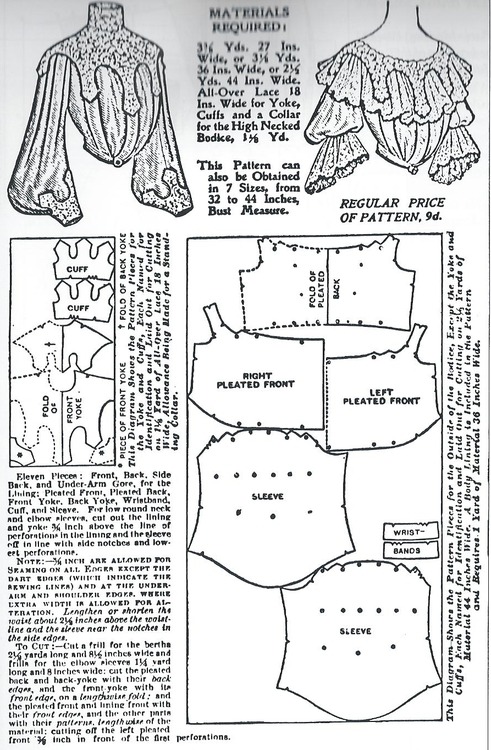
Pattern: Self-drafted, but based on period illustrations/patterns like the one below.

Source: the Original Pre-1929 Historical Patterns tumblr is a treasure trove.


Fabric: Half of a full-size flat sheet in gray cotton sateen, thrifted and leftover from drama costume making, for the main blouse fabric. The yoke was overlaid in black lace from a 1/2-yard remnant that I bought from Joann's years ago. I don't know the fiber content anymore, but it's definitely synthetic. For the cuff and collar lace overlays, I used scraps from a remnant pack that I bought at the Dark Garden trunk sale years ago. The strip of black fabric for back closure was from another thrifted cotton sateen sheet scrap, and the bias tape binding at the hem is silk dupioni leftover from my Ursula bustier. I'm really pleased with how I've been able to use all leftover pieces of fabric from my stash for this!

Notions: Interfacing for the collar, cuffs, and back closure, pieced together from the leftover of my tailoring class coat, and souvenir hooks and bars

Hours: A couple hours each for drafting and cutting, another hour of hand-basting lace, maybe five hours for actual sewing, and then another hour of hook and bar sewing, so let's say 11 hours total.

How accurate is it? Like everything else I do, not really: a cotton shirtwaist would need to be in thinner material, and obviously synthetic laces are right out, but I tried to get the overall impression of the look right? I think the thickness of the sheet fabric prevents the gathers from falling as nicely as they should, but my pattern pieces are pretty good I think.

Total cost: It's made from so many little scrappy leftover bits, it's hard to say, but I would say definitely less than $10.

Final thoughts: It's hard not to focus in on the one mistake I know I made: I cut the center front piece wrong, so there's something wonky going on in the middle. Plus, the stiffness of the sheet fabric makes for an awkwardly puffy-looking blouse (as opposed to period-accurate puffiness), so I feel like I should go back and redo it. That would involve A LOT of seam ripping though, so I may wait until the full ensemble is done to see if it still bothers me enough to warrant fixing it. I am hoping that once I finish everything else (skirt, belt, and Eton jacket/bolero-y thing), the overall look will be good enough that I won't feel like I need to.

Fingers crossed!


Tuesday, April 28, 2020

I'm Part of the #ADCapeCult Now!


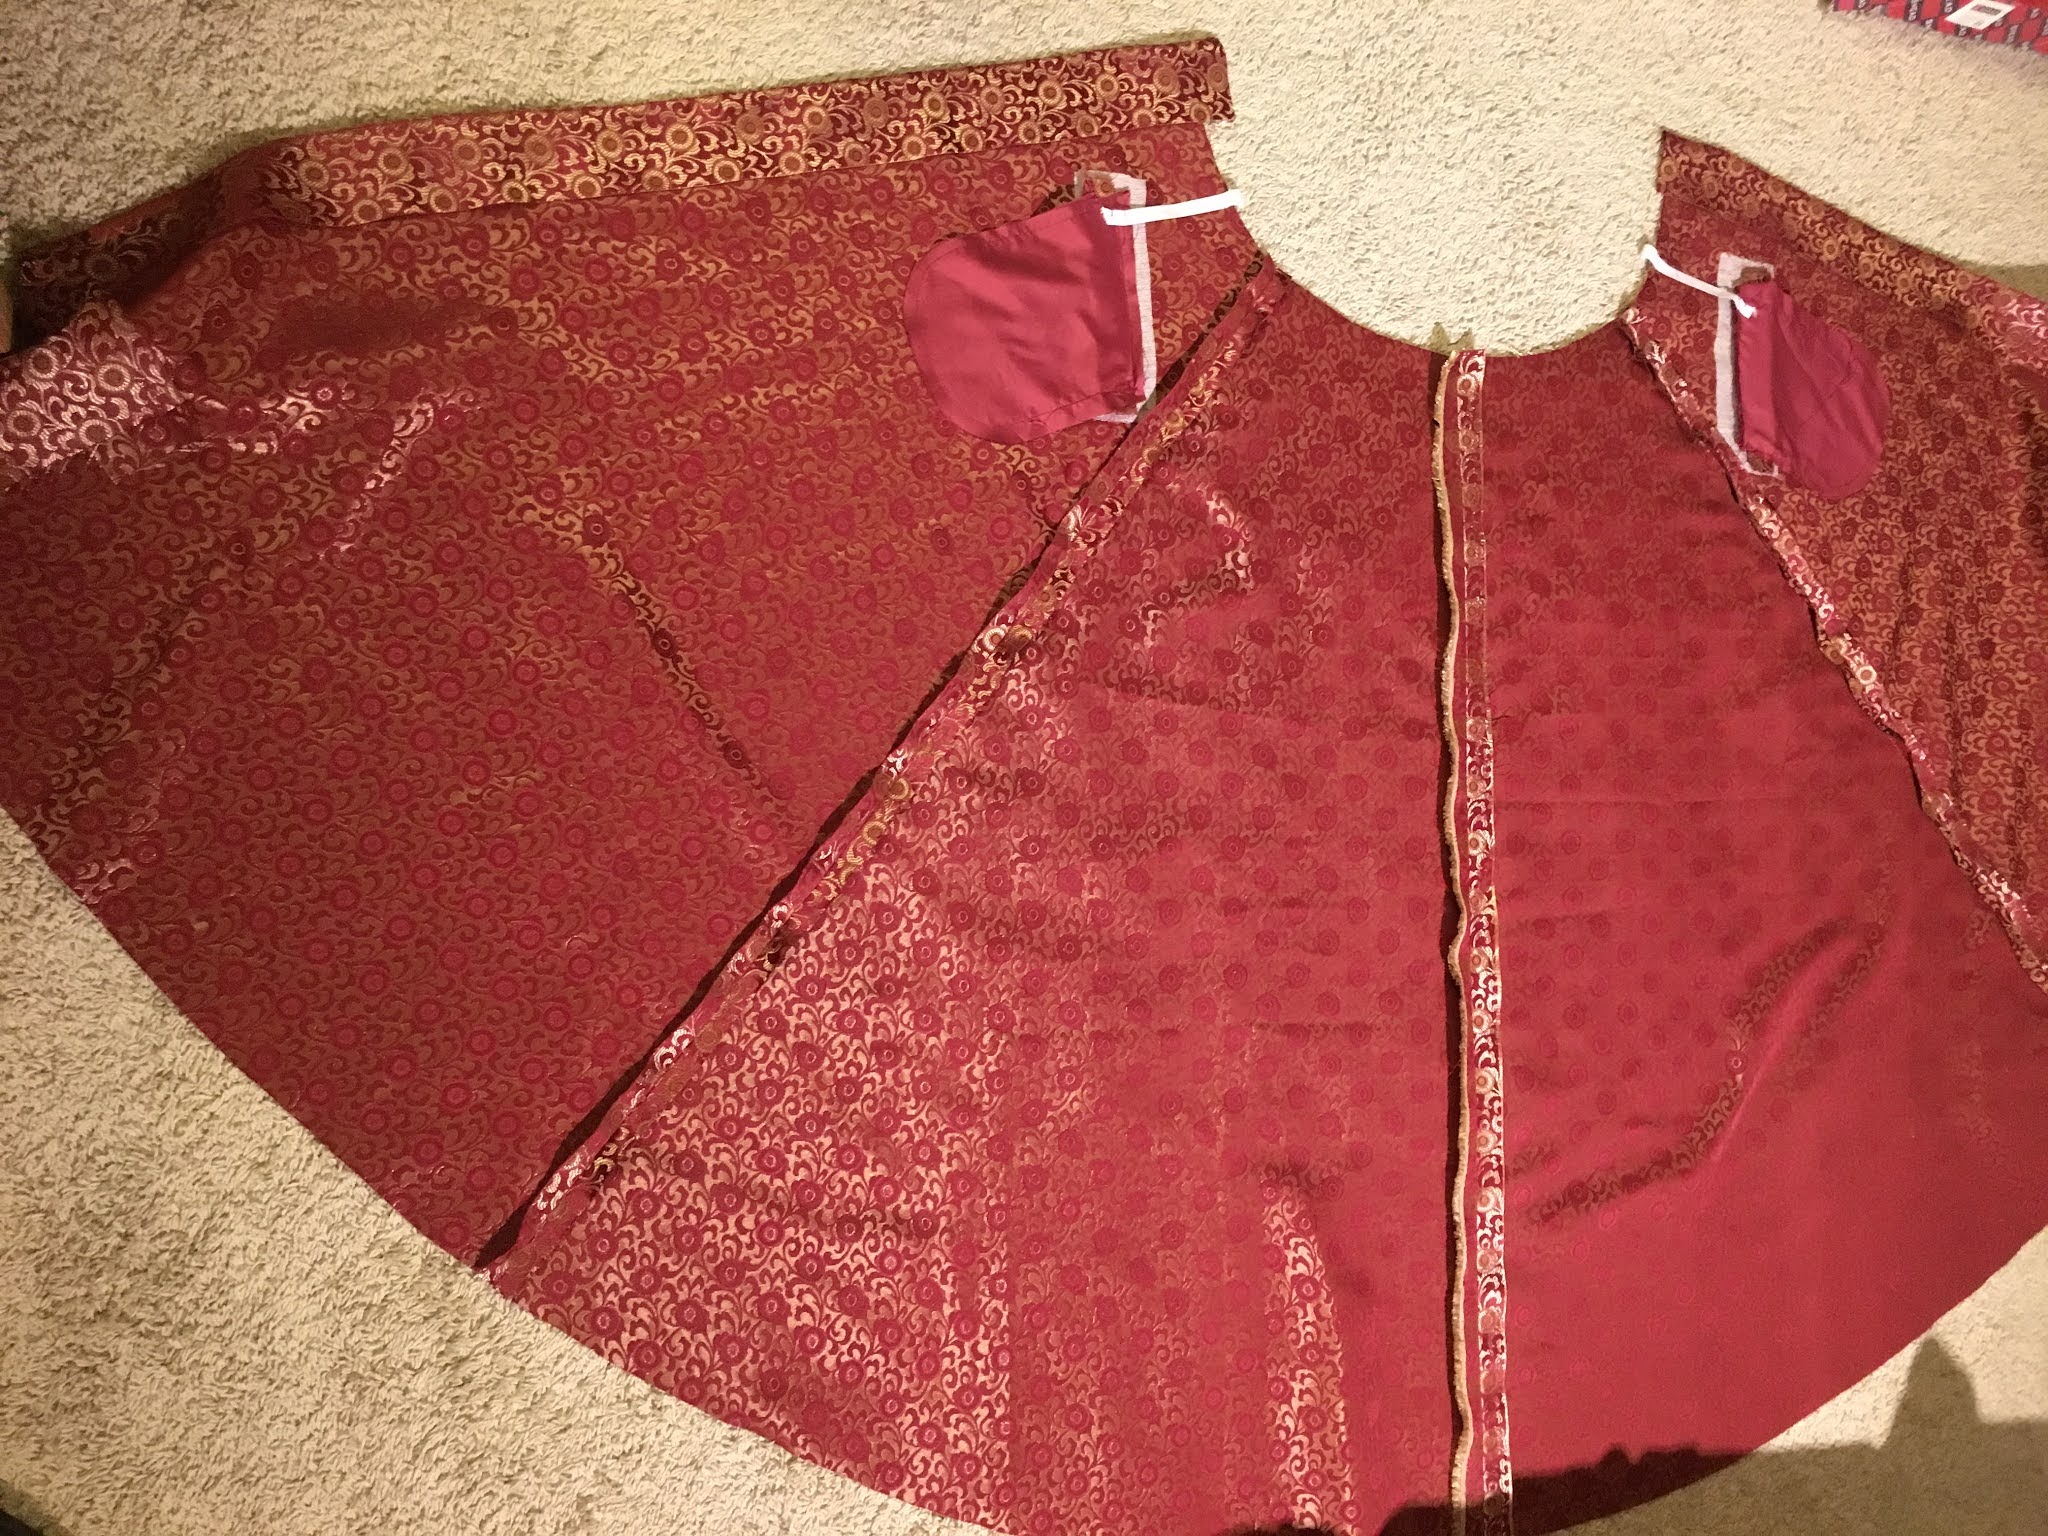
I've loved American Duchess for a long time, from their gorgeous historical shoes to the very helpful blog chronicling the making of various items of historical clothing, the accessibility of their Simplicity patterns and their informative Fashion History podcast. Somehow it escaped my notice that they had a Patreon page, but then all these costumers I admire and follow on IG were posting about making this 1912 wrap cape from a free pattern by AD. So now, a week of naptime/post-bedtime sewing later, I have a cape and am a patron of American Duchess!


I actually had this cape pinned ever since participating in the VPLL 1912 Project years ago, so of course I had to make it. It seemed like most IG-ers were either making neutral gray/black/brown versions, and a few people made capes in their Hogwarts house colors. I knew I wanted to go vivid, and I had a red brocade tablecloth that I got at a thrift store several years ago that I actually meant to make into a cape...but I'm so not a Gryffindor. In fact, when I took a Sorting Hat quiz that tells you what percentage of each house you are, I think I got something along the lines of 67% Slytherin and 33% Ravenclaw, and zero percent Hufflepuff and Gryffindor. In other words, if you want someone to learn a lot of information and then use it for their own ambitious ends, while not caring about other people or the right thing to do, then apparently I'm your person. *insert laugh-crying emoji here* I think I had a genuine existential dilemma for five minutes about making a red cape when I'm so not a Gryff, but in the end I decided I wanted a red cape too much, and  since I was lining it in black satin, I could just call it a Fire Nation cape. Not that entire fictional countries must match up to Hogwarts houses, but I really do think the Fire Nation (as evidenced by its royals) is the most Slytherin nation in ATLA. Nerdy crossover fanning aside, though, I'm so glad I went with the saturated dark red, both because that's one of my favorite colors to wear, and because if you're going to make an impractical historical cape, you might as well go the whole way and make it an impractical color too?


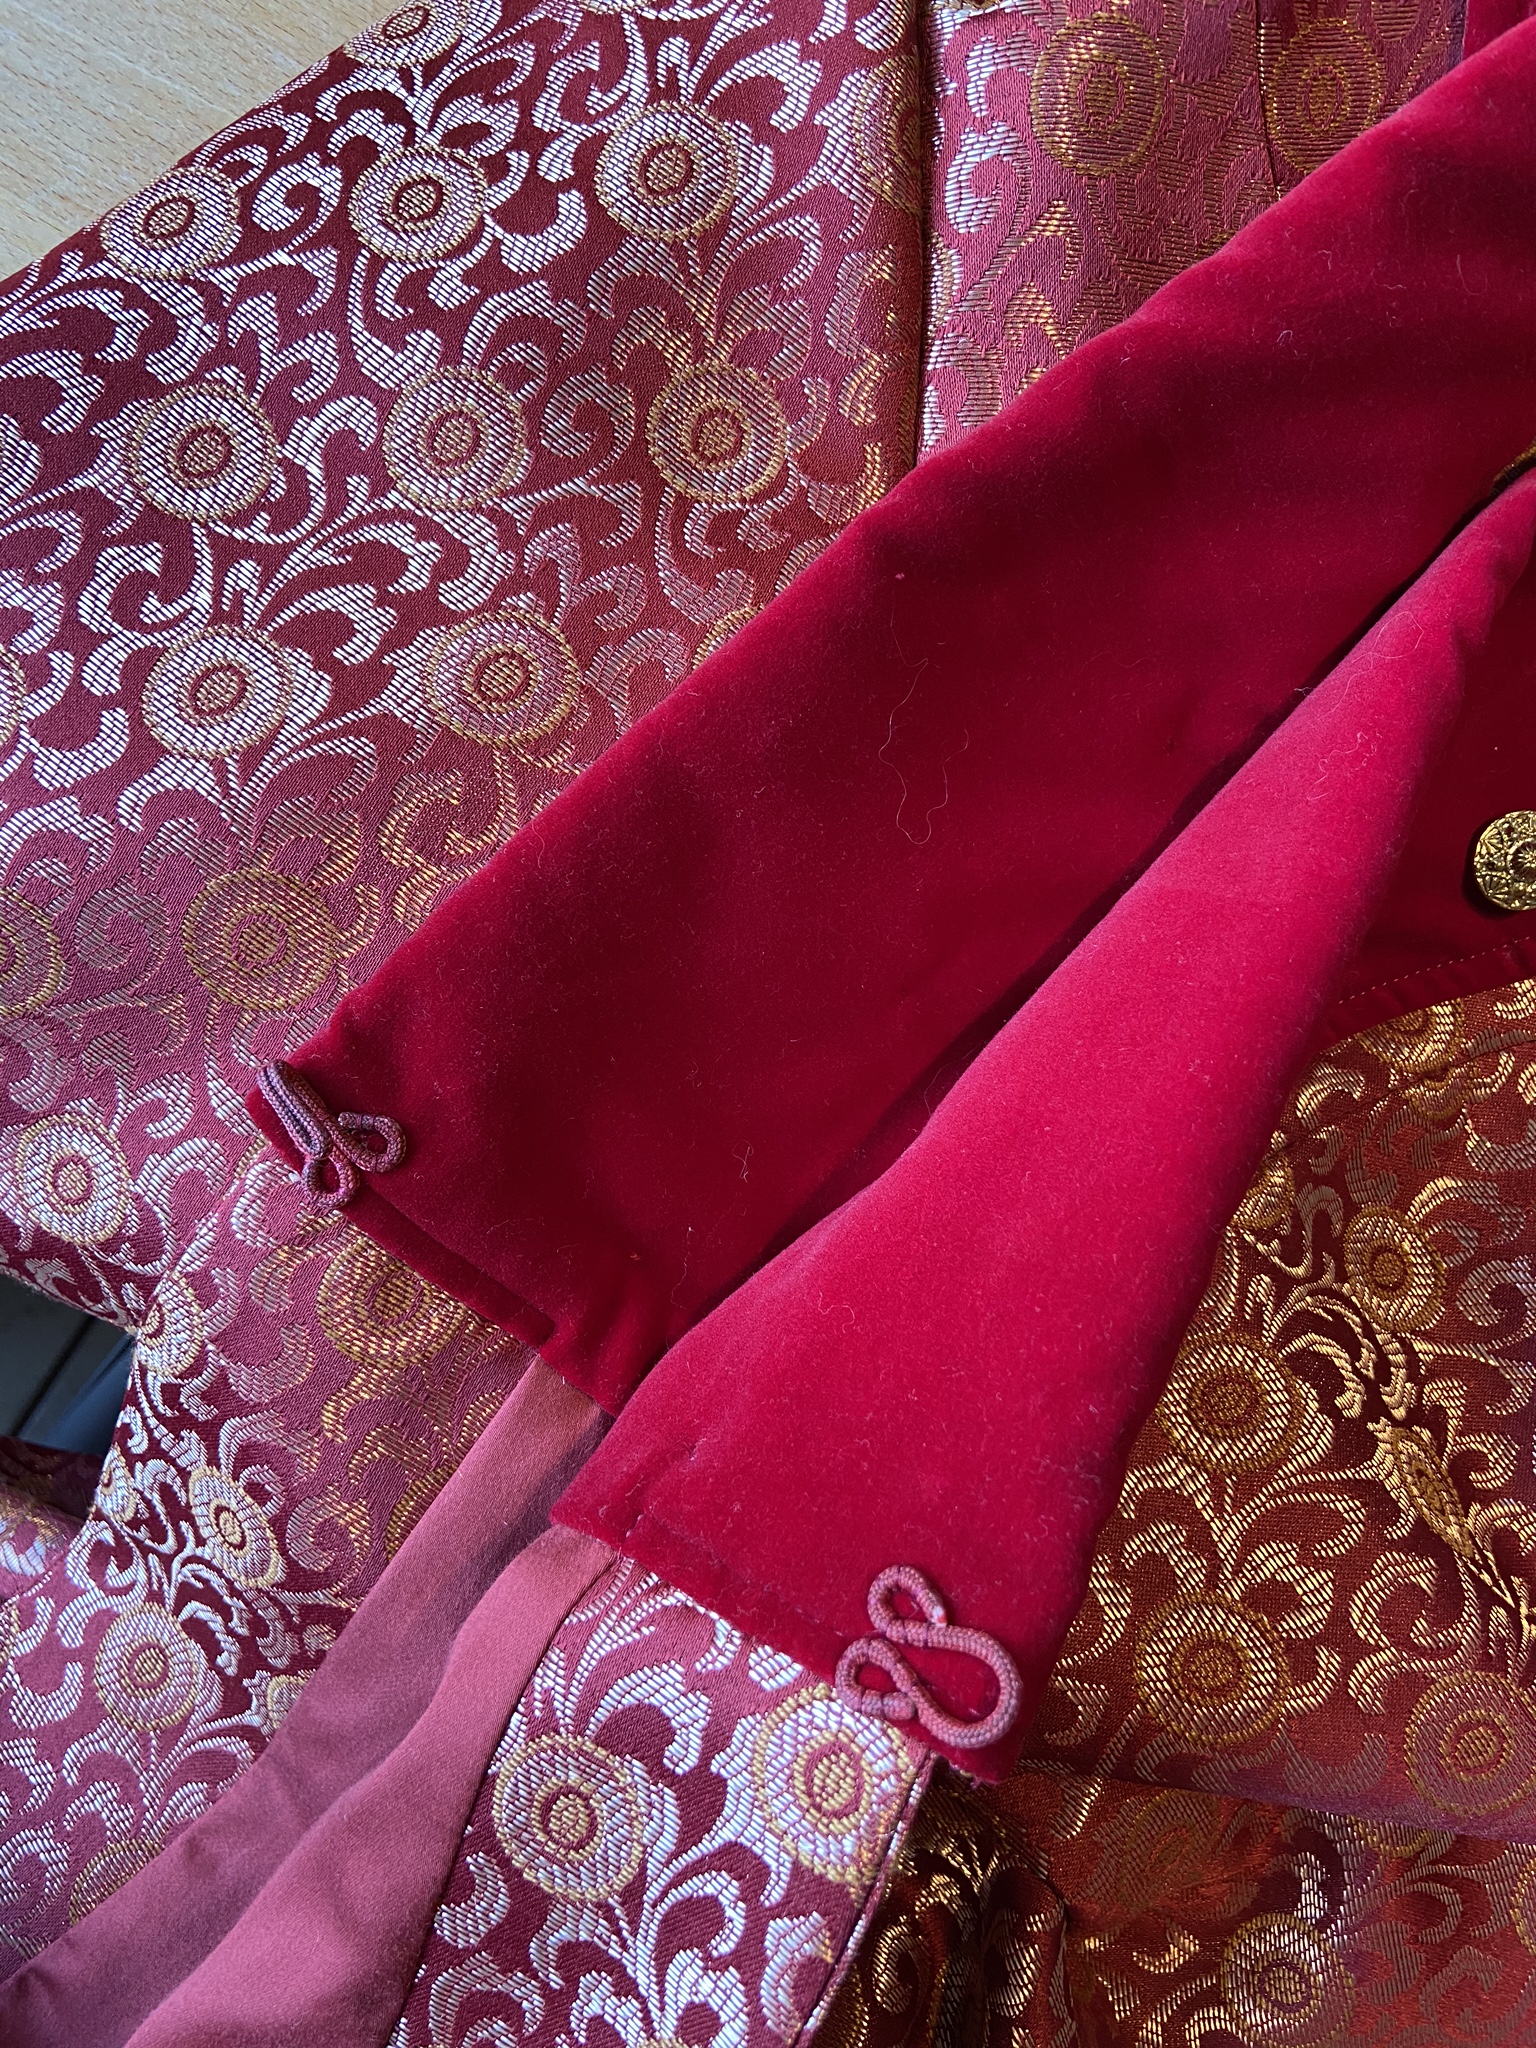
The AD pattern is done on a tiny grid, like Janet Arnold's Patterns of Fashion books. When I was making JA patterns, I enlarged them by drawing on the back of wrapping paper that was printed with a 1-inch grid. I don't have any gridded paper anymore, so I scaled up the pattern by plotting it on medical paper (which is very thin and see-through) laid over my gridded self-healing cutting mat. It took a couple hours (with lots of interruption from kids, so YMMV), then another couple of hours to plan the layout on my tablecloth and cut the pieces. Somebody on IG pointed out that the shoulder seam notch on the cape piece didn't make sense grain-wise, and many people pointed out that the cape was two inches too short on the back piece when you walked the back-cape seam. Putting together these two pieces of information, I decided to rotate the cape piece back two inches: this makes the hem line up and also puts the grainline perpendicular to the floor when worn. Other than that, I didn't have any issues with making up the garment. The darts did take forever to mark and pin, and my polyester fabrics were tricky to press well without getting a weird shine (thank you, silk-organza press cloth and wooden half-dowel), especially on the collar. I also decided to make the cape theoretically reversible, so that meant changing up the collar fabrics and putting the contrast piece on both sides. Hemming the back piece at the end also took a couple of tries before I got the tablecloth and the satin lining to hang right together. To add some additional visual interest to the cape, I decided to add little chain tassels to the collar corners to mimic the buttons at the shoulders on the original cape. The cape is secured at the ends of the wrap pieces with hooks and eyes.

I seriously love this tablecloth. 

Annnnddd...flipped!

And worn flipped. 


The finished cape is just delightfully full and twirly and swooshy and good for dramatically storming about. If I were Snape (because a chemistry teacher is just a step away from potions professor, right?), I could flounce about most pleasingly! My only regret is not checking the shoulder fit before cutting and sewing: with my wide shoulders, the only way to get the shoulder seam to not sit obviously too far in toward my neck (and therefore make the cape hang funny) is to wear the wrap portion too loose. It's not the end of the world (that would be coronavirus), but I just wish I'd thought to check. It's been so long since I've sewn a new pattern that I forgot what issues I usually need to adjust for.


Why is red so hard to photograph in the only somewhat-still-lit corner of our backyard when we sneak out to quickly snap some photos while the kids have their half hour of screen time? Oh wait, I think I just answered my own question...


Summary:

Pattern: the American Duchess 1910s Wrap Cape pattern, free on their Patreon page

Fabric: a thrifted dark red poly-cotton brocade tablecloth, and black polyester satin from a friend's destash for the lining. I'm really pleased that I was able to make this suddenly-jumped-to-the-head-of-the-sewing-queue project entirely from stash materials.

Notions: three sets of hooks and eyes from a charity shop that I got on one of our anniversary trips to the UK, and two chain tassels that used to be earrings that I got at a clothing exchange.

Hours: Five for prepwork (scaling up the pattern, layout planning and cutting, pinning darts), then maybe another three for sewing and an additional hour for evening out the hem, sewing hooks and eyes, and adding tassels, for a total of nine hours.

How accurate is it? My fiber content is obviously anachronistic, but in terms of general look and "passing," I'd say pretty good!

Total cost: A whopping $5 for the tablecloth!

Final thoughts: How can you not love a cape? It's impractical, especially with young kids who see such a giant expanse of fabric as basically a giant napkin, and of course there's the fact that I made outerwear from non-breathable fabrics right as the weather is heating up, but I regret nothing. I'm so thankful that AD put out this pattern at this time, and I'm glad I can support their business even a little bit by being a patron.


Monday, December 30, 2019

A Dangerous Coat

I used to think the 1910s and 1920s had the worst fashions, but the VPLL 1912 Project, Downton Abbey, the new Great Gatsby movie, the Fantastic Beasts movie, and Phryne Fisher have all conspired to totally change my mind about that. I now love love love these eras, so much so that when at a loss for what to do for my CaƱada College fashion department classes, I've just sort of defaulted to the 1920s. I drew drop-waisted dresses for my fashion illustration classes, made a summery cloche for my millinery class, and for this past semester I've worked on making a 1920s-ish coat for my tailoring class.

This tweed+fur coat of Phryne's was my inspiration.

When McCall's started releasing updated vintage patterns as part of their Archive Collection, I immediately snatched up a copy of M7259, a (sadly now out of print) caped coat pattern, and filed it away for "someday when I have a good reason/the time and skills." Since I can only take classes at night, and tailoring was the only class I hadn't taken yet for this past fall's evening classes, that gave me the reason, and presumably I would learn the skills and make the time. Admittedly, it's not a very difficult coat to make (it's even rated as "easy" on the pattern); a shapeless boxy coat doesn't require a lot of fitting, there's no notched collar or vents anywhere, and not even a welt pocket! But I knew I would have a busy semester already, what with parenting in general, Halloween and cons, and costuming. Did I feel a little embarrassed about the simplicity (even though it's a McCall's pattern...haha sorrynotsorry) of my pattern choice when I saw my classmates making five or more muslins, making all sorts of alterations, drafting new collars and sleeves, and putting in eight welt pockets? Maybe a little. Was I grateful I kept it uncomplicated when, after finishing up the drama production I had a little over a week to put together all my coat pieces and do all the fussy hand-stitching? You bet! Besides, I know I would never wear a blazer, and I already have two perfectly serviceable RTW coats that I love, so I might as well get going on my dream of having a Phryne-esque wardrobe.

The pattern: I was definitely swayed by the brilliant red sample. 


My little compilation of scraps to give me
an idea of how things might look together.
First step was selecting fabric: I knew I only had a couple of pieces of yardage with the right length, drape, and fiber content (our professor preferred natural materials, especially wool because of its "pressability"), so it was basically between a dark green wool blend suiting material or a gray wool tweed suiting with little colored specks in it. We decided that the gray tweed would hide more sins, what with this being my first serious coat, and I did have a little more of it so as to allow me to make the cape as well.

Next step was to do a pinned-together paper mock-up, which to me seemed a little pointless, but I can see how it would be a cheaper, faster way to get a sense of major size or fit issues without the effort of making a real muslin. As it was, I only had a very minor swayback adjustment to make, but then I do realize that I am extremely fortunate that I usually fit Big-4 patterns with very few adjustments (usually only swayback, narrow back, and small bust adjustments). Then we made actual fabric mock-ups with cotton muslin, and again, not much to report here, other than that I decided to shorten the cape significantly so as to keep it from being visually overwhelming.

Without and with the cape, with dark threads marking the grainline on the sleeves and the center front line. 

I sewed my mock-up with the side seam pockets that the pattern called for, but decided later that I didn't like them; they made things hang weirdly, I didn't like the bulk of the pocket bag, and they were too far back to feel natural when I put my hands in them. I decided that I needed to make pockets on the front of the coat, but at that point I had a minor crisis about what kind of pockets to make, and proceeded to flood my IG with way too many stories debating various pocket types and placements and their historical accuracy vs. general aesthetic vs. ease of use. Since I was also in the thick of drama costuming, the pocket issue gave me an excuse to not work on my coat for a month. I did assemble the cape (but not hem it), but three weeks before the coat due date, and I had really only a bunch of fashion fabric pieces (that I had at least interfaced with soft fusible knit interfacing; since my fabric was so thin and loosely woven, it really needed some extra support) and lining pieces.

This was what I was primarily deciding between: a shield-shaped patch pocket, or a swoopy-looking patch pocket that would be sewn into the side seam. Although the swoop won by a small margin on IG, I realized that I really preferred the look (and historical accuracy) of the shield and went with that option. If you want to see all my ridiculous wibbling about the pockets (and other construction bits), you can check out my 1920s coat highlights on my IG here.

The antepenultimate week (and also the week leading up to the show, so lots of last minute decisions, fittings, and runs to various stores for accessories and such), I sewed together the facing, lining, and lining patch pockets. The lining patch pockets were hand-stitched so that I wouldn't have topstitching thread showing, per this extant 1920s coat (I did briefly consider smocking the tops of my pockets, but then dismissed that idea as that of a person with more time than I had), which looked lovely but took a long time.

Here's what the facing + lining looked like hanging on Cecily. You can also see the only dart in the entire thing where the shawl collar is. Ignore the stack of toddler clothes storage boxes in the background...


The penultimate week (and also the week after the show, i.e. all the tasks of costume striking to be completed by me, the one-person costume shop), I sewed together the fashion fabric fronts and back, and sewed the sleeves (but didn't set them in) and brought them in to class to have them hung by my professor (I put on the coat and she pinned them in place in the position that caused the least drag lines. Since many of us work on computers, we have forward sloping shoulders and lining up the shoulder seam notch and underarm/side seams may not actually be the best position for a lot of people; my sleeves needed to be rotated forward about 3/8"). I basted the sleeves in by hand in class, then brought them home to set in by machine. I also had decided on shield-shaped patch pockets as being the best compromise between historical accuracy (while there are some examples of welt pockets on coats of the era, the vast majority of them had large patch pockets...or no pockets at all, but that was a non-option for me), general aesthetic (a heckin' large square, while historical accurate, looked a little too boring to me, so I went with a slightly more interesting shield shape), and ease of use (I placed them low enough that it wouldn't be awkward to put my hands in them, even if the perfectly vertical placement is a little less ergonomic than a slanted one). Like the lining, these patch pockets were hand-stitched invisibly, and thanks to the busyness of the fabric, they don't break up the lines of the front as much as I was afraid they might.

That last week, I set the sleeves in, put in all the tailor-y bits (homemade shoulder pads, sleeve heads) attached the outer shell to the facing/lining, and then went about the tedious business of evening out my hems and catch-stitching everything down. For the hem of the cape, I catch-stitched the fashion fabric and the lining separately, then used French tacks to secure the two together at the side seams and center back. I had previously attempted to attach the lining entirely, but couldn't get it to sit right with a jump hem on the bias portions, so I opted to let it hang separately.

You can see the shape of the cape here, as well as the snaps that hold it onto the coat. 

For the coat, it took a couple of tries (and lots of staring at the coat on Cecily as a pinned, glared critically, repinned, glared again, etc.) before I got everything to hang right without pulling, but eventually I got it all sewn down (again, by hand) with a jump hem and everything! Oh, and I also tacked the lining to the coat at the neck seam allowance and the side seams so that the lining wouldn't billow out separately from the outer shell of the coat. I finished all the hemming with two days to spare, but the next day was full of frustration as I attempted to sew in the fabric-covered snaps and large button in exactly the right places and without any weird pulling anywhere. The morning the coat was due, I plopped SHB#2 in front of Sesame Street so that I could sew on all the snaps that attached the cape to the coat, and then I was finally done!

Without the cape, with nicely-blending-in pockets. 

Hello, 1920s-esque ulster coat!


Summary
Pattern: McCall's 7259, part of the archive pattern collection, circa 1927
Fabric: A little over 3.5 yards of a 60" wide, dark gray, tweed wool suiting with little flecks of ivory, burgundy, black, cornflower blue, and mauve; I originally purchased this from an antique furniture store in Berkeley seven years ago when I found a tiny little shelf in the back of the store that had some random yardage. The lady said she had got it for herself to make something fabulous, but had come to realize she likely never would, and she just wanted it to go to a good home. I paid all of $30 for it, which I now realize was an absolute steal for fabric of this quality. The 2ish yards of 55" wide lining fabric was mostly this dark burgundy floral damask polyester satin, which is on the thick side for a lining, but that just makes it feel extra luxurious. This was from my best friend Elaine's partner's stash, that they passed on to me when they moved (out of Arizona, ultimately back to the Bay Area!), so when I look at the lining I'm reminded of their generosity. It wasn't quite large enough for me to be able to cut all the lining pieces, even with the shortened cape, so I supplemented with some black Bemberg rayon for the sleeves since they wouldn't be seen.
Notions: 3 yards of 20" wide fusi-knit interfacing, which I used on every pattern piece except for the lining pieces and the back piece. I didn't have enough to do the large back piece (and actually had to piece together bits for the side edges of the front, and didn't want to wait to order more, so I just used black silk organza to underline the back piece. The organza was a fortuitous find from the free shelf in the back of the sewing classroom, and I still have yards left! I also purchased six 3/8" metal snaps for the cape attachment, a 1.5" covered button kit for the coat closure, and used a set of 1" metal snaps (covered with fashion fabric) from my stash for the inner closure. The facings on both the cape and coat are piped with black silk dupioni left over from my bustier project, and the hem of the cape lining is finished with burgundy-colored lace hem tape from an inherited stash.

I love that the inside is so secretly beautiful, even if nobody will ever see it!

Will you make it again? Unlikely, since I don't really need another coat like this. I do want to make another Phryne-inspired 1920s coat though, maybe a lighter duster in linen?
Total cost: $30 for the wool, lining was free, about $15 for the interfacing, and $5 worth of snaps/buttons = about $50! Of course, throw in the cost of the class tuition + toll + parking...and all the hours spent...
First worn: Just in class to show off and for pictures, but I'd like to wear it to go see the Phryne Fisher movie when it comes out next year!
Final thoughts: I'm really glad that I was able to make this coat almost primarily from stash/secondhand fabric, thereby keeping to my unofficial pledge to not purchase new in order to stay as green as possible in all my sewing endeavors. Things like interfacing or the exact size of snap are hard to come by secondhand, so I'm making an allowance for those things, though. I'm in love with the (detachable!) drama that the cape provides, and the instant Sherlock-y vibes of a caped coat. I have a little bit of wool leftover; maybe I should make another deerstalker? Actually, I would rather try to make it into a 1920s hat to match, so maybe if I find a suitable pattern one day. Without the cape, the coat is a little boring, but that's fine, because I decided to splurge a little and buy myself a fabulously fluffy, white faux-fur collar from Amazon that I can throw over the shawl collar of this coat to up the Phryne-ness of it!

This was taken by the fashion department's blogger. 


I'm really pleased with the whole tailoring class experience: I got a lovely coat out of it (even if I later realized that I had made myself yet another grey wool coat (aforementioned RTW coats in my wardrobe are also grey wool, so I guess I have a definite coat type...), and while mine didn't have more technically challenging bits like bound buttonholes, welt pockets, or a notched collar, at least I got to practice those skills when I made my samples, and best of all, I got a scheduled sewing time every week (and I even got to throw in the bonus of regular conversation with another adult, since my costuming friend @simply_mi was also in the class!). Even though the lead up to class is always stressful (get dinner ready! make sure the house is somewhat in order! spend some time with SHB#1 when he comes home from school! make sure my bags are all packed with all the sewing things I need!), in the end it's really nice to know that I'm guaranteed at least three hours every week to do something just for me.

Sometimes I feel guilty for taking so much time for myself every week -- it's not just the sewing class itself, but the commute there and back, the time it takes me to do my assignments for the class, and the time it takes to go out and acquire the materials I need to do my assignments -- but just recently I fell down the rabbit hole of Bernadette Banner's historical sewing videos, and she mentioned Cathy Hay's Worth peacock gown reconstruction project, which then led me to this very helpful video where she talks about how not to feel guilty about sewing when you have a family. She quotes Iyanla Vanzant: "My cup runneth over: what runneth over is for you, but what's in the cup is for me." At first, it seemed like just another variant of the "put on your own oxygen mask first" mantra that I blogged about before, but upon further rumination I realized the problem with that: oxygen masks are vital to life, so it makes sense to take care of your own basic needs first. But sewing costumes, or just giving in to my drive to make things: that's not *really* a basic need, is it?

I don't know if it's the child-of-immigrants, sacrifice-everything-for-your-family, just-work-harder rhetoric that was drummed into my head growing up, or leftovers of my childhood church's very conservative, Puritan-esque suspicion of anything that seems like too much fun, but it's very, very difficult to let go of the feeling of guilt that I should be spending all my free time doing something less frivolous. Like I said, I already have two fine coats, and there's always something more productive I could be doing with my time: research on developing children's emotional intelligence, integrating NGSS into my science teaching, or figuring out how to reduce waste in our family. I go ahead and pursue my hobbies anyway, because I'm a selfish Slytherin like that, it's just that I carry along a lot of guilt with it that prevents me from fully enjoying it. I'm not sure where to draw the line, since I know it's obviously not an either/or issue. Taking time for myself is healthy, but parenthood does inherently involve some sacrifice, and there must be a balance somewhere...and what if I just have a really, really big cup and "need" lots of replenishing time before I give the runoff to anyone else? See how I'm hesitant to even call time to create a need, I mean it's not one of those things that form the foundation of Maslow's bogus hierarchy of needs now, is it? If any other sewing moms out there have any brilliant insights, I would appreciate them!

Anyway, all this to say, it's so hard to know how to break out of societal constraints and expectations for women and undo the years of programming. A man cave is, if not expected, definitely not frowned upon for a stereotypically male breadwinner to be able to relax, get away from responsibilities, and putter around. How that translates in my mind for a non-breadwinner is trickier until I remember that I'm trying not to devalue traditional "women's work" like childcare and sewing, and I want to set an example for my kids of self-care and not self-martyrdom. So I suppose it's kind of perfect that my coat has four nice large pockets, perfect for carrying leaflets to spread sedition? Or, you know, fairness, kindness, and equality. Ladies, I guess I did take the advice of Irish poet Sharon Owens, and sewed myself a dangerous coat made of pockets and sedition (go read her fabulous poem if you aren't already familiar with it).

Pockets! (Photo courtesy of my professor, Ronda Chaney.)

[Apologies for the mostly terrible photos in this post. Most of the construction photos were taken at night, since that's when I sew, and I kept thinking I would take better finished garment photos in an atmospheric location, but let's be honest, that's probably not happening anytime soon and I'd rather get this blogged before I forget all about how I made it! Also, more about my lab garment, a 1920s-ish evening gown, in the next blog post!]