Wednesday, August 17, 2011

Pretending to Be a Florist

Hi, my name is Cindy, and I'm a pretender. [Chorus: Hiiiii Cindyyyy.]
I like to masquerade as a real occupation to satisfy my own creative urges, frequently subjecting my friends to my amateur efforts, at least until I'm found out.

For example, as I mentioned before, I like playing graphic designer. I am not actually a graphic designer. I don't own a legit copy of Photoshop. Shoot, I don't even own a non-legit copy of Photoshop. I've never used Illustrator or CorelDRAW and frankly, I'm not even sure what exactly they do. But when a friend asked me to help her make wedding stationary, I happily jumped in to make programs and menus and all without know what I was doing. Thankfully, this friend was very gracious and patient with my earnest, if slightly subpar, efforts. I didn't learn and went on to do my own invitations, somehow making do with only a five-minute lesson from my sister on using GIMP.

Then, a month or so out from the wedding last weekend, I blithely volunteered to do the florals when the bride told our women's prayer group about how much a real florist wanted to charge. I was pretty sure I could do it for less, and how hard could it be to tie some ribbons around some flowers? I'd already done flowers for my own wedding (but that was just baby's breath bouquets bought from Albertson's the day before), after all. Well, thankfully, right after I committed, I thought better of it and asked my sister, who is an amazing artist, to fly down and help me out. I promised that we would go to Jimmy Eat World together if she would assist with the flowers.

Friday morning before the wedding we went to the wholesale flower market to get roses, filler, floral tape, pins and ribbon. We cleared off the kitchen table, filled the sink with water, and started unwrapping the flowers; it looked like a rose bush (and a fern plant and a baby's breath bush) had exploded in our kitchen.
Walnut was shocked by the explosion of flowers.
Sitting in my crisper drawer.
We decided to start with making the corsages and bouts, naively thinking that working with one rose at a time would be easier than several, right? Wrong! We quickly realized that we had no idea how to secure the ferny bits to the leafy bits (which we had to tear off of the roses themselves, not having thought to buy actual leaves) without them flopping everywhere...so we resorted to tape on their backs, hoping that no one from the wedding party would turn them over to see the ghetto-rrificness. Also, we didn't have a real corsage box so we delivered them in a Marie Callender's pie box taped with a sign reading "FLOWERS. DO NOT EAT."

Trashcan full of floral debris.

After a Chicken McNugget break (we are nothing if not uniformly non-high-class), we turned to the bouquets, which actually turned out to be much easier. Of course, that's because we are from the "let's just keep adding flowers until it looks better" school of thought. I'm sure real florists would've been appalled at our methods; we ended up using masking tape instead of floral tape because it worked better. At the end of the day, we concluded that should we ever start a business, it would be named the oh-so-promising "Oh Well, It's Good Enough," or possibly "Dangit, That Wasn't Supposed to Happen."

This actually pretty well encapsulates what most of our projects are like. I love working with my sister because we always have so much fun, simply because of how much we don't know about what we're doing. Every time we do something, whether it's experimenting with baking (brown butter bacon cookies, anyone?), sewing plushies, or painting a mural for our room, I am guaranteed to have a ridiculous time. I feel so lucky to have a sister with whom I can collaborate and produce great good enough art. Anyway, enough wibbling, here's what the final flowers looked like!
The bride's bouquet. Photography by Orange Turtle Photography.
Emily and I didn't know what the long stringy green things were, so we called them chives throughout the bouquet-assembly process. Photography by Orange Turtle Photography.

We made it up to Walnut later by letting him have a rose to play with.

Monday, August 15, 2011

The Eric Chan Ice Cream Sandwich Relay Car Rally Improv Extravaganza Birthday Farewell

What a crazy weekend! I feel weird for not having sewn for a week...haha is that bad? That is probably some kind of indication of an addiction of sorts. But I've been having so much fun with my sister visiting, the wedding of two friends from our church, and running my husband's birthday party. Even though there was no sewing, it's still been craft-mania around here. I got recruited into helping out with flowers for the wedding, and my sister kindly agreed to come down to San Diego to help out, since I have no idea what I'm doing.
That took up a good amount of Friday, with a break to go to the Jimmy Eat World concert at the Del Mar racetrack! It was my first time seeing a real concert (the King's Singers at Davies Symphony Hall probably doesn't really count as a "real" concert), complete with crazy jumping up and down, people smoking and drinking all around us (yuck...someone spilled beer on us accidentally), and my ears ringing afterward. But I love JEW, so it was worth it. The wedding took up all of Saturday, what with delivering flowers in the morning, the ceremony, reception, and hanging out afterward. I'll wait to talk about the flowers until I have the official photographer pictures.

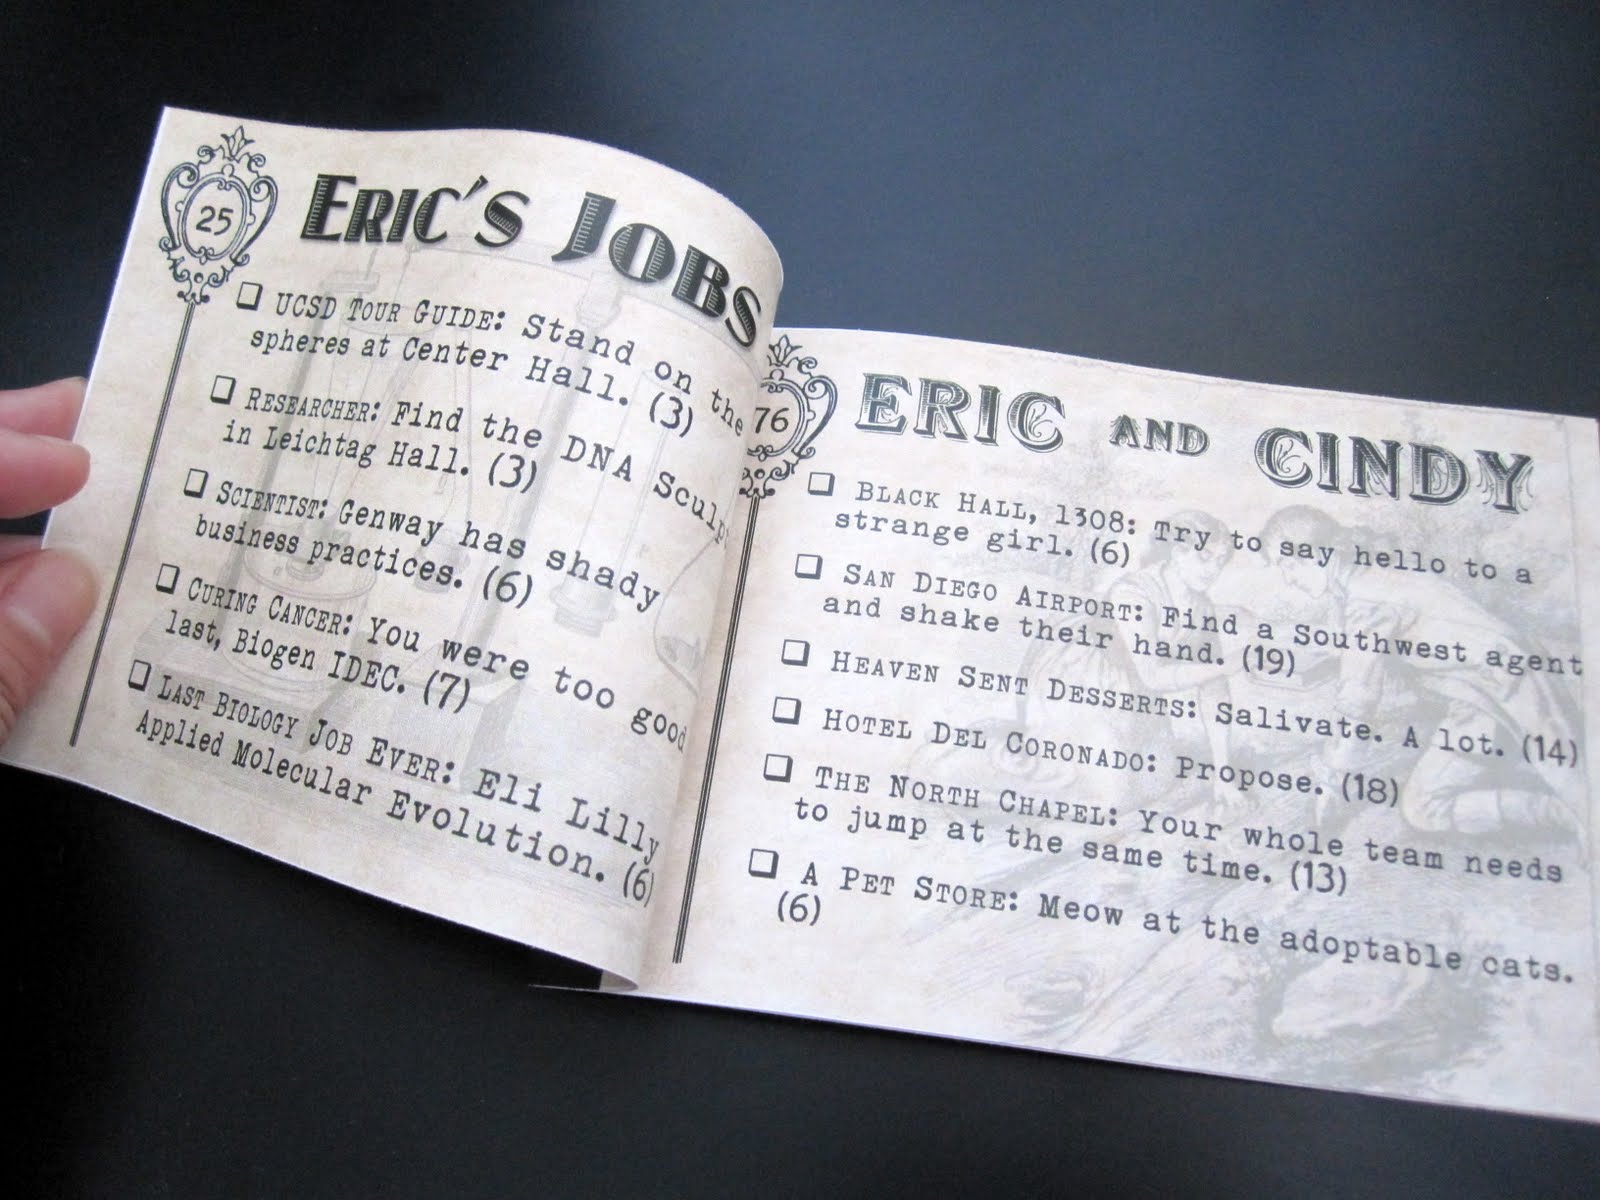
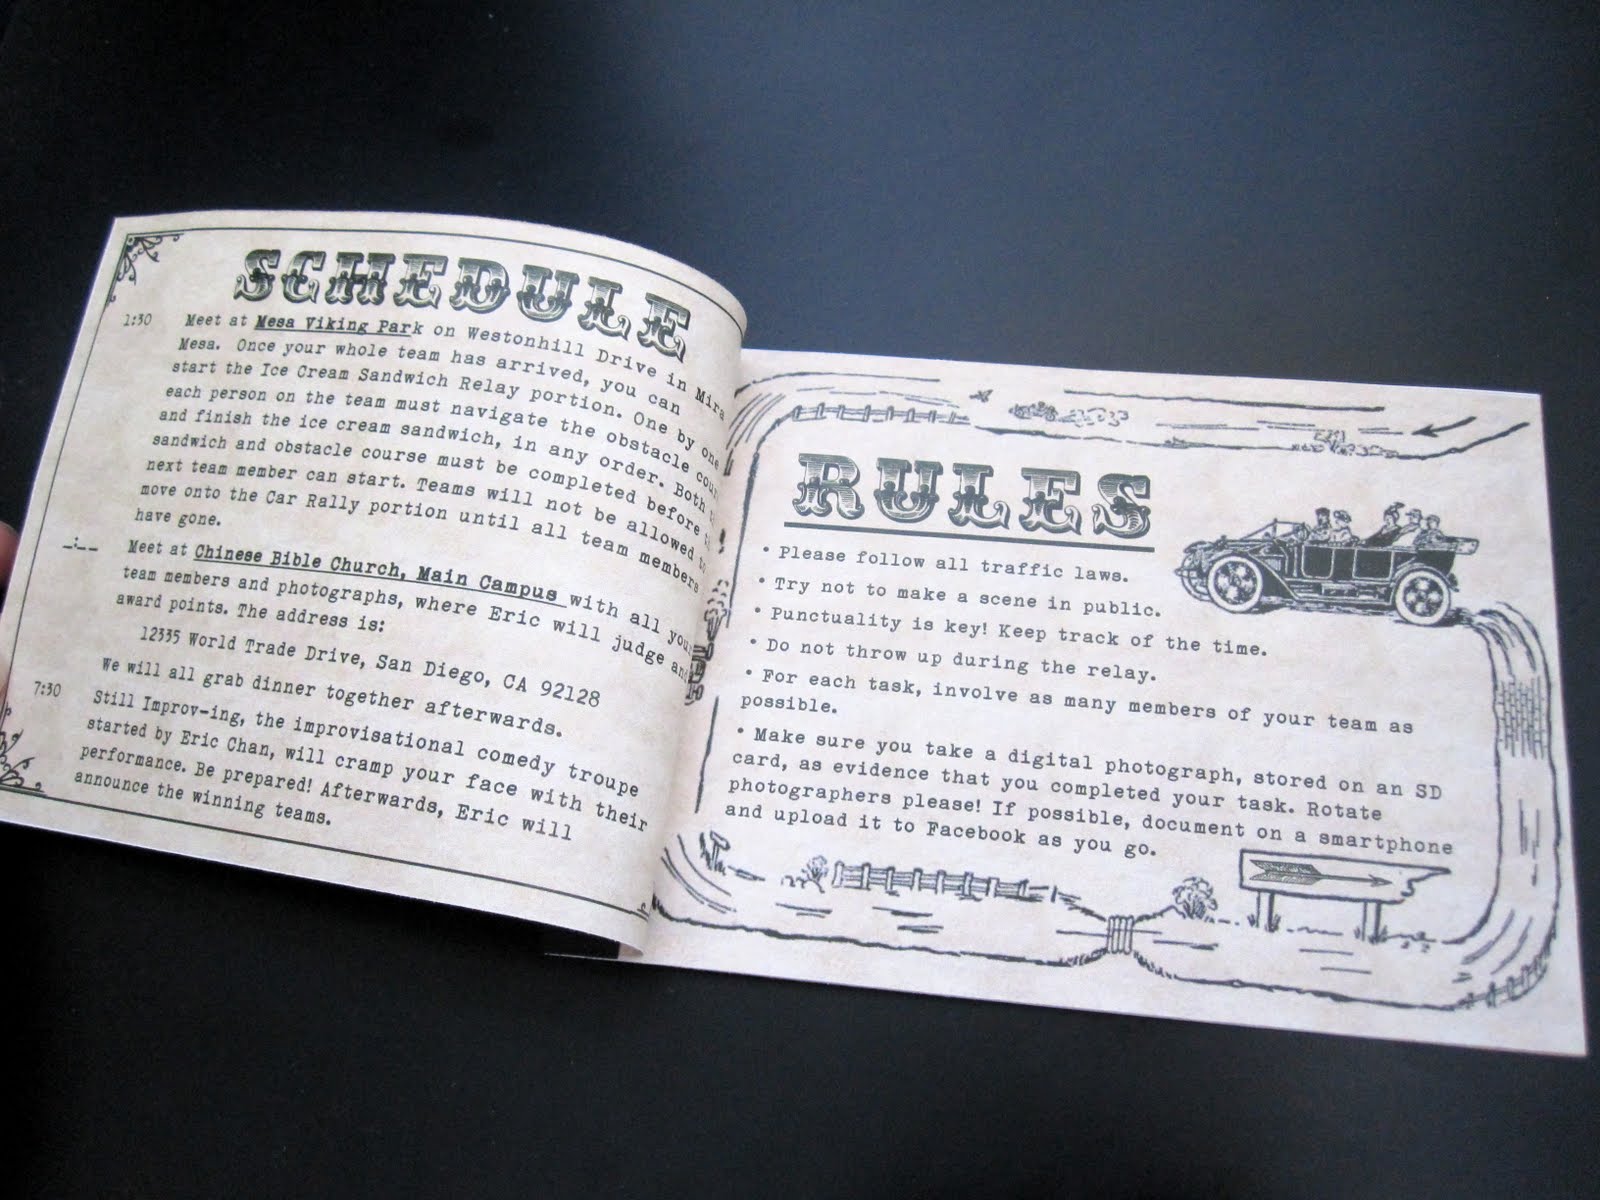
On Sunday, my husband and I threw his belated birthday party -- a combo of an obstacle course relay and car rally/scavenger hunt, ending with an improv show -- which involved my big project of the week, a Ticket to Ride-themed program. By my husband's request, I was going for a loosely vintage, generally old-timey, slightly steampunk look. I had so much fun finding appropriate fonts and graphics and putting it all together.


We started out at a local park after lunch, where the teams met for the ice cream eating and obstacle course relay portion. Since we were awarding bonus points for coordinated outfits, some teams went all out.
This team was hardcore.

For the car rally portion, teams were given the booklets I put together, which listed several locations in San Diego that were important to my husband. At each location, teams had to perform a task and take a picture to document it.


Just like in Ticket to Ride, teams could choose whether they wanted to go for the "big ticket" items, which were all pretty far away, or easier tasks that had smaller point values. They got bonuses for completed tickets, and if they located us during the afternoon they got wild cards that were good for one task. The whole thing was dreamed up and put together by my brilliant husband, who, as one friend put it, definitely has the non-Biblical, but still important, gift of making things fun. I loved seeing all our friends enjoy themselves (and get ultra-competitive) trekking around San Diego. We ended the night with an improv show put on by another of his brainchilds (brainchildren?), the improv comedy troupe Still Improv-ing.

This was the perfect way to send ourselves off to LA as well, since now we have pictures of all our friends at our favorite San Diego memories!

Thursday, August 11, 2011

Playing at Being a Graphic Designer

Going off of yesterday's post, I often wonder what my life would be like if, instead of choosing the approved-by-Chinese-parents path of being a science major, I opted instead for something like, say, graphic design. Or costume design. Not that I knew, ten years ago, that I loved these things. Actually, I still don't know if I love these things. After all, I have no idea what a real designer's life is like. I just pretend to be one when the opportunity arises, like last year, when I made my own wedding invitations.


Making maps was so easy with this strategy.
I found this graphic of a couple doing chemistry, which I changed to look like us, in our colors, for our thank you cards.
I really enjoy coming up with a theme and then designing paper goods to match. Even when I was teaching at my first school, some of the projects I was most proud of were the AP Chem, Chemistry, and Biology lab manuals that I wrote. There's a weird pleasure that comes from compiling the best labs for student learning, designing the appropriate diagrams, and putting in thorough appendices.

Anyway, for the last couple of days I've been prepping like mad for my husband's combination birthday and farewell to San Diego party. If you've ever played the Days of Wonder's amazing board game, Ticket to Ride, you know that it is a fantastically fun game -- accessible to all ages, different every time, educational -- that has beautiful graphics. Set at the turn of the 20th century, with a theme of railway travel, it definitely has some steampunk elements. The characters all have an old-timey look, and the borders actually have little gears! This board game is definitely a staple in our marriage (enough so that we named a table at our reception after it); we've had nights where we play five games in a row (it's only about 20 minutes a game with only two players)! So when my husband announced that he wanted a Ticket to Ride-themed event, with a car rally/scavenger hunt to mimic building trains to connect locations, I got super excited about designing the program/booklet that gives people their tasks.  I've been working on it for the last couple of days, and it's coming along swimmingly. It's not quite period-accurate, but it all has that historical feel. I can't wait to have these printed up and handed out to everyone on Sunday! I'm pretty sure most people won't be as excited about or even notice the details that I put in, or how everything coordinates, but it makes me happy inside to know they're there.

Wednesday, August 10, 2011

In a Sewing Rut

After finishing my Precocious Kid's Art Project Dress, I felt a brief moment of elation that I had 1) sewn my first vintage pattern, and 2) there were no exposed fabric edges in it. That moment quickly left, however, and I tried to figure out why. I'm beginning to think it's because I didn't attempt anything difficult with this dress. For my Ondine's Curse Dress, I had to draft a collar. For my Blackcurrant Pastille Dress, I had to do a yoke in the top. For the Nothing But Blue Skies Dress, I did a weirdo back design and gathered pockets. For my Bellatrix costume, I sewed with leather and put in grommets. For the Betsey Johnson Floral Explosion Dress, I did a hand-picked zipper. So the fact that there were no new techniques, however easy, on this last dress made me feel stale and uninspired as a seamstress.

I realized, in a conversation with a good friend about Strengths Finder, that it's because I'm not learning and being stimulated by new things. Strengths Finder is this quiz that you take to, well, find your strengths. My husband and I originally took it as part of our premarital counseling. Produced by Gallup, it presumably tells you what you do best, what skills come most naturally to you, what makes up the core of who you are. I was skeptical at first, and admittedly I am still a little ticked off that 4 out of 5 of my top strengths seem to be the same thing, but it does more or less fit who I think I am. According to the printout that they spit at you after a hundreds-of-questions-long online quiz, my top five strengths are Input, Learner, Intellection, Individualization, and Deliberative. So, the summary is, I really like collecting knowledge and then thinking about it. Oh, and I see everyone as an individual. But the main thing is that if I'm not learning and assimilating new skills or knowledge, I feel stale. This is why I've dabbled in so many art forms, including, but not limited to, sewing, letterpress, graphic design, upholstery, glass fusing, lampworking, weaving, crocheting, jewelry-making, wood-burning, painting, and drawing. I really want to learn how to do everything in the world. So when I'm not doing new things in sewing, I get bored.

This is why I was so excited when the talented Reana Louise of Curves, Patterns, and Pins announced a new sewing challenge:

Basically, one makes a list of all the techniques that have eluded one in sewing and make a pointed effort to try them. Or something. So here's my list of things to learn/techniques to try:
  1. Putting piping into seams
  2. Lapped zippers done! 9/21/11
  3. Boning done! 10/13/11
  4. Strapless bodice done! 10/13/11
  5. Peter Pan collar
  6. Scalloped edges (whether on the neckline or the hem of a dress)
  7. Horsehair braid in a circle skirt
  8. Shirring done! 10/17/11
  9. Grosgrain waist stay done! 9/21/11
  10. Insetting lace
  11. Fish-eye darts
  12. Pleats
  13. Pintucks done! 12/22/11
  14. Draping
  15. Working with sheers, like chiffon
  16. Welt pockets
  17. Making a crinoline
  18. Bias-cutting to make chevrons
  19. Making my own bias tape
  20. Quilting
I think I'll end it at an even twenty. There are still so many other things that I want to do that aren't sewing-related, like build furniture and do brass-etching, but having a concrete list helps focus my brain. Most of the time I already feel like jack of all trades, master of none, but this will hopefully help me be slightly more a master (mistress?) of sewing, given that this is the longest I've ever been interested in an art form. Too bad there isn't a job that involves learning just a little bit of everything, but not necessarily becoming an expert in it. Sometimes (like when I'm trying to decide what to do with my life), it seems there's no room in today's society anymore for Renaissance souls. Being a science teacher lets you cover some of it, but not entirely enough for my liking. I can't wait to homeschool my imaginary kids so that I can teach them everything and anything, whenever.
Modified caption for Hyperbole and a Half's brilliant drawing.

Monday, August 8, 2011

The Precocious Kid's Art Project Dress

Husband and I got married last summer, a little before the school year began. As soon as they found out I was a newlywed, all my freshmen girls wanted to know if I was going to have kids right way. Apparently they love babies, and were super eager for me to have one for them to ooh and aah over. I, on the other hand, was like "Oh, no, we're not planning on having any babies. We'll just have five cats." They thought I was serious, gullible things that they are; there was a great outcry, and they immediately began trying to convince me why babies are awesome. You know, they make these adorable wailing noises, create beautiful brown poop, have crusty bits coming out of their noses when they're sick, and need help to do everything. Ummm, no thanks. As I said to my AP Biology kids, they're just like little parasites feeding off of the poor host, i.e. mom.

Don't I look thrilled about the idea of a baby?
No, but really, all joking aside, we're just not ready for babies yet. Financially or emotionally. I've never been one of those girls who gushes over babies and their cuteness (usually, the best I can come up with is that they have incredibly large cheeks), and currently Walnut is the only baby we need. So the closest I'm getting to those tiniest humans, at least for now, is this dress. The fabric is, for once, not a thrifted bedsheet OR a remnant; I bought it new and had it cut at IKEA because I loved how cheerful it is. It looks like a kid took a bunch of crayons and started drawing all sorts of flowers, albeit a really artistically-advanced kid because everything looks really pretty and perfect, and I'm pretty sure most of the kids I know couldn't have produced it. Anyway, the fabric is 100% cotton, so it was pleasant to sew with and easy to press. Unfortunately, I only bought 2 yards of it a year ago, and it appears to be sold out, so things got a little tricky during the dress-making.

I decided to finally break into one of the vintage patterns that I picked up at the thrift store a month ago, a size 10 Vogue Patterns Misses' "fitted and flared, wrap sleeveless dress." It's marked as 9458, but I can't find any references on the pattern or online to the date of the pattern. Given that it's only one size, and patterns began to be dated in the 1980s, I'm guessing it's from somewhere in the 1970s? I was super excited to be sewing my first vintage pattern, especially when I opened up the envelope and saw how different patterns looked back then! I'm sure this is no surprise to seamstresses who are used to such things, but I was floored by the fact that the pattern ONLY COMES IN ONE SIZE.
Click to see larger pic of the measurements.
For someone who's only ever seen 4-12 or 6-10 or 14-20, it's just weird to think that I had better choose the right size right away, because there's no other option in the envelope! I was hesitant when I bought it, since I wasn't sure about being a size 10 -- the body measurements given on the back of the envelope are definitely smaller than mine -- but I figured I usually cut patterns meant for those measurements and they turn out fine because of the ease that pattern-makers think I want, but I don't actually.

The pattern envelope is pretty beat up, but the pieces inside are all intact and already cut out. There was one missing piece, the front bodice, but based on the layout drawings it looks pretty similar to the back piece, so I was able to recreate it fairly well. The pattern pieces all have these cute machine foot icons indicating where to stitch, as well as lines marked for topstitching. The instruction sheets were pretty clear, and I actually followed them this time since I've never made a dress like this before! I was also pleasantly surprised to find an insert that you can use to subscribe to Vogue Patterns Magazine! I love seeing these snippets of vintage life (and pricing!).
Click to read 1970s ad copy.
Amazing! This form itself is worth FOUR Jack in the Box tacos!

Cutting out the pattern pieces was a little tricky, since, as I said, I only had 2 yards of fabric and the pattern calls for 2.5 yards. I ended up cutting the lining from a white sheet instead of the fashion fabric, as well as making the back skirt piece about four inches narrower and cutting the super long front waistband in some navy leftover from the Ondine's Curse Dress. I think the darker fabric ends up working really well, actually. The dress went together really easily and quickly, and I was the most careful I've ever been while topstitching. I must say, I really love how simple and yet ingenuous this dress is! Also, I'm enamored with the idea of a well-fitting dress with no zipper. Even though I think I'm pretty decent with zippers now (a far cry from a year ago, when putting in an actually invisible invisible zipper was number one on my list of things to master), I still don't like them.
A look at how this dress works. I love how the snaps look!
Giant Carrot Guy models the dress to show how the back piece wraps around.

Putting on the dress is a little weird, since there are no zippers. The whole thing looks like two aprons attached at the neck-ties. The back "apron" buttons in the front (I used metallic snaps, because I've been dying to use some since finding Make It-Love It's tutorial), then the front "apron" comes down over it and ties at the back. The side pieces are low, so I can't wear a normal bra with this dress, unfortunately -- sticky chicken breasts it is! The tie is oddly short, not nearly long enough for a bow, which I guess is okay.
This is how it looks with the front piece down and wrapped and tied.

This is the kind of dress where I am definitely wearing a slip, just in case the wrap decides to unwrap.

All in all, this dress was a fascinating piece of history to construct, and definitely the most unique dress I've made so far! I love the shape of the skirt and the cheeriness of the fabric. At about $12 for the fabric, it's a little more expensive than my usual me-made dresses, but still better than buying ready-made.
Here I am, copying the poses from the envelope. Walnut is significantly heavier and squirmier than a basket of flowers, so I had to use my other arm. Also, that scarf really does not match.

Friday, August 5, 2011

Last Plushie Post, Promise (at least for a while)

Just saw this image from the latest IKEA catalog:


I just wanted to say that before IKEA's TORVA came along, I already had the idea of making a giant carrot friend. For some reason, the last summer before college was designated as the summer of carrot obsession. Friends gave me carrot pens and scissors; while in China with my mom I got a bunch of carrot magnets...all of it culminating in my making a giant stuffed carrot.
With Walnut, for an idea of the scale.
I didn't really know what I was doing at the time, so I cut a rough carrot shape out of cheap orange acrylic felt and sewed it together. After stuffing it, I had no idea how to attach the greens. I ran to my mom, who very patiently hand-sewed the top on invisibly. I'm ever so grateful to her, because I'm sure that as a very busy mom with three kids and full-time job, she had better things to do than attach a carrot top for her don't-you-have-better-things-to-do-considering-you're-going-to-college-in-a-few-weeks daughter. Anyway, Giant Carrot Guy was my body pillow all throughout college, and now he's relegated to modeling my failed Sorbetto in the corner of the sewing room.

I really do love IKEA's designs (I actually have quite a few things from them, and an inordinate amount from the kid's section, considering my age), and they can't be blamed for copying my idea of a large carrot friend, considering that this is his premiere online! I have a soft spot for their fabrics (even if my main fabric source of choice is thrifted bedsheets), and my current dressmaking project is actually using the GRONSKA BLOM from a couple years ago.
One more plushie picture, just because Walnut is adorable:
Fortunately, he won't fit into the whale shark's mouth pouch.

Thursday, August 4, 2011

It's the Most Wonderful Time of the Year

The Boston Phoenix says it best:
It's finally here. People count down to this for months. As soon as the weather starts to change, it's fresh in everyone's minds -- the ritual, the camaraderie, the friends and families gathering together, all to celebrate overlarge cartilaginous fish with rows and rows of flesh-ripping teeth. Yes, ladies and gentlemen: it's Shark Week. It's one of those television events that can immobilize the entire country slack-jawed in front of the television set -- sorta like the Super Bowl, but it lasts for six whole days and is somewhat educational.
As a biology major and teacher, I have always loved sharks...their awesome immune systems, their sweet hydrodynamic bodies, notorious inability to breathe if they stop swimming, ridiculous amount of teeth, and sandpaper skin...beautiful. I would never, of course, want to actually encounter one, but they're fun to admire from afar! Very very far.

Anyway, we don't have cable in our apartment, so instead of watching sharks on TV, I opted to celebrate this geekiest of weeks by making a shark plushie. After making a measly black sausage plushie, I felt the itch to make something larger. Grander. More awe-inspiring. At first, I was going to make the ever-popular great white. After all, I do have plenty of gray fleece in my fabric stash. As I was looking through my bags and bins, though, I came across the perfect fabric for making everyone's favorite lovable giant: the largest fish in the world, the whale shark.

[NOTE: Did you notice the high percentage of sentences starting with "A" in that paragraph above? I didn't even do it on purpose, it just happened!]

I feel like whale sharks get the short end of the stick. Everyone gushes about great whites (how could you not? they're great!), tiger sharks are the most dangerous, thresher sharks have that ridiculously amazing tail, even the innocuous-sounding nurse shark is actually able to breathe while staying stationary by using buccal pumps. But whale sharks? They're just large. And they don't even hunt down their fishy prey; they eat plankton. That makes them kind of cute in my mind, just swimming along, minding their own business, nomming through life. Perfect for making into a plushie!

Now, if I'd been a proper scientist, instead of way too excited about this project, I would have done some research and realized that 1) the dorsal fin is much too tall, and 2) it should be set further back on the head. And if I'd been less lazy, I would have put in gills and pelvic and anal fins. Ehh...I'll just use it as a teachable object when I have kids one day, a sort of How Many Things Can You Spot That Are Wrong With This Shark toy. In the meantime, I am enjoying his large, silly face.
He has the same expression as his real-life counterpart!
Look! He's smiling at you! I made it so that I could hide things inside his mouth.
I can also pull out his mouth so that it looks like he's sticking his tongue out.

When I was little, I came up with all sorts of extra-creative names for stuffed animals, like (are you ready for this?) Bunbuns for a bunny, Turtie for a turtle, Cowkie for a cow, and the real winner, Snowie for a snow-white horse. So, going by those standards, would this whale shark be Whale-y? Sharkie? Whale-Sharkie? Or...how about...Spottie? Yikes. Sounds like he has a bad case of acne.
Un-scientifically eating toast. Sorry, I don't have a plankton plushie for you dude.

I ended up having to take all his pictures on our bed because it's the only well-lit place big enough for him. At least our sheets are kind of ocean-colored. It reminds me of how my brother and I would always sail our Lego ships on his bed because he had blue sheets because he was a boy.

Anyway, now that I've gotten the plushie bug out of my system, it's back to dressmaking! Out of curiosity, though, would anyone actually be interested in a pattern/fake-torial for making this guy?

Somewhat Simple