

I do go on kicks, don't I? Every time I discover a new technique or hobby, I go crazy with it. Whether it's using knits or princess seams or making zippered pouches or snowflakes, I am all about overdoing it. So I present to you yet another embroidery piece, and that's not even counting the one I did in between Simon's Cat and this one. But that one is for my sister's Christmas present, so I won't show it here yet.
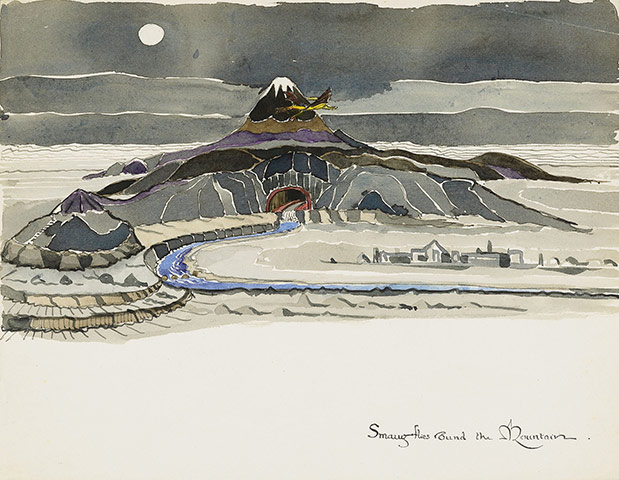
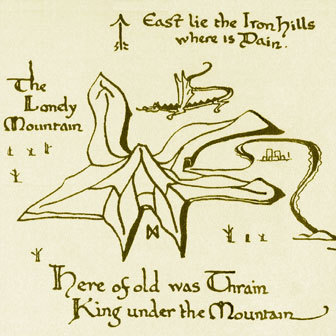
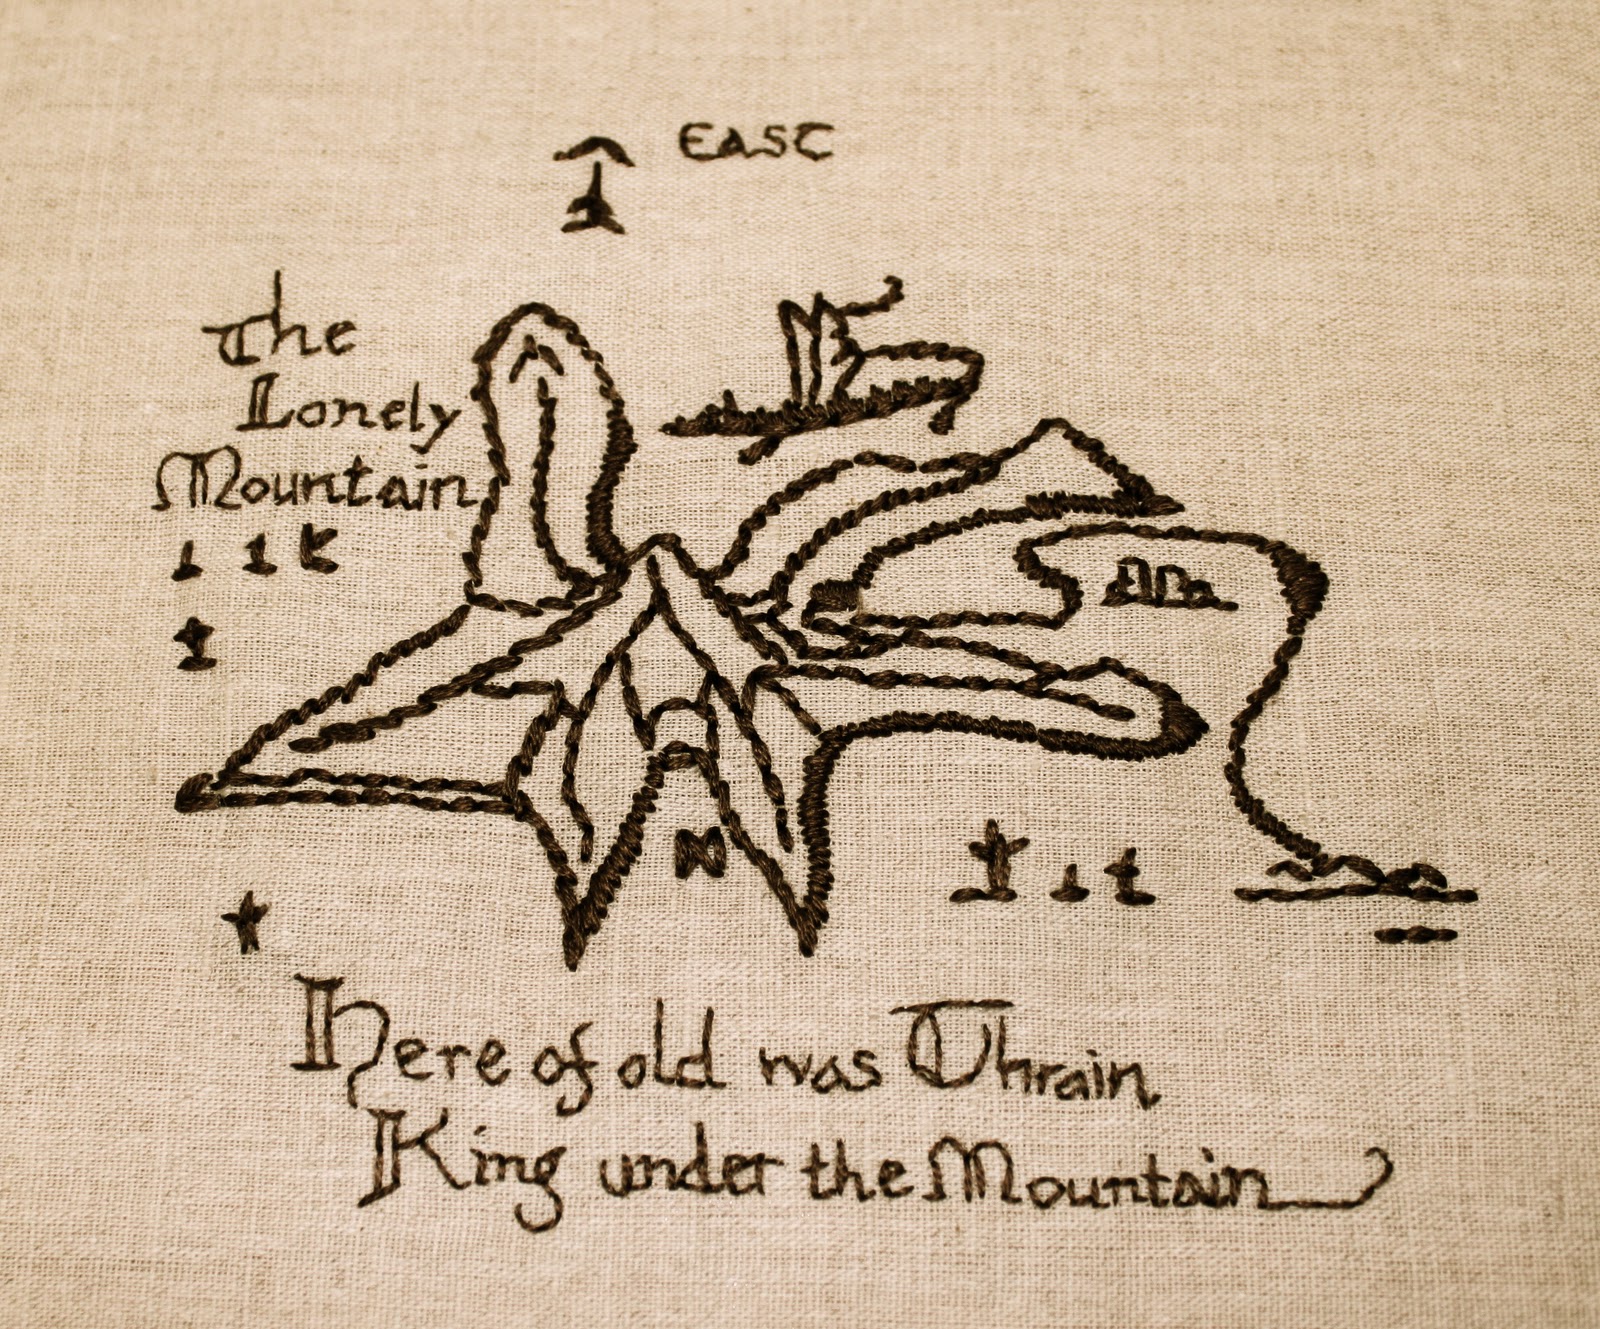
Since Peter Jackson's movie version of The Hobbit is coming out in a year, I have grand plans for a spectacular Hobbit-themed embroidery piece (because once I get into something new, it's always go big or go home, regardless of my actual skill level) based on this original painting by Tolkien, so this was my practice piece.
 |
| Carbon paper sandwich. |
 |
| The faint carbon lines leftover after tracing. |
After that, it was just a matter of slowly stitching in the lines. I used a full six strands for the mountain and dragon and trees, but switched to two strands for the lettering. In hindsight, I should've done fewer stitches for the dragon and trees too, as they look pretty blobby. That's why this is a practice piece, I guess. I mostly used stem stitches and back stitches for the lines of the mountain, and filled in the shaded portions with satin stitches. The letters are all back stitched.

 |
| The mess on the back. I have no idea what actual real embroidery pieces are supposed to look like, since no one ever shows the backs of them. |
Things I've learned:
- Don't be afraid to use different numbers of strands
- Inserting your needle even one thread over can make a difference (and the corollary, when in doubt about placement, don't just shove it in anyway and assume it'll be okay)
- Make sure to have perfectly smooth nails and fingers or else any rough patches can catch on the floss and pull it out of the needle
- Tiny details need to be exaggerated a little to make them show up clearly in the final piece
- It's a lot easier to hang out with people while embroidering, rather than sewing!
- Don't watch documentaries about architecture while embroidering, since both require visual attention; podcasts are a lot better.
- I really, really, really like how methodical and meditative this art is!
- Old maps are the best candidates for embroidery, since they're supposed to be all wiggly and weird. That's my justification for the imperfections in this. Still, I'm pretty chuffed with the final piece!
 |
| Next to a Macbook Air for an idea of scale. |
 |
| Close-up! |
I'm going to take a break from embroidery for a little bit so that I can make my Sew Weekly "Anything Goes" dress, but this will be a good craft to take home to San Francisco where I won't have access to my sewing machine.
Linked to Skip to My Lou, The Girl Creative, and Sew Can Do link parties.
So cool and so nerdy! I might just steal this idea for a present for my dad (a major Tolkien fan). I also loved your Simon's Cat embroidery!!!
ReplyDeleteI LOVE it.. I should take up embroidery just to make an embroidered map for my mom. Except, y'know, the whole time thing.
ReplyDeleteI feel like a horrible parent that I haven't read my kids The Hobbit yet. Although it scared the pants of me when my mom first read it to me, to the point where I made her stop halfway through, and I didn't come back to it until I was eleven or twelve. So excited for the movie, though.
Very cool! Thanks for linking up to Craftastic Monday:)
ReplyDeleteThis is very nerdy...and brilliant. LOVE it!
ReplyDeleteOh, I do love this so very very much!
ReplyDelete