Thursday, June 27, 2013

Historical Sew Fortnightly: Pretty Pretty Princesses

Some costumers may be all about historical accuracy and representing the garments of the common folk, but I am not those costumers. I would probably fall into the theatrical costuming category at best, merely giving the impression of a historical garment, and only from twenty feet away. This justaucorps, or 17th century frock coat (most people are probably familiar with the look from the Pirates of the Caribbean franchise), doesn't even make it that far -- it's all about the froth and fancy, but that's fine with me. It's made to fulfill a specific fantasy, which is to have a fantastic coat with a full skirt to flounce about in. And I think that marks the most words that begin with "F" in two sentences ever to appear on this blog.

Since this challenge was about making something fit for royalty, I went with these two paintings for inspiration:

This portrait of Elisabeth Christine of Brunswick-Wolfenbuettel, wife of the Holy Roman Emperor Charles the VI, dates to the early 1700s. She ruled as General Governor of Catalonia in her husband's absence, and was later politically influential when she formed a party against the Spanish Council in Vienna. 

Antoine Pesne's portrait of the Crown Prince Frederick II of Prussia, later Frederick the Great, also from the early 1700s.  Frederick was known for religious tolerance and was a patron of the arts (and even wrote flute music). 

My takeaways were: collarless, black outer fabric, brass buttons, gold trim, red lining, flaring skirts below the waist, and a vaguely military look. Even though both my paintings were from the early 1700s, I wanted to go with an earlier version of the justaucorps. I knew I could start with Simplicity 4923, an appallingly costume-y looking pattern released after PotC first came out, for a base pattern, but I wanted to at least attempt to bring some historical accuracy to my garment. I found the following paintings and etchings/engravings of justaucorps from around the turn of the century to be particularly helpful:

Unlike the later versions in the 1700s, these justaucorps were relatively bulky and unfitted. They have low pockets, and the dude on the right has two lines of decoration on the large cuffs.
Beauvilliers' 1690s justaucorps had low pockets and a rounded edge at the neck. 

Charles Vane, an actual pirate from around the turn of the century, wearing a coat with scalloped, low pockets.

An extant coat from the Met, circa 1735 and more contemporary with the paintings, also showing the side pleats, and low, scalloped pocket. 
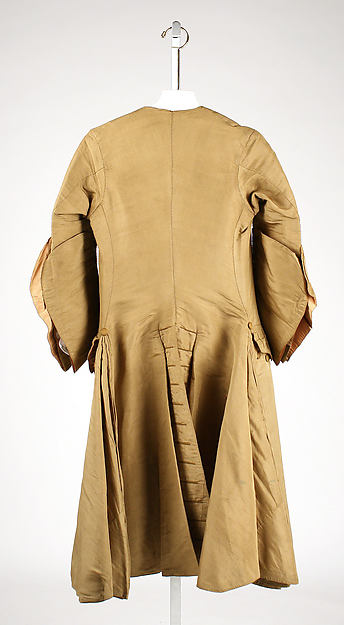
A coat from the 1720s, showing some interesting piecing on those voluminous side pleats, and how the grain affected the way the center back pleat hung. This also gives a pretty good idea of how the back pieces were cut slightly on the bias. 
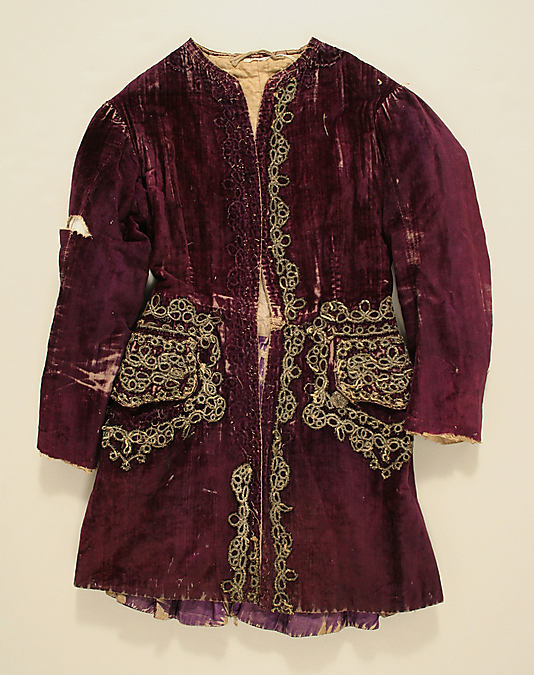
This coat from the early 1700s hasn't aged well, but I love the elaborate metallic trim on velvet.  
This painting of Louis XIV and his heirs shows that velvet was definitely an option when it came to royal justaucorps material. 
This engraving of Louis XIV from 1699 shows a coat with a swirly, vaguely floral pattern (as well as obnoxiously large cuffs and buttons bigger than his eyeballs). 
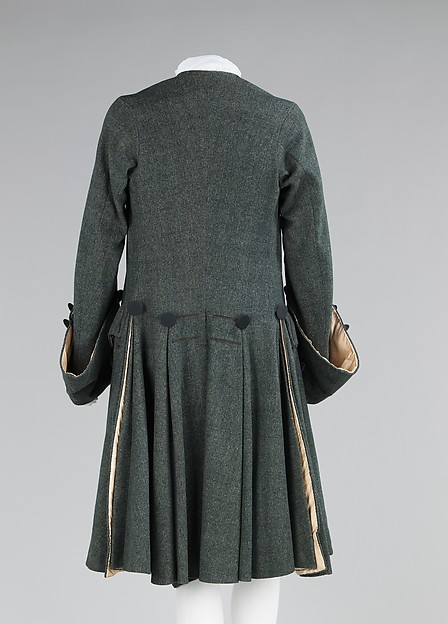
This coat, while dating much later, shows clear side slits and the lining inside of the cuff. 

This diagram was extremely helpful in figuring out where to alter Simplicity 4923 for greater historical accuracy. Namely, make back narrower and the side pleats HUGE. Elaine very kindly helped me translate the French. 
This German pattern shop also had lots of helpful diagrams for overall shapes of things. I had to laugh, though, at the possibility of purchasing a pattern for a "frack," because it just made me think of BSG.  

(more research/pinspiration here and here)

So after all that research, what did I come up with?

Ta da! I present to you the coat of a pirate queen. 
Side and back views. I don't know if you can really tell here, but the shoulder seams angle to the back, like in this coat. 
Close-up of the gold lace trim that I used in lieu of hand-embroidery, plus my eagle buttons. 

Absolutely enormous cuff and decorative pocket flap (no functional pockets on this coat!).

The lace trim continues down the back slit. You can also see the huge amount of fabric pleated into the sides. 
Fuschia lining, because I'm fabulous like that. The dimples are from the buttons; I would've liked to have sewn them on before doing the lining, but I didn't decide until the very end what kind of button placement to use. 

Extant coats also show raw edges and lots of messy tacking stitches on the pleats, so I feel okay about mine. 


My apologies that I don't have pictures of the coat on me, but I'm holding off on a "real" photoshoot until I put together the rest of the outfit. I've got the tricorne (although I may replace the feathers with ones that match the lining better), but I still need to make a pirate shirt for the next HSF challenge. I don't know that I'll ever make the waistcoat and breeches, though. 

Cecily models both the tricorne and the justaucorps. The feathers on the tricorne are very red, while the lining of the coat is very fuschia. Are they far enough away from each other to be worth changing the feathers?


Summary: (very long, because I have A LOT of things to say about the making of this coat!)

Pattern: Simplicity 4923, with modifications based on historical justaucorps patterns. I made the skirts much fuller, narrowed the back significantly, and lowered the pockets. 

Year: Although the Golden Age of Piracy was from the 1650s to 1730s, most of the extant garments I was able to find for reference date to the early/mid 1700s. So I'm going to say mine is approximately early 1700s, based on both the fullness of the skirts and the slight cutaway look of the front opening. The look of the cuff is pretty 1740s, and the lace trim is meant to mimic the look of the elaborate embroidery of the time. 

Fabric: Total fail here on historical accuracy, but it was pretty epic upcycling/stashbusting -- the velvet is half of an absolutely enormous circular polyester tablecloth that I picked up at the East Bay Depot for Creative Reuse last summer. I would never have thought to purchase new velvet yardage, especially not the six yards that the pattern calls for, but that's the beauty of reusing old textiles! The velvet is very heavy and has a swirly floral pattern in it, similar to the engraving of Louis XIV. The lining, unfortunately, I had to purchase new...4 yards of absolutely gorgeous fuschia cotton sateen (with a slight stretch) from Michael Levine Loft, in two cuts, so it was a challenge getting all my pattern pieces on it! I considered using it to make a cocktail dress instead, it was that beautiful, but decided that 1) head-to-knee fuschia is not a look I'm comfortable with, and 2) if I used a sheet for the lining it would be much more difficult to slip my arms into the sleeves. This sateen is so slippery, it's perfect for sliding around in.

Notions: 5 yards of gold lace trim from Fabric Outlet (originally purchased for Elaine's wedding dress, then rejected for being the wrong shade of gold), silk thread and beeswax for hand-sewing, and 42 brass buttons from Fabrix. The serendipitous thing about the buttons was that I hadn't counted how many I would need when I started the project, I just chose my favorite buttons from my stash and started sewing them on. I had and needed exactly 42 buttons. None left over. No places on the coat that I wish had more buttons. Is 42 not the answer to life, the universe, and everything?!

Techniques: Sewing on the bias, working with velvet (except that this was actually a fail: I cut one half of the coat back with the nap going the wrong way! I wanted to smack myself but decided I didn't care enough to recut it. Honestly, there's so much going on with this coat, it's not too obvious...right? Please tell me I'm right!), and learning the historic stitch le point a rabbatre sous la main. Even though it's not normally used for hemming, I decided it was the best way to secure the lining to the velvet at the hem the very full skirts. 

I love how the stitches on the outside just disappear into the pile of the velvet. 


Hours: I've been working on this since before our Italy trip, so I'd say a good sixty hours. Yikes! Cutting (and modifying my pattern pieces) was a challenge. The fitting was actually pretty easy, hand-sewing was time consuming (ZOMG those buttons! hand sewing all the points on the lace trim!), but the main source of frustration and reason for loving/hating my seam ripper was getting the velvet and sateen to cooperate. Between the pile of the velvet and the extreme slipperiness of the sateen, I could not for the life of me get the edges to stay lined up, even with numerous pins and a walking foot. I know, I probably could've saved myself so much time and mental cursing if I'd just taken the time to hand baste all the pieces together...but you know how you think you'll save yourself time by not doing something, and then your time-saving laziness ends up costing you more time? Yeah. That. I kept myself sane through all of this by listening to Klaus Badelt's epic PotC soundtrack. Nothing like swashbuckling music to make you feel like the forty-second button is a triumph!

Will you make it again? My first reaction is a resounding NO, but a tiny part of my brain says I want to make another one from a more utilitarian fabric so that I can be more like Captain Jack Sparrow. Shut up, brain. You don't know what's good for you.

How historically accurate is it? According to Leimomi, the ultimate question here is, would someone from the time period be confused if they saw you walking down the street in it? And unfortunately, the answer here is yes, very. While I may have the general silhouette right, my materials have transformed it into something beyond recognition. As ever, I do my research so that I know exactly what I'm ignoring ;)

Total cost: $10 for the velvet, $5 for the lining, $20 for the lace, and $5 for the buttons, which brings the total cost to $40 for a fancy pirate coat. Not bad at all!

Final thoughts: So far, I've been in love with all my HSF pieces, and this is no exception. It makes me feel like a pretty pretty pirate princess. Mr. Cation was pretty impressed with all the detail, but was also concerned about my threatening to wear this out as a regular coat (it's incredibly warm and heavy). Even if a coat like this isn't exactly practical, I feel like it epitomizes the kind of garment that I wanted to make when I signed up for the HSF challenge: fantastic (in the sense of awesome and fantasy-based), with history as a starting point but not as a constraint, and just generally happifying. It's definitely the most involved project I've done besides Elaine's wedding dress, and maybe starting another 50+ hour project on the tails of another one wasn't the smartest thing I've ever done, but I really learned and loved it so much!

While I was taking pictures of the coat, this was going on on the floor:

Walnut twists around and exposes his belly when he wants attention (and scritching).
Nyerhe! How cute does a guy have to look around here to get some pats?
Okay, you're just taking pictures of me, not actually petting my belly. 
Noooo, stoppit Mom! Don't take anymore pictures of me, okay?
This guy. 


Tuesday, June 25, 2013

Fashion A-Z, An Illustrated Dictionary

My very talented sister is in the middle of doing an illustrated alphabet of microbes, but was having trouble coming up with species for J, Q, and X, understandably. When I was doing an A-Z series on famous chemists/scientists for my AP class, I thankfully had Joule, but faltered after van der Waals. So I'm always impressed when alphabets related to a certain topic actually have representatives for the less common letters. The Fashion A-Z: An Illustrated Dictionary, is only missing entries for X, but frankly, I can't think of anything to go in that section, so they get a gold star from me.

Even wondered what a jemmy, qiviut, or zori are? Now you can look it up even when the system is down!


I received this book to review from Laurence King Publishing; it's a mini version of the (presumably) more extensive full-size dictionary. For someone like me, who's a voracious reader and trivia collector, this dictionary is a delight -- it's everything I didn't realize I wanted to know about not just fashion, but also fabric types and sewing terms. Even better, it's helpful for reading historical fiction! When Ida Brown gives Laura Ingalls a triangular fichu as a wedding gift, elementary school me always imagined a tissue. What can I say -- the words rhyme, and that logic made sense at the time! Now, though, I know that a fichu is "...worn by women during the 18th and 19th c.'s as a neckerchief or shawl...made of fine lightweight fabrics such as lace or linen." When Scarlett O'Hara contemplates and then dismisses the idea of the black bombazine dress for the barbecue at Twelve Oaks, I no longer have to try to imagine a combination-bomb-and-magazine in dress form; instead, I know bombazine is "a twill or plain weave fabric...originated in ancient China and is one of the oldest known fabrics...it began, almost exclusively, to be dyed black due to its popularity as mourningwear." And when Meg March laments her dowdy tarlatan at Annie Moffat's party, I can correct my mental picture of her in a tartan dress (because I totally didn't realize I was confusing the two words!) and put her in a dress of "coarse, sheer, gauze-like cotton fabric woven in an open plain weave and typically stiffened with size." In other words, a giant cheesecloth-esque dress. 

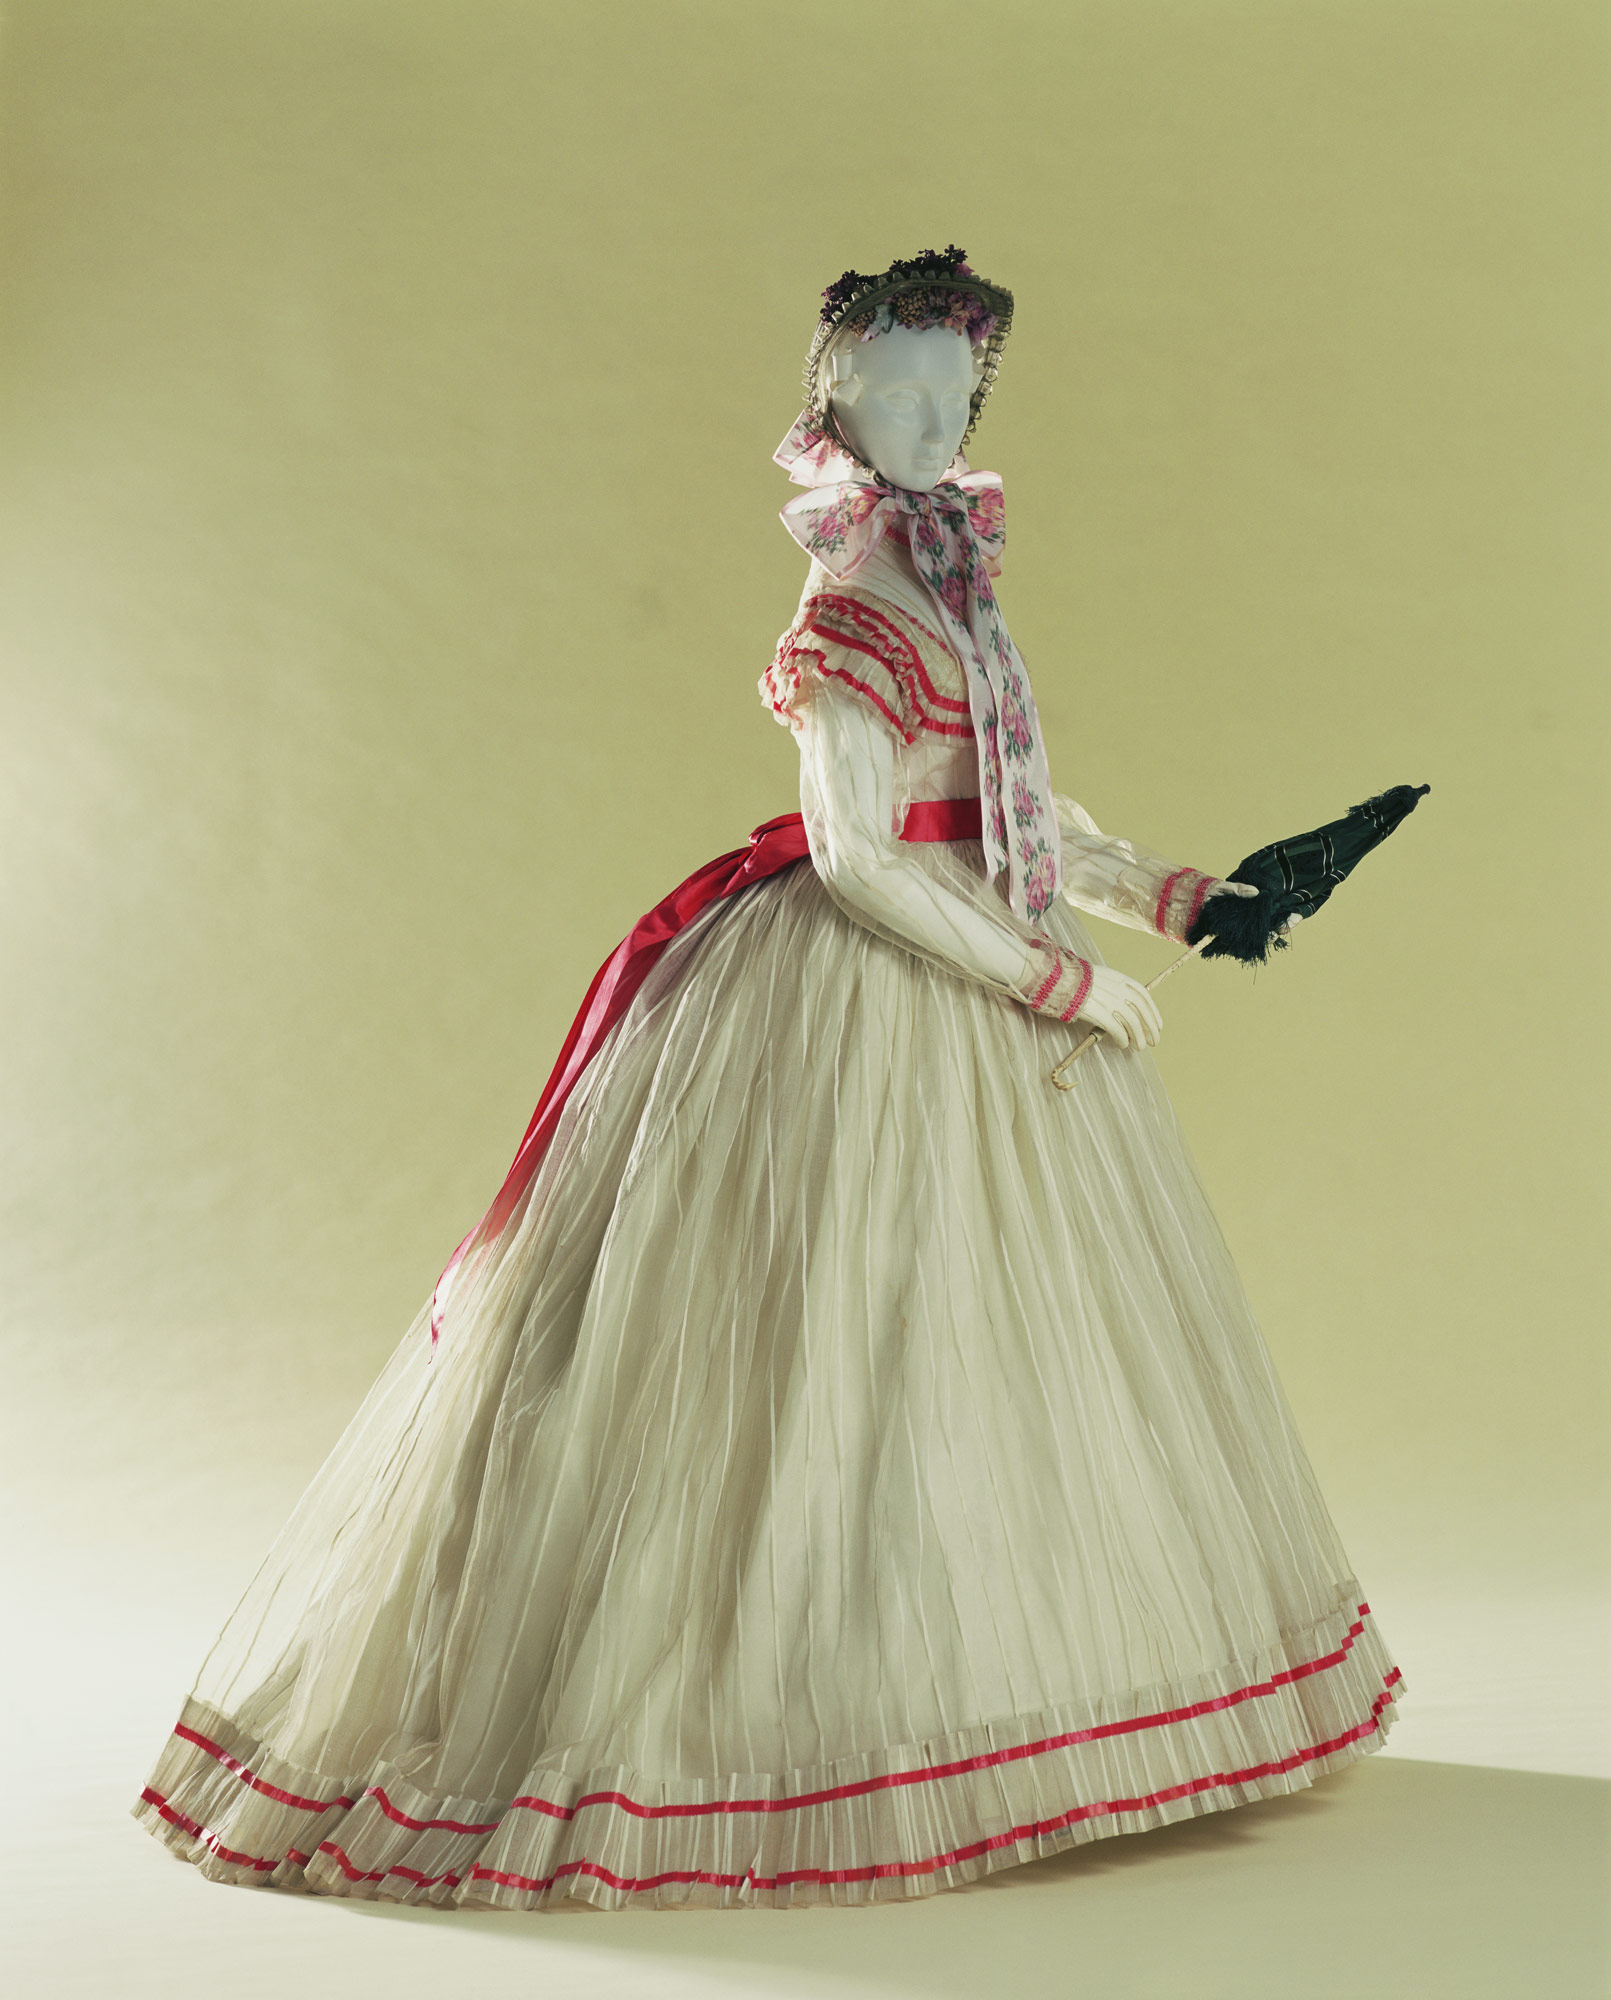
A tarlatan dress, from the Kyoto Costume Institute, from around the same era as Little Women. 


I also really appreciate that this dictionary not only has descriptions of types of fabric (polyamide? sarcenet? drugget, anyone?) and clothing (toga, anorak, even power dressing!), it also has quite a few "ethnic" entries as well. From the Chinese cheongsam to the Russian ushanka to the South Asian kurta to the Native American bietle, it's a good "Huh, so that's what it's called!" reference book. It might seem like this kind of book is rendered obsolete by the availability of information on teh interwebs, but let me tell you why I still love this: I'm all about maximizing reading/learning time (this is why I love listening to podcasts while sewing!), so this dictionary has been my toothbrushing-time reading. It's perfect because the entries are nice and short and obviously it's not the kind of book one sits and reads through from beginning to end, but I always learn something new in the two minutes before my Sonicare buzzes to let me know that time is up.

I love that the giant letter illustrations that open each new section are actually thoughtfully designed: a herringbone weave H, a striped S, a dotted D, etc.  And oh hey look, it's a deerstalker cap and mine looks just like the illustration!


My only gripes with this dictionary are that 1) the illustrations are frequently for entries that seem more "common", whereas I would prefer to have an illustration of one of the more rare terms (I mean, I know what a lapel looks like; could you illustrate a larrigan instead?), and 2) they don't have an entry for justaucorps. Why does #2, matter, you ask? Because that's what I was working on all last week, and I would've loved to be like, don't know what the heck that is? Then enter the giveaway and find out when you finally get to look it up in the dictionary! Or, you know, just wait until I post about it and just look at my photos. I guess you could also click on the link and find out now, but if you don't, it'll be more surprising when I finally get around to taking and posting photos of my justaucorps.

But hey, did you catch that? LK Publishing is sponsoring a giveaway of this book here at Cation Designs! Leave a comment below telling me what your favorite "obscure" sewing term is for a chance to win your own copy of this fantastic little dictionary. I'll close the giveaway on Friday, June 28 at 11:59 pm PST. And if you haven't entered the other giveaway for an interfacing swatch set, go do it! 

Monday, June 24, 2013

In Praise of Superior Materials

Since last week was my first totally free week (school was over for both myself and Mr. Cation, and end of the year meetings were finally done), I decided to take a little break from blogging and treat myself to a sewcation. You know, it's kind of like a staycation, but instead of going to local tourist spots, I just stayed home and sewed all day. Seriously, it was such. bliss. to be able to sew for hours without interruption! And I needed it, because it was a pretty involved project...but more about that in another blog post.

Here's a sneak peek!

One of my takeaways from my week of sewing (besides the fact that sewcations are awesome for introverts like me) was that it is totally worth it to spend money on quality items. A danger of my Very Thrifty Asian Upbringing is that I tend to think I can get away with the cheapest tools and materials; my  sewing machine is the lowest-of-the-line model I could find on Amazon and for the longest time I just used regular office scissors for cutting fabric (but I only used them for fabric, never for paper!). My threads were all the $0.25/spool ones from SAS, and come on, I sew with old sheets most of the time! Fabric that costs more than $8/yd is usually ruled out as too pricey. But I knew that good tools could revolutionalize my sewing (my rotary cutter and self-healing mat and magnetic pincushion are my favorite examples). So when Jo-ann's had its Firefly Frenzy sale, I took advantage of the deep discounts and flurry of coupons to treat myself to some better stuff:


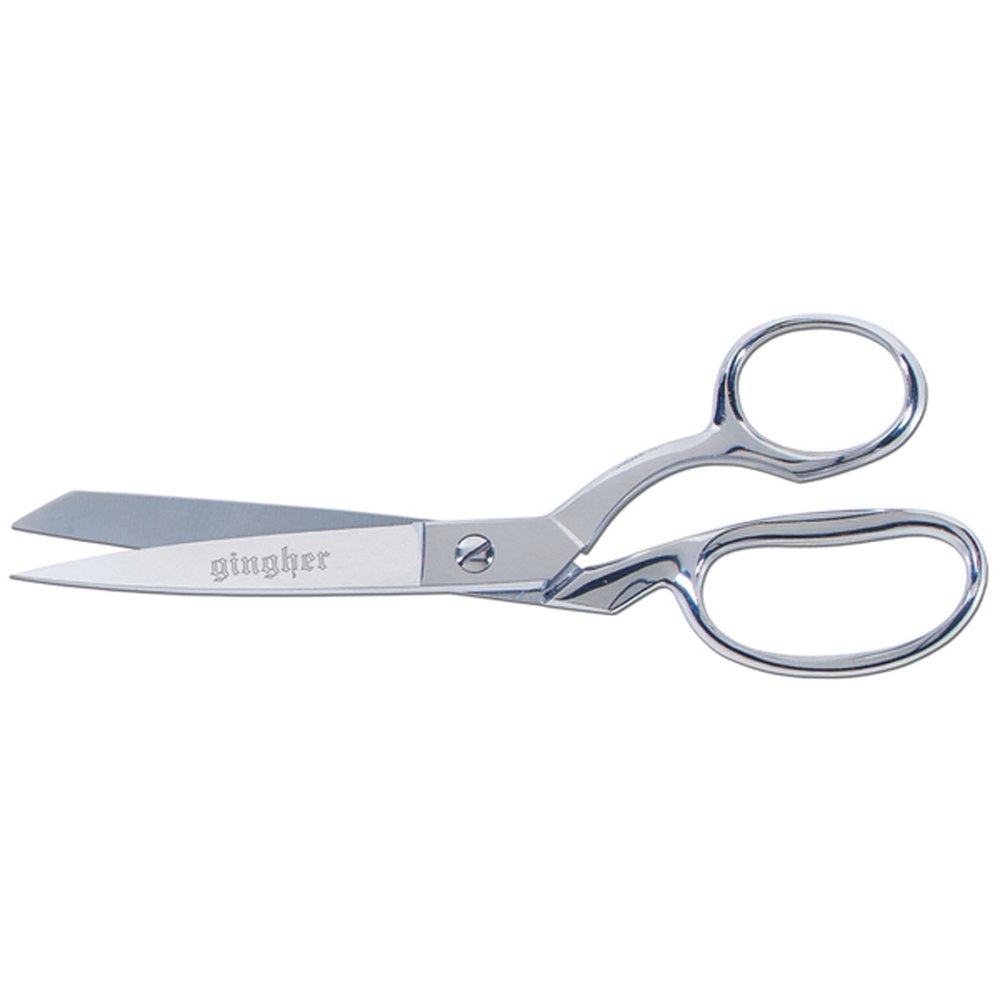
1) Gingher dressmaking shears: Sewing bloggers I respect are always talking about how awesome these are, and I have to admit -- I scoffed. How awesome could a pair of scissors really be? FRIENDS, I WAS SO WRONG. I cannot get over how much I love these shears! They really do handle multiple layers of fabric beautifully, they cut all the way to the tippy tip, and it is like cutting through hot butter, it's so easy. I can't say it enough -- good tools can make an onerous task (does anyone actually enjoy cutting?) so much more tolerable. Between my rotary cutter and these shears, cutting out pattern pieces is almost borderline enjoyable. Between the coupons and teacher discounts, I got mine for $8, a price even I can stomach!

2) Silk thread and beeswax for hand-sewing: I've always just used cheap polyester all-purpose thread for all my hand-sewing (and machine sewing, for that matter), whether for blind-stitching hems, attaching trim and buttons, or basting (for the rare times I actually take the time to baste). And when it tangled up horribly or snapped, I always assumed that that's what people do!! errr, that's what thread just does. But the historical sewing bloggers I follow all talk about its superiority for hand-sewing, so I gave it a try. It wasn't quite the epiphany that the Gingher shears were, but it was still pretty impressive. I haven't hated hand-sewing for a while, but now I even find it relaxing and fun. Which is good, because there was a ton of hand-sewing involved in my week-long project. 

I love this tumblr and am so sad it's no longer updated.
But hey, I gave sewing with a thimble a try after a particularly painful needle jab!


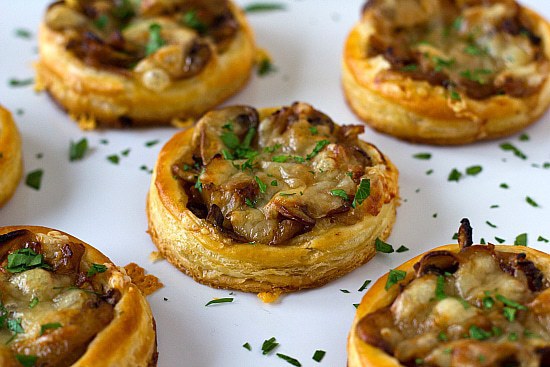
3) Quality interfacing: I didn't get this at Jo-ann's, but from Fashion Sewing Supply. I've always used the cheap Pellon non-woven interfacing for my projects and would always get frustrated when it bubbled or peeled off or totally changed the hand and drape of my fabric. Honestly, when people talked about how interfacing was necessary for making coats, I just didn't get it. I didn't scoff, like I did with the shears, but I was just confused. How could it really make such a big difference? I finally sucked it up and got myself a couple of yards of Pro-Weft Supreme Medium-Weight Interfacing last year, but hadn't had a reason to use it until now. I was quickly blown away by how beautifully it stabilized my fabric without making it stiff, how much better it fused, and how freaking good it smelled while fusing. Okay, I know that last bit of praise probably concerns some people (I promise I'm not huffing interfacing fumes on purpose!), but seriously, this stuff smelled like an excellent mushroom puff pastry. Yes, I could really smell the umami and buttery flakiness. 

I had to fight the urge to make these instead of finishing my project. 

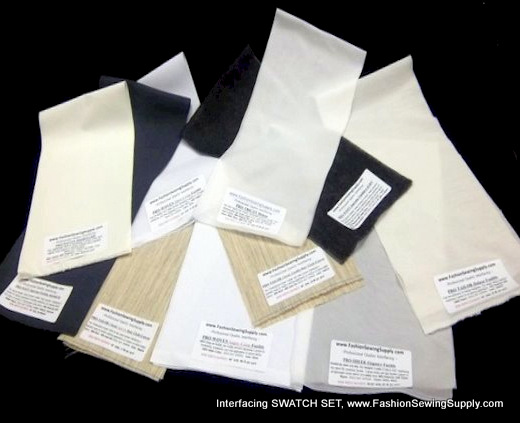
After I tried out the interfacing, I wrote a thank you note to FSS, because I was that taken with their product. To my surprise, Pam, the owner, personally wrote me back to say how glad she was that I enjoyed the interfacing and even offered to send me a swatch set so that I would have a better idea of the endless horizons of mushroom puff pastry before me types of interfacing they offered for various needs. Readers, in this day and age of anonymous online commerce, it was such a pleasant surprise to hear from Pam and be offered this kind of customer service. Even better, she's offered a swatch set for one of you lucky ducks to try! Seriously, if you've ever wondered what the big deal with interfacing is, or if you're just not sure what feels like what and need to figure out what works for your particular project, here's your chance! Leave a comment below telling me what sewing tool, notion, or material revolutionalized your sewing process, and I'll choose a winner on June 28, Friday night, at 11:59 pm PST. 

For a list of the swatches included, take a look over here. I'll be honest, I petted mine for quite a bit and then spent a good amount of time researching what kinds of projects each would be suited for. 


And if interfacing isn't your thing, stay tuned...I've got another giveaway coming! Gosh, this is the most giveaways I've ever done in a month, but then again, this month marks my second blogiversary and I didn't have my act together enough to make another pattern, so here, have a bunch of lotteries instead. Only it's not the kind where you draw a black spot and get stoned to death. Oops, should I have put a spoiler alert on that? 

Sunday, June 16, 2013

Cromwell, I Charge Thee


A couple of days ago, Mr. Cation got his second master's degree, a whole bunch of students from my second year of teaching got their bachelor's degrees, and a week ago even more students from my fifth and seventh years teaching got their high school diplomas. It's funny seeing all these graduation pictures pop up on social media, and then thinking back to some of my own graduations long ago. My high school was huge enough and I was unremarkable enough that I didn't win any of the senior standouts, but in my very tiny junior high's eighth grade class, I was voted "Most Likely to Succeed." Here's the photo evidence:

Really bad scan of the yearbook's already tiny, blurry picture. 

The yearbook staff had us pose for the photo holding fistfuls of dollar bills to represent our future success. In retrospect, this is ironic, as teaching high school science is not exactly the path to luxury; in fact, it's pretty much the opposite. In contrast, my male counterpart for that award went on to get a Ph.D from Princeton and do his post-doc at Stanford -- certainly more fitting of the typical definition of success! Sometimes I wonder if I should have been more ambitious in my career; what if I had decided to go into research, or actually gone to medical school the way Asian kids are supposed to do? I could have gotten depressed about this, but then I had two helpful thoughts:

  1. There are no such things as middle school reunions, so I don't need to worry about showing up decades down the line without fistfuls of money. 
  2. My chosen career path isn't exactly glamorous or lucrative, but I've had the privilege of working closely with many bright young minds over the years, inspiring them to pursue STEM fields (quite a few of my former students even went on to major in chemistry-related things!), or even just to use their brains more, helping them work through personal issues...and of course, encouraging them to let their geek flags fly!
Obviously, thought #2 is the more helpful thought. When I hear from former students, and when I look back at the end-of-the-year notes they've written me, I'm reminded that these relationships, while not financially successful, are no less important than doctoral research at a prestigious university. And really, I shouldn't be surprised that this is what I ended up doing, as I had a great role model in this. My dad (whom I've written about before as an inspiration for my sewing) got his own Ph.D in chemical engineering at Columbia, but chose a less intense, much less prestigious (and therefore lower-paying) job that let him work from home when I was growing up. This allowed him to spend so much quality time with us kids, teaching us to bike and rollerblade and play tennis, building forts and treehouses with us and showing us how to use power tools, reading to us at night and practicing the Socratic method during dinner, and generally showing us how much he loved and cared for us.

That's not to say that dads who work outside the home don't do the same, but when I talk to my students and hear how absent or busy their dads are, it makes me all the more grateful that my father showed us in a very real way that relationships are more important than ambition. I took his presence in our childhoods for granted at the time, but I know now how unique his choice was in a time when stay-at-home dads weren't the new hip thing. Without his influence, I wouldn't have my love of finding out how things work, my appreciation for literature and art and music, or my confidence in being unique (although that last one took a bit longer to learn). Although my mom taught me how to use a sewing machine, my dad was the one who equipped me mentally to teach myself the art of dressmaking. He gave up a lot to pass on that DIY mentality to me.

So, on this Father's Day, I quote Laura Ingalls Wilder quoting Shakespeare in her essay on ambition: "Ambition is a good servant but a bad master. So long as we control our ambition, it is good, but if there is danger of being ruled by it, then I would say in the words of Shakespeare, 'Cromwell, I charge thee, fling away ambition, for by that sin fell the angels.'" (These Happy Golden Years)

And hey, the eighth grade standouts story has a happy ending! Besides being voted "Most Likely to Succeed," I was also voted...

They had us pose with house-painting tools...?


I think that one worked out much better in the traditional sense of the award, as I'm pretty sure most of what goes on on this little bloggy blog could fall under the definition of art. Or at least arts and crafts. Okay, so maybe just crafts, but you know what I mean.

It's too bad they didn't have a category for "Most Likely to Become Obsessed with Cats." I would've owned that award.

Walnut did not want to wear the graduation cap. Look at that face of dread!
Can you tell? He's actually sticking his tongue out at the impending cap!
His whole body is just seething with resentment here. 


Friday, June 14, 2013

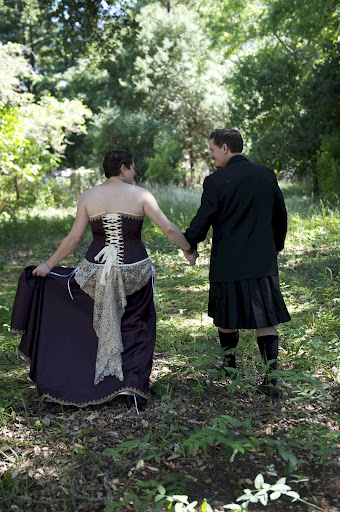
The Real Wedding Photos Are Here!

Not that my photos of Elaine's wedding weren't real, but they were just quick iPhone snaps. These are the professional ones taken with real cameras! All photos courtesy of Tom Chown Photography.


When I was back up in SF earlier this week for work, I dropped by Elaine's parents' house for lunch and her mom very kindly said that there wasn't anyone who didn't have something positive to say about her dress, so that made me very happy.


My one regret is that I didn't put in any kind of bustling mechanism for the train at the back...but Elaine managed to dance just fine despite my oversight!


Mr. Cation and I had a really nice dance too, to "The Luckiest," which was the song we had at our own wedding (three years ago next Wednesday!) during our unity precipitate ceremony.

And in a wide sea of eyes, I see one pair that I recognize, and I know...that I am...the luckiest.


In case you weren't following along with me in my wedding dress sewing journey, here are all the previous posts about the making of this dress:

Wedding Dress Progress Post #1
Wedding Dress Progress Post #2
Wedding Dress Progress Post #3
Not Really a Wedding Dress Progress Post
Wedding Dress Progress Post #4
Wedding Dress Progress Post #5
Wedding Dress Progress Post #6, plus my final thoughts on the making of it

Many thanks to all of you who believed in me (including, of course, Elaine and her family) and encouraged me along the way! Lastly, for those of you who don't believe me when I say how nervous I am about SHBs, I've finally got some evidence, captured on film an SD card:

There was a 3 month old at the wedding, and the photographer captured this expression of mine as I looked at the baby. Note the distress, trepidation, and reluctance to approach. I totally didn't even realize I was making this face; I seriously thought I was smiling. Yeah...


Wednesday, June 12, 2013

"[Woman] walks down the street in a [shirt] like that, and you know..."

...she's got to be a Browncoat.


Joss Whedon's Firefly is one of my favorite TV shows ever, if not the favorite. I'm in that guilty group who didn't watch it when it first aired on FOX, and only discovered it too late to show support and keep it from being canceled. Still, I'm forever grateful for the half a season and movie we did get (and also grateful to the nerdy students who told me to watch it). When I started sewing, I thought one day I might make myself a brown duster, or maybe one of Inara Serra's fabulous outfits, but when it comes down to it, the actual likelihood of that is pretty low. So rather than wait for the day that I get my cosplaying act together, I thought I'd declare my love by wearing my heart...well, over my heart.

“Take my love, take my land, take me where I cannot stand. I don’t care, I’m still free, you can’t take the sky from me. Take me out to the black, tell them I ain’t comin’ back. Burn the land and boil the sea, you can’t take the sky from me...” Best theme song ever, or best theme song ever?


I've been loving the galaxy print trend (although possibly it's over already, I wouldn't know) ever since I saw Sew Country Chick's dress for her daughter, and I remembered it again recently thanks to this fantastic sheet dress by Me and My Polar Bear. I knew that there were tutorials online for DIY-ing the look (since I wasn't lucky enough to own those awesome Tesco sheets!), so after some googling, I pulled out my freezer paper, bleach, and paintbrushes and gave it a go.


I used this image as the basis for my Serenity silhouette; it was easy to trace onto freezer paper by loading it up on my iPad and using it as a fake light-box. I cut out the shape, ironed it onto a black t-shirt that I had made, and then went to town with my spray bottle of 1:1 water/bleach solution (I inserted a plastic bag into the shirt first so that the bleach wouldn't bleed through to the back). By twisting the nozzle, I was able to vary the spray pattern to get fine mist (good for layering to cover large areas) or more concentrated streams (to make the "shooting star"-esque lines). All of this took less than ten minutes -- I was working fast and haphazard so that the bleach wouldn't make holes in my fabric! -- and then I rinsed the whole thing in cold water to stop the hypochlorite action. I then went back with a paint brush and made larger splotches in random places. Rinse again, and lastly, I used some acrylic paint to add yellow at the Serenity's butt-end, and white centers and blue-purple edges to the "nebulae." This final step took the longest, as I wanted to make sure that it actually looked believably space-like.

Here's what it looked like after the initial bleach spray, after I peeled off the freezer paper, but before I started adding paint and touching it up. I was a little nervous at this point, because this doesn't really look that cool yet. I didn't take any process pictures after this, unfortunately, because my hands were covered with paint. I always get really messy when I craft, and end up covered with paint or hot glue or sawdust, which makes documenting difficult.
I pressed the whole thing afterwards with a very hot iron to set the paint. I'll let you know how it holds up after washing!


Summary:
Fabric: Less than half a yard of black cotton knit with a pretty high spandex content, which I originally made into a t-shirt when I first started sewing three years ago. At the time, I had no idea how to finish curved edges, so the neckline is totally raw. I left it that way since there's no way I'm finding a matching fabric to bind it with.
Notions: None, but lots of craft supplies!
Hours: It probably took me an hour to make the shirt originally, then about three hours to print, cut, bleach, rinse, paint, and iron the design.
Will you make it again? Not this exact design, since I don't need more Serenity shirts, and definitely not this tee "pattern" since it's not exactly well done...I think I just sketched a shirt shape and started sewing when I made this, and the shameful secret is that I cut this so that it stretches the wrong way! I didn't know about directional cutting and 2-way stretch when I made this, so I'm lucky that it even fits, albeit quite tightly.
Other shameful secret: I also cut the scoop neck way too large/low when I made this (measure twice, cut once was NOT my motto!), so I never wore it. When I was trying to figure out if I had a black tee that I could use for this project, I realized I could just turn it around!  

First worn: For running errands today, but nobody recognized it...boo! :( One cashier at Trader Joe's asked about it, though, so I got to enthuse about how awesome a space western is, and at the end of my little ramble he said he'd check it out if he remembered later. Ehh, good enough.
Total cost: Since I used an old shirt, and these are all supplies I already had, $0! Yay for giving new life to an old garment!
Final thoughts: I love it? Do I really need any more final thoughts than that? How about the fact that when I wore the shirt for Mr. Cation, who also loves Firefly, he was totally floored to find out that I had made it myself! He thought it was a shirt that I had bought, not painted. I'd say that's a rousing success!

Worn with my most Kaylee-like olive green cargo pants from GAP, thrifted for $8 with the tags still on.

Silly anecdote: After I had finished the shirt, I hung it up inside out on a hanger to air out. I went to sleep and when I checked on it the next morning, I totally panicked because I thought all the paint/bleach had faded somehow and made my Serenity silhouette all blurry and indistinct! Then I realized that I was looking at the wrong side of the image, and my heart started again.

Here's what it looks like inside-out. Totally not recognizable as a space ship -- you see why I freaked out. 
Right side out: much more distinct! Phew. 


Last year I made a t-shirt to declare my Star Wars love, so this makes two sci-fi stories that happen in space that I've got me-made shirts for. I still want to make one for Battlestar Galactica and one for Sailor Moon (okay, that last one isn't sci-fi, but her transformation sequence looks kind of like it happens in space, and besides, all the Sailor Scouts are named for planets, and then there's that alternate galaxy, the Negaverse, and alien twins Alan and Ann...okay, I'll shut up now), and that'll nicely round out my media-that-happens-in-space me-made shirt collection!

So...have I convinced anyone else to give Firefly a try? Or at least DIY-ing a galaxy print fabric?