Wednesday, July 20, 2011

Steps in Clothing Skills

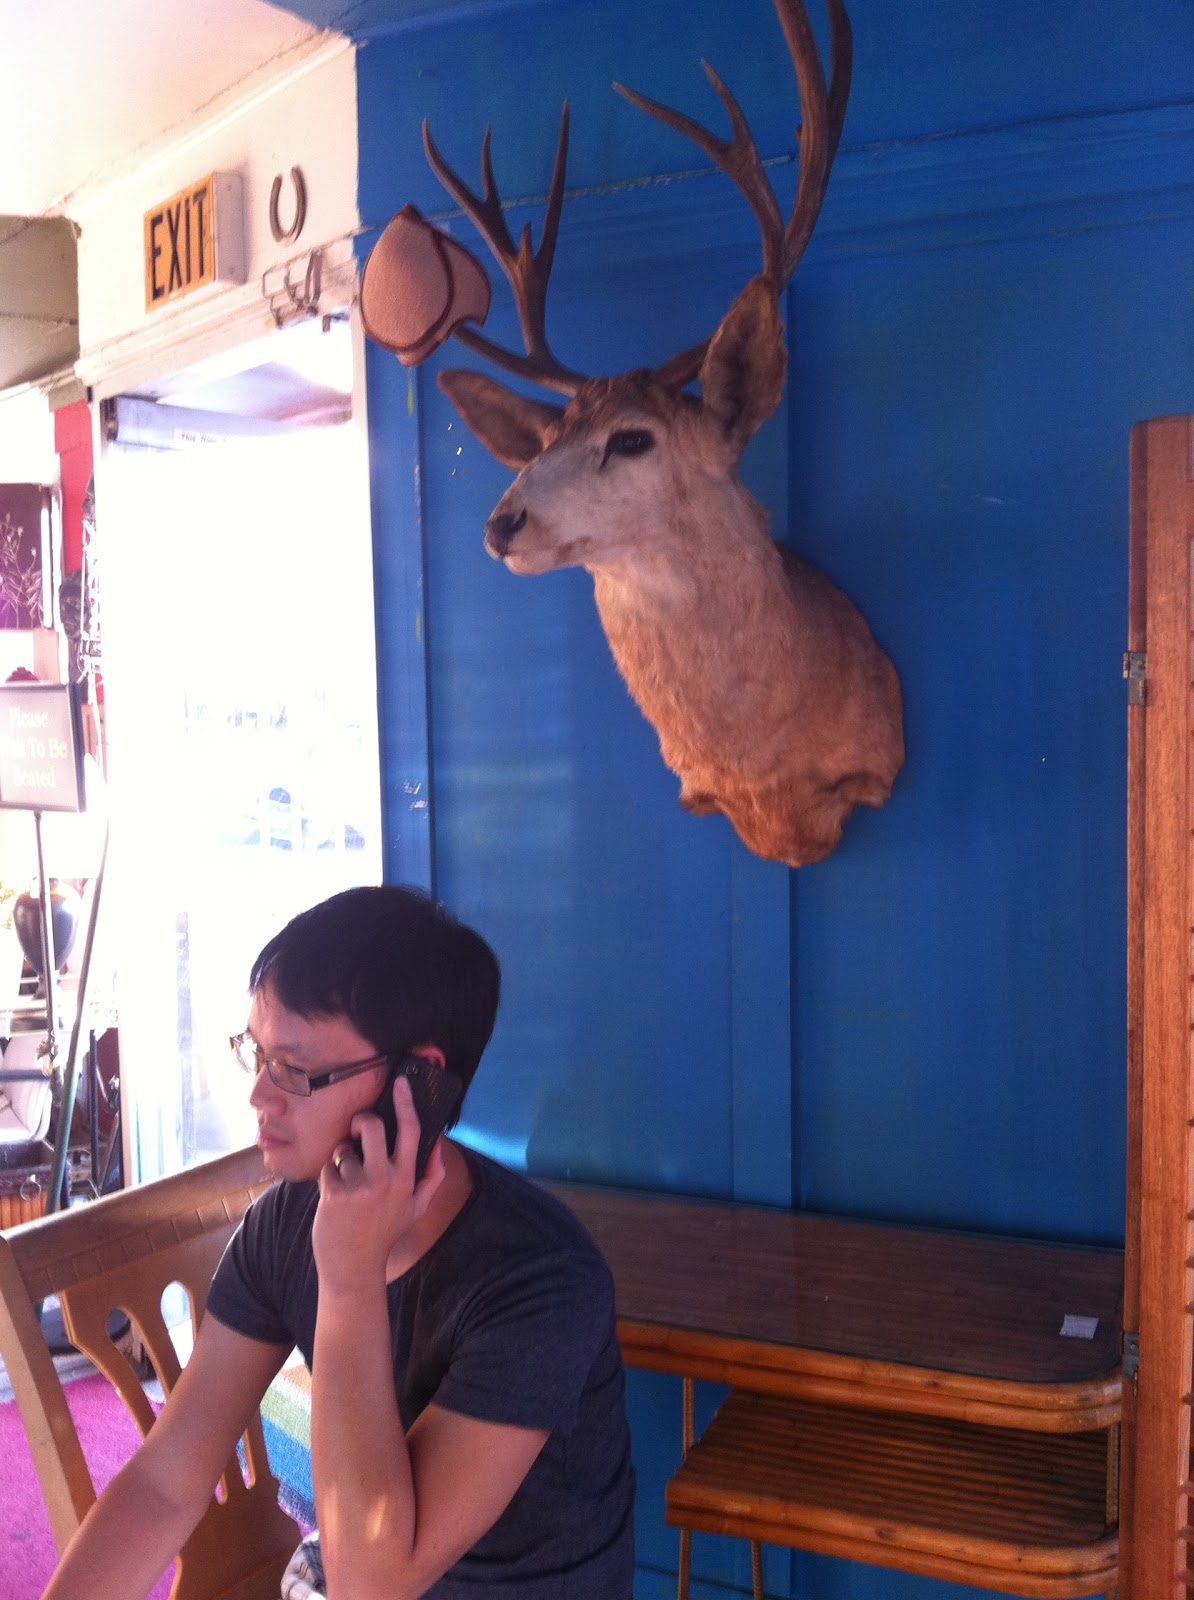
A couple weeks ago, my husband and I went to North Park to have dinner with another couple. We got there a little early and my husband, much to his regret, pointed out that there was what looked like a thrift/antique store across the street. This led to his sitting gingerly on a rickety chair under a taxidermied deer head for half an hour while I browsed the collections of furniture, knick-knacks, and dustballs. It was all worth it, though, when I emerged triumphant with possibly the most hilarious home-ec book ever: Steps in Clothing Skills, by Lucille Dunn, Annetta Bailey, and Wanda Vansickle, copyright 1970. As I've been reading through this textbook, I have seriously been laughing out loud at some of the things it says. I'm not sure what age this book is intended for (middle school?), but the advice ranges from actually kind of useful (I learned some things from the sewing section) to obvious (you really need to be told to use shampoo to clean your hair?) to laughable. Check out this intriguing table of contents:


Let's look at the first section: "Personality -- Plus!" A lot of it is grooming tips.

Poor maligned Diana.
Yes, that's exactly what I will do. Cut up perfectly good soap with a pirate knife in order to make inferior shampoo.
I actually should practice this. I fidget way too much when I sit.
A bumpy 'sump'n'?! Seriously, who writes like that? But I do love how straightforward this is: "I need to start regular bathing today."

The next few pictures about posture and carriage cracked me up. If I were a student reading this, I don't know if I'd be able to take it seriously.
Yes, I will practice walking with this ridiculous textbook on top of my head.
"When you smile, you help make others feel happy." Or creeped out, depending on which smile you use.
That girl is standing remarkably calmly for having a giant fish so close to her.

They do have some useful tips about behavior and conduct, though. Some of my students could stand to learn a few things.
I wish my students would throw away their lazy ways.

I wonder what the illustrator thought when he/she got assigned to draw several pictures of different dogs on the phone. Click on the picture to see it in all its glorious detail.

And that's just the first chapter! But really, there are actually some useful things in here about various fabric types, how to properly press your clothing, and getting started sewing. They even have directions for making basics like tote bags and skirts. And best of all, these campy drawings to accompany all of it! I'll be posting more hilarity in the upcoming weeks in between sewing projects.

Tuesday, July 19, 2011

Anthropologie Knock-Off: the Backswept Dress

UPDATE: I posted more detailed instructions on how to make this over at BurdaStyle.

Renamed the "Nothing But Blue Skies Dress"
Sad confession time: one of the highlights of the end of each month is getting the new Anthropologie catalog. I seriously look forward to it, then get nervous when it doesn't arrive, and then finally go to Shayna's place and read through hers since I can't wait. Unfortunately, most of the dresses I covet are in the $200+ range, which makes it pretty much impossible to even think about buying them. Partly because a science teacher's salary isn't so large, and partly because my mom's voice in the back of my head won't let me spend that much on a single article of clothing. Good thing I've got a sewing machine!

Two months ago, I fell in love with the Backswept Dress, and ever since then my brain hasn't been able to let go of it. I told myself that I wasn't a huge fan of the seafoam green/orange combination on the fabric, and dry-clean only silk is way too impractical (see above statement about a science teacher's salary, along with the fact that there's no way I would ever wear something like this for students to see my back). My brain came back with the brilliant retort that I don't even like working with silk, so why not keep the design elements and reinterpret it as a fun, casual, wear-to-the-beach sort of frock? Also, as I've mentioned before, I don't have any vineyards to stroll through.

To get the whole bright beachy look, I decided to use a thrifted bedsheet from the Disney Pixar Toy Story movie. How do I know it's from Disney? It's got little Disney logos under some of the clouds :\ I really tried my darndest to not let any of them in, but due to the fact that it's only a twin fitted sheet, and it was a very full skirt, I had to keep one. In the middle of the front. Sigh.

Since the sheet is a poly-cotton blend, I figure it will hold up to the ravages of sun and sand much better than silk. It also made the dress a lot easier to work with, especially considering that I was making up the pattern as I went. I took a bodice pattern from my stash that was fairly similar to the original (fitted, shoulders that hang over the side, crew neck) and redid the back to get the tie-look. I tried to put the ties where my bra strap should be, but I was a little bit off. Oh well. Since I am allergic to facings, I used white bias binding to do the neckline and armholes. This is possibly my best topstitching job yet!
I kept the armscye and eliminated the dart, redrew diagonal lines to get the triangular pieces of the back, and then extended the center back into a tie.
I made a facing for the tie, sewed it right sides together, then flipped it inside out.
For the skirt, I wanted the pockets on the sides, but I didn't want to go overboard on ties, so I kept them as simple gathered pockets. To make the actual skirt, I ended up sketching a vaguely curved rectangle, then cutting off the two ends, sewing the pockets on, and then reattaching them. This more or less (probably less) imitated the look of the original dress without the pleat business. I inserted elastic into the back of the dress, just like the original, then attached it to my bodice. Can I just say that making a dress without a zipper is AMAZING? I love it! I'm going to need to work this idea into more items.
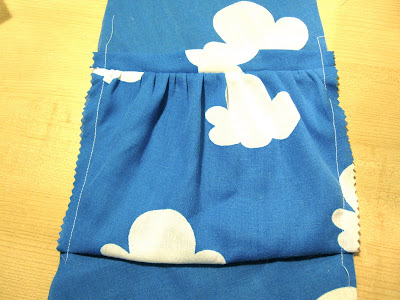
The pocket was a roughly trapezoidal shape that I gathered across the top.

I sewed the gathered top to a bias strip made from the same fabric.

Pocket attached to the side panel of the skirt.
Love the lovely pockets!

Also, I have not hemmed the skirt yet. So all of these pictures are showing the not-quite finished product, because I was too impatient to hem it before trying it on and parading around the apartment.

Details: 
Cost: $1.50(!) for the sheet, then another couple bucks for the bias binding and elastic.
Pattern: Bodice front from McCall's 5845, back modified and skirt self-drafted.
Time required: Several hours, but it went fast! I only spent two days on this dress, and normally it takes me a week.
Final verdict: I am so glad I found the perfect "pattern" to go with this sheet -- I think clouds be a little overwhelming on a more formal dress. As it is, my husband said it looks a little like I'm wearing a dress with popcorn all over it :\ Whatever. I love my new dress and I think it's so much more suitable (at least for my life) than the original.
Can you tell I am so excited about this dress? Also, note that Walnut is less than enthused, grumping it up in the hallway.
The problem with using fitted twin sheets as a source of fabric is you really don't have much left. This is all that remains.

Monday, July 18, 2011

Fake-torial for a Fake Corset

I call this a fake-torial because I'm not sure that anyone would want to follow these directions to make my cobbled-together-leather-pieces-masquerading-as-a-corset. But hey, even then, it's good to keep track of one's thought processes, right? One day I will make a real corset and look back at this and laugh.
My "pattern" pieces: not to scale.

Directions to make my Bellatrix costume underbust fake corset: 
(fake because its only corset-like aspect is lacing and grommets; click on any of the pictures to see a larger version)

1. Get a pair of leather pants, or some other source of leather from the thrift store (skirts, large men's jackets, tote bags, etc.) I recommend thrifting your leather to reduce the number of animals killed for their hides, to promote less waste/reusing/recycling/reducing the number of tanning chemical released into the environment, and simply because it's cheaper than buying new. Alternately, you could use synthetic pleather, but I don't know what working with it is like. The pants I used were a lovely buttery soft texture which made it a pleasure to work with (aside from the grandma smell).

2. Decide how tall you want your corset to be and draw a vertical line on a large piece of wrapping paper ($1/roll at Target!). Figure out your underbust, waist, and hip measurement and draw them so that the vertical line bisects each line. Sketch curved lines to connect the lines, making a shape that roughly approximates your body shape. See my diagram below.

3. Cut out your paper pattern and use it to cut out four pieces of leather: front right, front left, back right, back left. Sew a bunch of zig-zag stitch lines all over the pieces to approximate Bellatrix's patched-together look.

4. Fold over the straight side of your back pattern pieces and stitch in order to make a thicker section for attaching the grommets. Wonder why the leather isn't feeding through the sewing machine properly, then realize it's because it's slightly sticky. Sandwich with tissue paper, then run it through again to great success.

5. Tear off the tissue paper. Pick off the little bits that are still stuck to the seams.

6. Sew the side-seams for your pattern pieces. Hold up the pieces to your body, only to realize that for some reason the front pieces don't meet properly. Realize that it's because you forgot to put in seam allowances. Draw and cut out a trapezoidal piece (see above "pattern" piece) to fill in the gap. Remove the napping cat, who has taken advantage of your temporary absence from the sewing desk chair.
"But I'm too cute to disturb!"
7. Sew the trapezoidal piece in between the front pieces.
All the pieces together.
Close-up of the trapezoidal piece.

View of the inside.

8. Put grommets into the back pieces, about 1 inch apart. Curse the thickness of the leather that defies your hole puncher's best efforts. Realize that it's not the hole puncher's fault, as it was meant for paper. Cut 3 yards of ribbon and lace up the back following this helpful tutorial.
Trying to take pictures of black things and still capturing the detail is ridiculous.
8. Squeeze into the corset and have your husband tighten the laces and tie them into a bow. Done!

9. After you come back from the HPDH2 midnight showing, realize that you should harvest the rest of the leather from the pants, resulting in this:
Hmm...what can I make with all the leftover leather scraps?
Disclaimer: I don't really know what I'm doing when it comes to making real corsets. I am aware that a real corset should have boning, probably a lining, and a busk in front. This is just my make-it-up-as-you-go process that works well enough for costuming purposes. Most of what I do falls under this category, in fact. That said, I loved the process of trying to imagine what I wanted to make, trying to translate 3D shapes into a 2D pattern, trouble-shooting, and coming up with a decent product. I think that's my favorite part of sewing, actually.

Friday, July 15, 2011

The End of an Era and Leather Pants Grandma

Bellatrix and Tonks, all friendly-like.
Last night, my husband and I and another couple went to the Harry Potter and the Deathly Hallows Part 2 midnight showing. Being that it was the last HP film, we went all out and got dressed up. The movie was well done, but it made me so sad that there are no more coming. There are only a few movie series that I truly love, and while Star Wars came out before I was born and is therefore a moot point (Episodes I-III don't count), at least with the Lord of the Rings there are two more Hobbit movies coming. So it was with simultaneous heaviness and elation that I donned my Bellatrix Lestrange costume to go see Harry finally fulfull his destiny.

I'd forgotten how much fun it is to get all dressed up -- the last time I did was for a Dungeons and Dragons encounter and that didn't really count. As we walked around and marveled at other cosplayers (can you really call them that if it's just a movie showing?), we did get a couple requests for pictures, which is always kinda awesome. I have to say, I think I was the most movie-accurate Bella there that night...a lot of people had sort of generic gothy-witchy costumes. However, even then, I was still missing a lot of elements, like the silver swirlies all over, and I opted not to wear boots (too warm -- why have a movie premiere in summer when the major characters all wear layers and layers of black robes?!).


I began by drawing the Dark Mark on my inner left forearm in black eyeliner pencil. I was afraid it would be super tricky, but it turned out okay. I sprayed a black frizzy wig from Party City to get the white streak in Bella's hair, and of course I had the bird skull necklace I made last week.


For Bellatrix's top, I cut apart a black long-sleeve tee at the shoulders and up the sleeves, hemmed the edges, and then inserted many, many grommets and threaded black ribbon through it all. The skirt was this beautiful, wispy, flowy long chiffon skirt that I thrifted for $8. I absolutely loved how it would flap around my legs as I swept from place to place. After putting on the top and skirt, I tied the wand holster around my waist on a piece of ribbon. I thought about attaching to the corset, but decided that I might want to use it in the future without a wand...
This was actually extremely useful during the premiere, since wands are kind of long and pointy and get in the way of everything.

Not too bad, for being cobbled together without a pattern.
The corset was nearly a disaster. I didn't have quite enough ribbon for the lacing, so after I'd laced it all up, I couldn't quite shimmy into it because there was barely any slack! My husband had to tug it down over my head while I awkwardly wiggled and tried to breathe through the leather. All this to say, I got plenty of the grandma smell for several minutes. As I said before, since these leather pants were thrifted, they smelled strongly, and I mean STRONGLY, of grandma. You know, that indefinable old-people-sickly-sweet-musty-potpourri-plus-mothballs-and-who-knows-what-else smell. Gotta love it. At first, I was annoyed about it since Bellatrix, the best lieutenant of the Dark Lord, should not go around smelling like a cookie-baking, sweater-knitting little old lady in a rocking chair. But then I thought about it more and realized that if any grandma was going to even OWN leather pants, it would be someone who used to be like Bella. You know, a grandma with A Past, who used to do cool things like ride motorcycles (I don't know what else would require leather pants). Just no sadism, insanity, and maniacal laughter, of course. So I guess it is appropriate after all!

The icing on the proverbial costume cake was a snake ring I randomly found at Claire's. I colored in the clear rhinestones with a a green Sharpie, and tada! (chroma morphius?) A Slytherin ring!

All in all, I loved my Bellatrix costume...this is the first time I got so detailed in making sure I got all the elements as close as possible, as well as the first time I made something so complicated! Now that I've made my second fake corset, I think I could almost tackle a real one.

The microwave and wok in the back kinda take away from the whole feel of my cursing stance. Perhaps I am in this kitchen taking down unsuspecting Muggles.

Thursday, July 14, 2011

Pretending to be Ollivander

Last night, in preparation for Harry Potter and the Deathly Hallows, Part 2, my friend Jennilyn and I spent nearly four hours making wands for our characters. My husband just sat on the couch, preparing his D&D encounter, incredulous. Let's just sum it up by saying that Ollivander's job is much harder than I imagined it would be!

We started out with some plastic pipets that my husband brought home from work. He's a research scientist, and these pipets are pennies each, so this was his way of supporting us in our fandom. By painting, taping, and hot gluing, we were able to take these clear tools of biology labs and slowly (very very slowly) turn them into the tools of witches and wizards (albeit without the dragon heartstrings or unicorn tail hairs inside).

Walnut got curious about what was going on.


Things got a little crazy as we got more into it.
Finally, after all the paint and glue dried, we were able to Sharpie in our design details. This morning I also added some dark glaze to the wands so that they would look more dark wizard-esque. Here are the final results!
Top: Nymphadora Tonks; Bottom: Cedric Diggory. Jennilyn did an excellent job with some challenging wand shaping.


Top: the Elder Wand! The nodules, which are meant to be clusters of elderberries, are made of hot glue. I did consider making Voldie's original wand, but the crazy shape at the end defies masking tape. Bottom: Bellatrix' first wand, which she loses to Hermione.
I think the dark glaze really makes a big difference.

I also finished my corset yesterday, which I'll hopefully show tomorrow. It was definitely a trial-and-error experience, trying to draft one from scratch! Now I just need to figure out how to get the white streak in my wig, then make a Voldemort robe for my husband, who so graciously agreed to accompany me as the Dark Lord.