
I bought these red and gold damask curtains at a thrift store years ago and knew that I wanted to make them into some kind of fabulous floor length coat. I also knew that my skills then weren't quite up to the task, so I put them in my stash and waited. After making a shapeless coat that basically only had three pattern pieces in the Beginning Tailoring class at Cañada College last winter, I was ready to move onto something more complicated. I figured that this would be the perfect chance to have the guidance of an expert while making my dream coat. Unfortunately, coronavirus had other plans for the world, and it turned out that instead of working alongside classmates with an instructor at the giant cutting tables at the college, I was going to be googling a lot of things and essentially learning to tailor on my own. Thank goodness for YouTube (cue the Schuyler sisters singing "How lucky we are to be alive right now!").

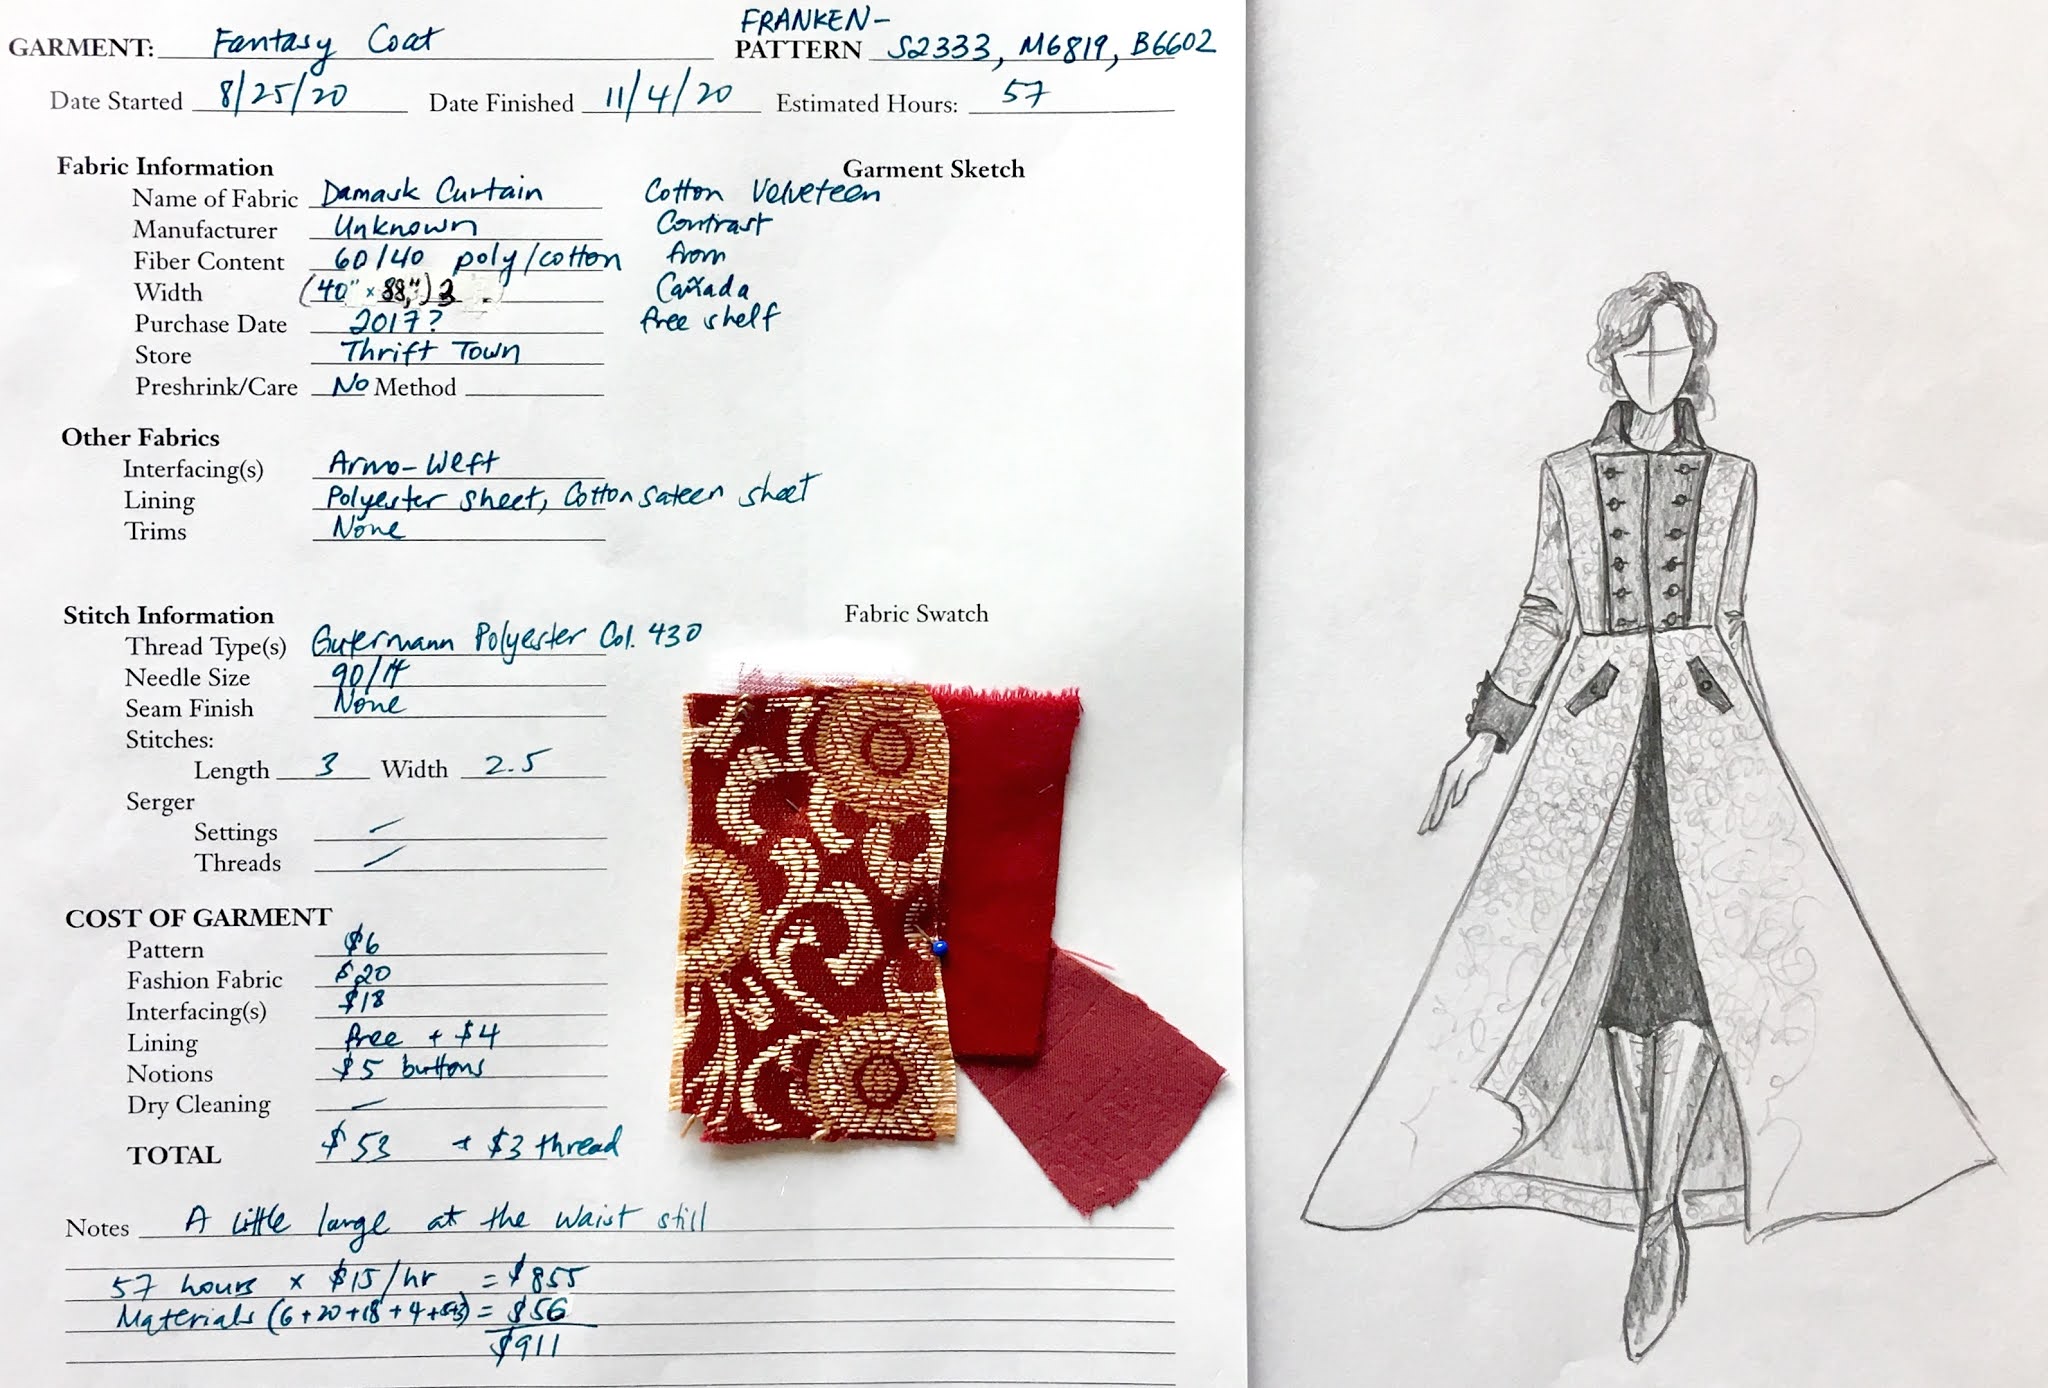
I really appreciated that this class made us document every step of our work; usually I just sort of make things up as I go along and then attempt to recall how long it took and what I did. It's ironic that even though I'm a science teacher and meticulous details are supposed to be my thing, I tend to be more loosey-goosey in my sewing. Anyway, our professor required us to write up a list of steps, then document all the time we spent on each step. We also had to do a sketch (beforehand, so that we could check how well our final garment matched up...as opposed to my usual method, which is to make the garment first and then sketch what it looks like), write up a list of all materials and costs, and even record the sewing machine settings and thread type/color.
The first step our professor required was a paper fitting, just to make sure there weren't any glaring issues with our patterns. Since mine was a frankenpattern of three different Big 4 patterns, I begrudgingly did this step (even though I thought it was silly in the previous tailoring class), then moved on quickly to the muslin. I know I'm very fortunate to be almost exactly the measurements of a Big 4 size 10 in the torso, so there wasn't much I needed to change. I made my typical pattern corrections: wider shoulders, longer sleeves, SBA, swayback adjustment, narrow back...but I wish I'd narrowed the waist and back a little more, since it's not as fitted as I would like, even though it is meant to be outerwear.

We are required to make one hand-padstitched collar for this class. Normally we would get to see our professor demo this in class, but instead I watched Bernadette Banner's video tutorial featuring Royal Black Couture to learn how to do this. It took a little bit of doing to get used to the rhythm of all the diagonal stitches, and my stitches still aren't the neatest, but after steaming it I'm really pleased with how well it holds its shape.

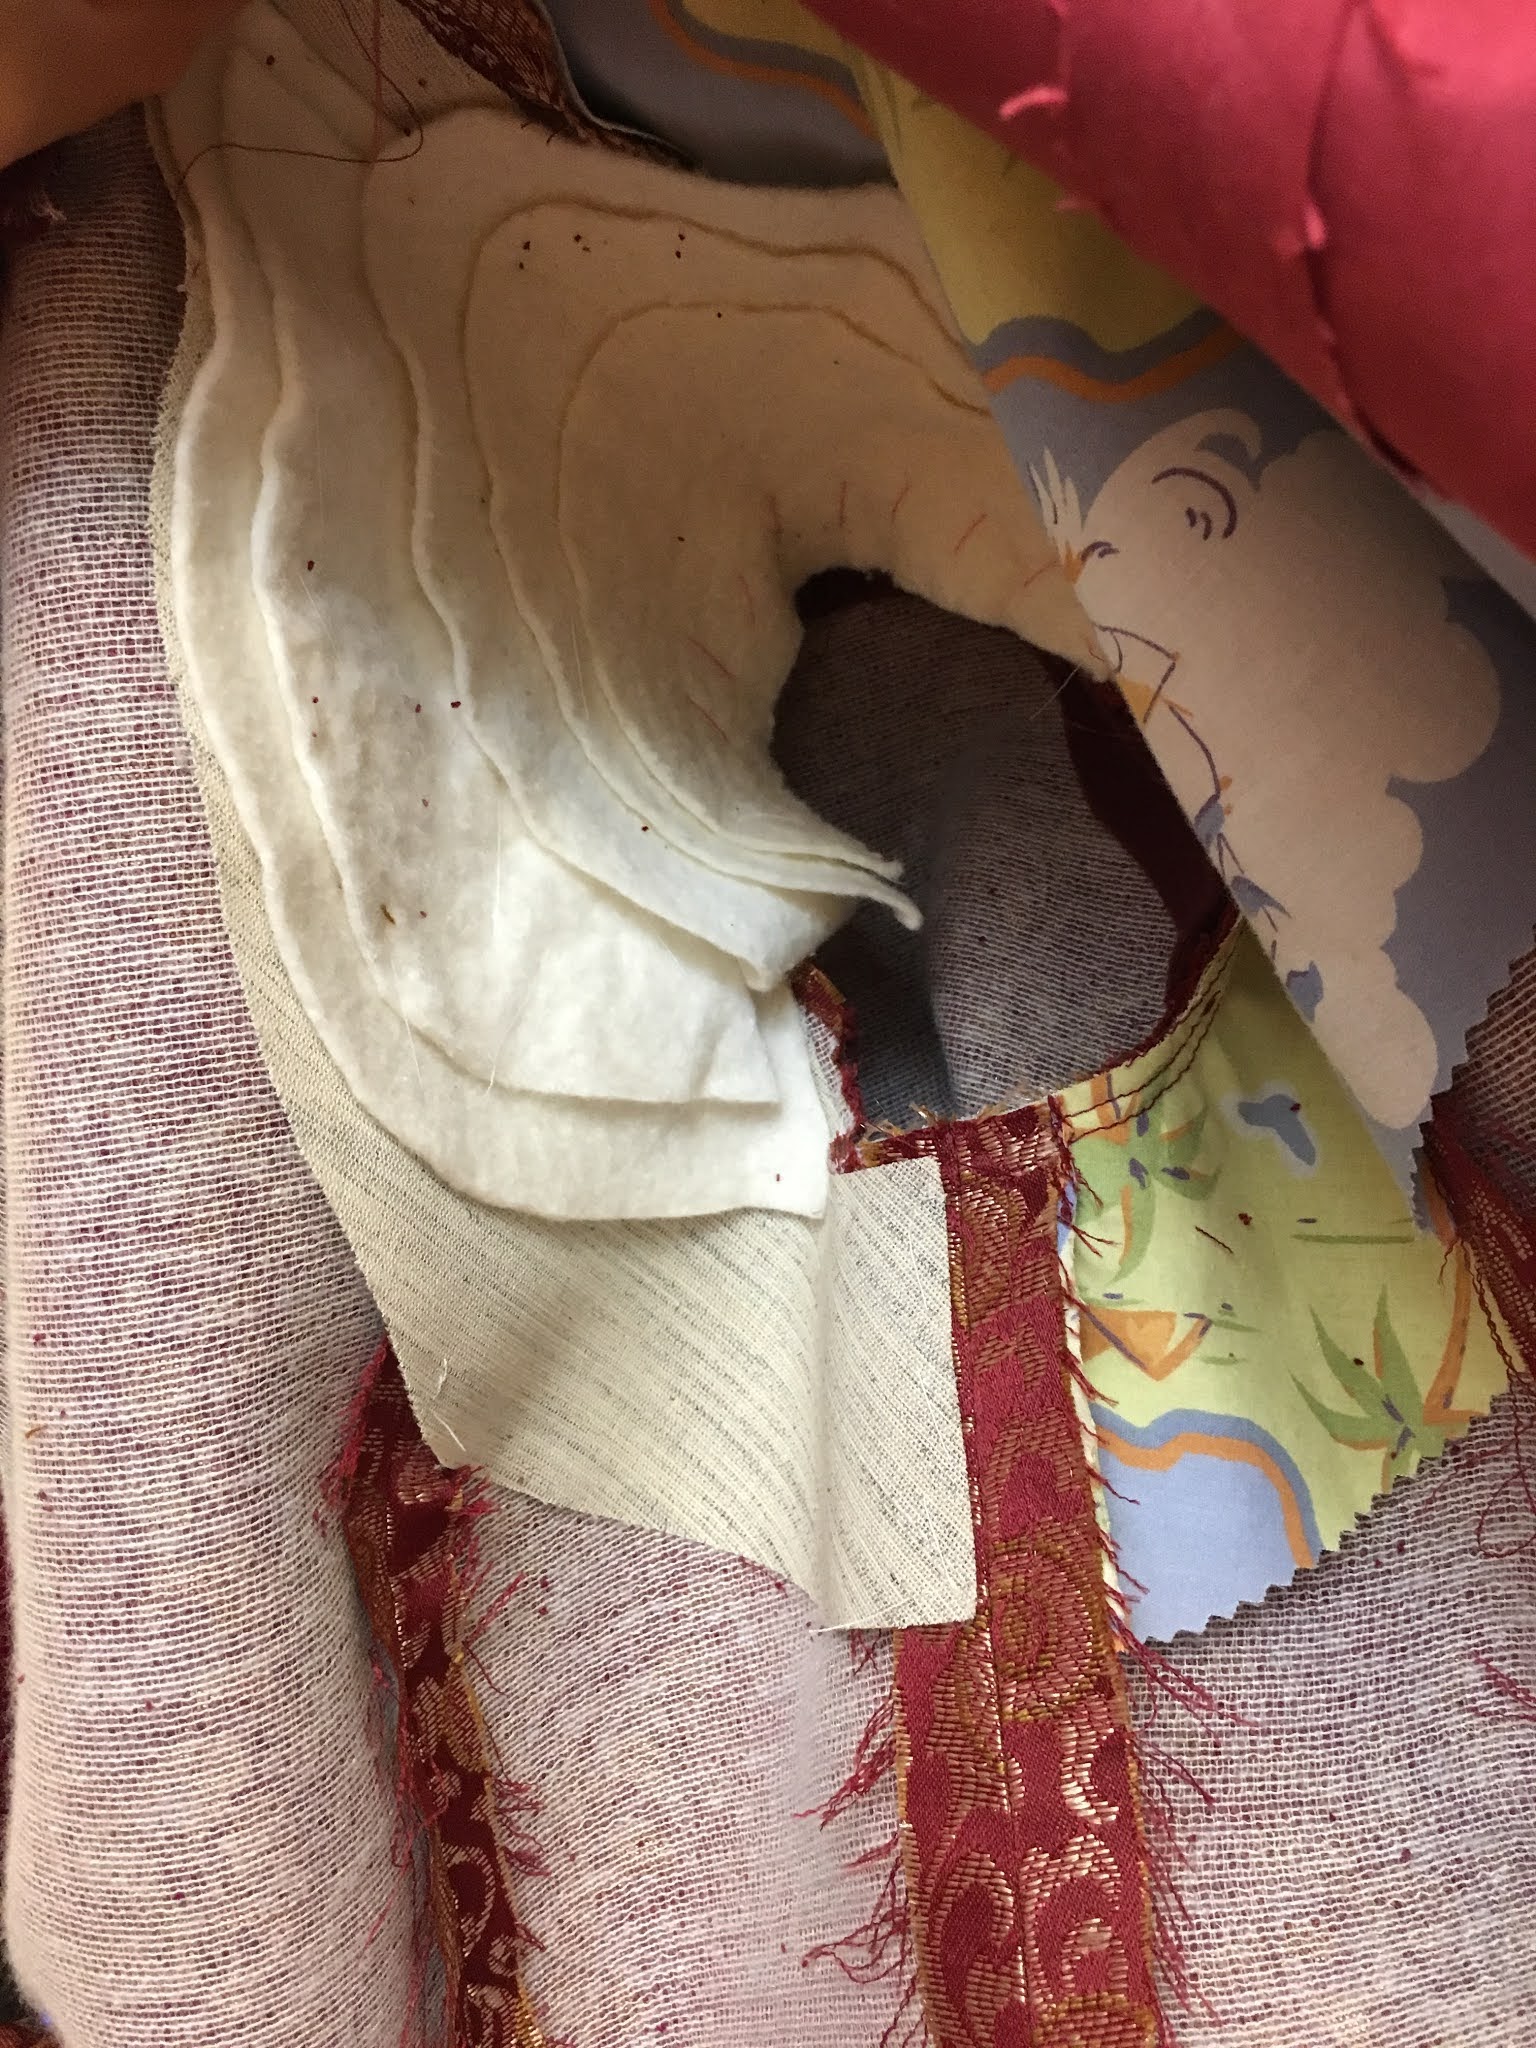
It's really incredible how much goes into making a structured coat or jacket. I used fusible Armo-Weft interfacing on all my fashion fabric pieces to add some body to the floppy curtain fabric, and this also helped prevent some of the fraying that this weave is prone to. In order to help the garment hang better and strengthen the back during movement, I added a back stay. And since this is a pirate coat, what better fabric to use than this (100% cotton, tightly woven and washed multiple times) map-print bed sheet? Secret treasure maps hidden in one's clothing for the win! In the front, I cut out a piece of horsehair canvas and basted on a couple layers of batting to make a chest piece. This fills in the hollow that can occur between the shoulder, arm, lapel, and bust area and helps the whole garment lie more smoothly. To help stabilize the edge of the lapel, I also hand-stitched 1/4" wide cotton twill tape butting up against the stitching line. In hindsight, I'm not sure that this was necessary since my lapel isn't cut on the bias (the way a typical blazer lapel would be), and the whole thing was topstitched anyway.


I used to only set in sleeves with the two-rows-of-gathering-stitches method, but that never worked really well for me and I always got weird puckers. This time, I tried the method of gathering the sleeve cap with a piece of stretched-out fleece, and it worked beautifully! The thickness of the fleece keeps the fashion fabric from making actual puckers, and then once it's set in, you can just push the fleece into the sleeve cap to act as a sleeve head instead of having to sew one in by hand. SO NEAT. I love all-in-one steps. Gertie's video demonstrates the whole process here, but instead of using mohair or lambswool, I just used a strip of scrap polar fleece, which is obviously cheaper and easier to find. After setting in the sleeve, I also put in a handmade shoulder pad (just three layers of thin cotton batting basted together). I remember the first time our professor talked about shoulder pads, I was so skeptical; I just kept thinking of the massive 1980s shoulder pads. The nice thing about handmade ones, though, is you can use as many layers of batting as you want to make it thinner or thicker, and it really does help the whole garment hang more nicely. Consider me a shoulder pad convert!

For the skirt of the coat, I waffled a bit about whether I really wanted to make it floor-length. A floor-length half-circle skirted coat would definitely allow for the most dramatic flouncing and swanning about, but it would also be impractical and take forever to hem by hand. But then I realized that I had enough fabric to make it floor length, so in the interest of not leaving a bunch of unnecessary extra fabric in the stash, I decided to just go for the floor length version. To visually break up the expanse of red and gold fabric, I put some welt pockets with flaps in. The last time I made a pirate coat, my pocket flaps were fake, and I regret not having functional pockets. Not making the same mistake this time! Since I had a waist seam, I decided to go for another trick I learned from Bernadette Banner: I added a twill tape stay from the top of the pocket bag to the waist seam. This will help support the pocket and keep it from sagging when I put things in.


The rest of the construction was pretty straightforward, if tedious. Lots of topstitching to help hold the velveteen facing, upper collar, cuffs, and pocket flaps in place, since I didn't want to press it too much, then all the hand sewing: I catch-stitched the hem of the skirt and sleeves, then slipstitched the lining to create a jump hem.


I had originally entertained ideas of having the front lapel be "reversible," so that it could flip closed to be a double breasted coat, or stay buttoned back to show the velveteen facing. I even took a hand-sewn buttonhole class with that in mind, but in the end my samples were still too messy and the idea of doing twelve of them was just...no. Besides, I like the contrast of the red velveteen; without that showing, the front of the coat is just too much damask and the collar and cuffs look a little out of place. So rather than make ugly buttonholes, I just permanently sewed on the buttons. To close the coat, I just used a giant hook and eye. Joann's only carried white ones, so I used a combination of red Sharpie and brown fabric marker to color it dark red to (somewhat) match the fabric.


Summary:
Pattern: I used the collar from Simplicity 2333, the cuffed sleeve from Butterick 6602, and the skirt from McCalls 6819, then frankenpatterned the last two together to make a shoulder-princess-seam bodice, that I then extended past the center front so that it could flip back to make the lapel. The slant welt pocket with a flap was modeled after the one in this very helpful Waffle Patterns tutorial, but just rotated to be more horizontal than vertical.
Fabric: The main fashion fabric was curtains that I thrifted at least four years ago, a surprisingly nice 60/40 poly-cotton red and gold damask. Once I picked apart the seams, I ended up with three 40"x88" panels. The red cotton velveteen (I used about 1/3 yard) was from the college's free shelf, a place where students can pick up other people's destashed fabrics. The lining was two different secondhand sheets; the torso was a microfiber with a faint swirl pattern, and the skirt was a cotton sateen.
Notions: Armo-Weft fusible interfacing from The Sewing Place, then the cotton twill tape, horsehair canvas, and metal buttons were all already in my stash.
Total cost: $20 for the curtains + $4 for the sheet + $18 for the interfacing (but with lots leftover) + $6 for the patterns + $5 for the bulk bag of buttons ages ago + $3 for thread = $53 total. Of course, once you factor in the 57 hours, even if I paid myself a measly only-slightly-more-than-CA-minimum-wage $15/hr, this coat is worth almost $1000. And this is why bespoke clothing made at a living wage is so expensive. Good thing sewing is my superpower?
Would you make this again? No, because I don't need two pirate coats. TBH, I'm not sure I needed *one* pirate coat, but hey, it's 2020, treat yo'self.
First worn: Just to take pictures, because we aren't going anywhere, since, you know, global pandemic.
Final thoughts: When I think back to when I first started sewing, I was pretty much allergic to anything involving hand-sewing and would avoid it at all costs. Thankfully, I got over that, and now I actually enjoy the process of slowly and methodically catching mere threads at a time as I invisibly stitch hems. That, and the whole fussy tailoring process, was actually really fun and you can't argue with the results. I can see how people get addicted to tailoring and/or jacket-making. Unfortunately, I don't see myself indulging in this process too often, as I have too many demands on my time and projects on my bucket list to allow for such slow sewing. Still, I'm really glad to have finally checked off one of those projects on the list, as well as moved some fabrics out of the stash!

When I had Mr. Cation take pictures for me, I of course had to wear my over-the-top tricorn with the coat, since it's all trimmed in red and gold. Then, to my chagrin, he said that the hat+coat combo made me look just like Captain Morgan. I had no idea that he was even a thing, but once I got over the fact that I accidentally cosplayed a cheap rum mascot, I of course had to do a pose with my foot up on one of our barrel planters.
