

I never thought that having a second child would result in my finally making all my dream cosplays, but something about having another drain on my energy/time made me think "oh f*** it, things are never going to ease up so I might as well just do it now." Since I've had BBG, I've done my Asian-inspired Wonder Woman, victorious Mulan, and many other dream cosplays, and Glam Loki is another one! Loki is my favorite MCU character, both for his sartorial style and his snark+angst. (what can I say, I love me a well-dressed antihero...see also: Thranduil, Ballister Blackheart, BBC Sherlock, and Prince Zuko). I did an Asian-inspired version of Loki for the Thor: Dark World movie many years ago, but wanted to do another one with more of a nod to the overlapping torso pieces on his original Thor costume. I bought Simplicity 2253 many years ago with an eye toward making a glamorous genderbent version of Loki, but just never had a reason or enough courage to tackle the 30+ pieces that I would have to cut out...until this year.
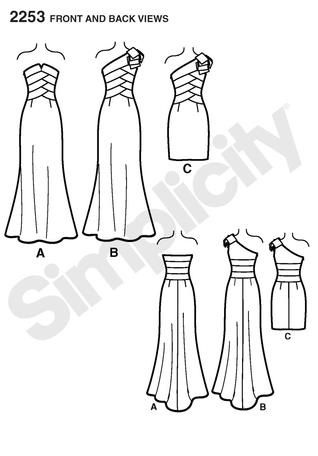 |
| I made view A. |
I've been taking fashion design classes at Canada College for oh, six years now, and one of my favorite professors is Lynda Maynard: she's hilarious and so knowledgable and I just like her teaching style. I've taken all her classes (French moulage, pants drafting and construction, bustier, and copying RTW) and was kind of bummed when I had finished them all, so I was super excited when it was announced that she would teach Evening Gown Construction over the summer. I was a little less excited when I found out that we would be making a strapless gown, as my only foray into strapless gowns was not my favorite. I kind of had this idea in my head that only certain body types could pull them off, and mine was not the right kind; spoiler alert: I was wrong. Thank goodness for education and expanding ones' knowledge, right?
 |
| I have not yet, however, expanded my knowledge when it comes to doing hair for cosplays. |
Besides learning lots of tips and tricks for working with tricky fabric (velvet! chiffon! sequins! things cut on the bias!), I also learned that the key to making strapless gowns work (i.e. stay up without lots of periodic tugging) is having a well-fitted corselet underneath. A corselet differs from a corset in that the former is meant to be a close-fitting garment that conforms to the curves/shape of the wearer, but is not meant to change one's measurements or silhouette. A corset, on the other hand, is a garment that is specifically worn to change the measurements or silhouette of the wearer (think wearing an S-bend corset to get the fashionable Edwardian silhouette, or any number of literary heroines tightening their corset laces to fit into their gowns). Having worn both, I can say that they can both be comfortable if fitted and made correctly, but they definitely serve different purposes and the latter is certainly more restrictive (but not in a painful way, unlike all those corset myths about women removing ribs and fainting all over the place!). In a lot of ways, the corselet is similar to the bustier; the only real difference is that a bustier is meant to be a standalone garment, so it has an additional fashion fabric and lining layer.
 |
| Front view of the corselet on Cecily, who is close to my measurements but not quite the same. |
 |
| Back view. |
 |
| Side view. |
My corselet was made from unbleached muslin, but any tightly-woven, thin, stable natural-fiber fabric can be used; other recommendations were cotton batiste or bobbinet. Essentially I made the lining pattern of my dress twice, then stitched the two layers together, sandwiching the steel boning in between. I also added a grosgrain waist stay and decorative lace and the whole thing closed with lingerie-style hook-and-eye tape.
 |
| Did it bother me slightly that the hook and eye tape was bright white and the muslin was unbleached ivory? Yes, yes it did. |
 |
| You can see the boning placement (and my humongous seam allowances) really well in this backlit picture. |
The finished corselet is then hand tacked at the top only to the neckline of the evening gown. Because the corselet is fitted perfectly to one's body and lengthened by an inch to combat the inevitable settling over time, it serves to hold up the weight of the entire garment and no awkward tugging up of the gown is required! I know this is true because I wore this gown for a whole day at Silicon Valley Comic Con and did not once fear a costume malfunction.
 |
| Don't judge my hand stitching please. |
Once I made the corselet, I had to cut out all the pieces of fashion fabric for the gown. It was both more tedious than I thought it would be (all those pieces, but x2 or x3, because I underlined the black twill with silk organza, and some of the pieces had an additional lace or gold taffeta or green velveteen layer!) and easier (the actual construction is easier than it looks; no weird pivoting around angles because of the order in which it's sewn). The back closure is a hand-picked zipper which disappeared beautifully into the green panné velvet of the skirt and the black and gold lace of the bodice.
 |
| Tiny prick stitches! |
I did run into a problem that turned into a happy accident when it came to piping the front upside-down V. Since I was trying to avoid buying anything new if at all possible, I used some gold lamé bias tape that I had leftover from a previous project. After I sewed it in, it looked too flat, so I had the (I thought) brilliant idea of plumping it up with some white pipe cleaners I had. Unfortunately, since I was inserting the pipe cleaner after sewing, I poked a hole through the fragile lamé, right at the center front! I tried to stitch it down with some gold thread to keep it from getting worse, but it just made the issue more obvious because there was a giant lump of messy handstitching. On the day my gown was due, I had an epiphany and realized that I could cover it up with the gold necklace I'd originally bought to wear with this gown. I found it at a thrift store and thought it perfectly echoed the little curved gold piece of Loki's first outfit, so instead of wearing it, I detached it from the chain and sewed it to my gown. The concave back fits perfectly over the ugly bit on my gown and I honestly like the look better than my original plan.
 |
| Look at the shameful bunch of hnnnghhh in the middle! You can see here that I already started trying to cover it up by hand-stitching a little piece of of green material over the mess. |
 |
| Glorious. Like it was meant to be there. |
Once I finished the gown, I decided the skirt portion needed something more in order to bling up all the green, so I added gold chain "draperies" to the hips. I'm toying with the idea of making some kind of necklace that has similar gold chains draping over the shoulders to visually break up the expanse of neck and shoulder skin. When I wore it at SVCC, it felt like it was missing something and maybe that would help visually tie it all together? Or maybe it'll just look too busy?
 |
| I measured out two sets of four chains in increasing 2" increments, then attached them all to jump rings that I sewed to the center front point. |
 |
| On the back, I attached them where the lace panels end. |
To go with the dress, which was only subtly Loki-ish, I decided I needed to make his signature humongous horned headpiece. Googling and Pinteresting (I know the former is a real verb now, but the latter definitely isn't) turned up Red Shoes and Wine's Burlesque Loki, so I followed her brilliant lead and used a sawed-up floral heart to make the horns. After carving and sanding it down, I used wood filler to coat it all, sanded that down too, and painted it with a base layer of brown acrylic craft paint, several layers of gold, and finally a matte polyurethane coat to seal it. I cut out the rest of the headpiece from craft foam and painted it the same way, then hot-glued it all to a flexible headband. To make sure that the horns wouldn't detach themselves suddenly, I used two tiny nails to poke through the craft foam and into the styrofoam. The flexibility of the headband meant that I could bend it around my forehead enough to get it to stay, as long as it wasn't too windy, I didn't look too far down, or turn too suddenly. Since Loki would definitely have some blinging huge rings, I purchased the largest green and gold beads (I don't know if there's a better word for them; they're flat and have the holes situated such that they would be perfect on a bracelet or choker) I could find and strung them on black elastic cord to make matching rings. I borrowed some gold cuffs from my sister, and of course, I had to break out my Chitauri scepter from my Asian-Loki in order to complete the whole look. Thankfully, the batteries were still working and all I had to do was touch up some paint.
 |
| Accessories! The gold at the bottom is a purse that I ended up not using. |
 |
| The staff looks pretty good still, even after hanging out in a closet for several years! |
Summary:
Fabric: Muslin for the corselet; black twill (Han Solo vest remnant), black silk organza (secondhand from the Canada College free shelf), black and gold lace (remnant from Dark Garden, purchased during a trunk sale), gold poly-taffeta (inherited stash), and green poly-velveteen (inherited stash) for the bodice; stretch green panné velvet (leftover from McGonagall) for the skirt
Notions: Cream-colored lace hem tape and bias tape (inherited stash), pink grosgrain ribbon (FIDM store), spiral steel boning (leftover from Elaine's wedding dress) and hook-and-eye tape for the corselet; gold chain, zipper, and nylon horsehair braid for the dress
Hours: So. Many. I made a test muslin of the corselet as well as the dress, then there was the actual construction of the whole thing. Basically it was my main project for the eight weeks of class. I'd estimate upwards of 50 hours.
 |
| My muslin fitting of the pattern. |
How accurate is it? Seeing as how it's my own imagining of the character, it's extremely accurate, hah! But in all seriousness (as serious as one can be about a cosplay outfit), despite the upside down overlapping torso pieces (the original outfit is Vs; mine are flipped the other way because that's what the pattern was), the color scheme was enough that when I wore the gown (sans headpiece and staff) for the class final showcase, people asked if I was meant to be Loki. And of course, with all the props, it was pretty obvious at SVCC, and it was gratifying to see people's eyes light up when they recognized my cosplay.
Total cost: $92 for the cost of the class, $64 in bridge tolls and parking permits for the eight sessions, about $20 worth of muslin, $10 for various notions, $6 for a floral heart, $3 for a headband, $4 for the beads for the rings, and all the rest was from stash. Did all my driving back and forth by myself negate the sustainability efforts of trying to avoid buying new fabric? Sigh, probably.
I am trying really hard to be more green in my costuming efforts and going with stash or secondhand materials whenever possible, even when it's tempting to buy something shiny and new (all those sequined fabrics and laces and burnout velvets -- Jo-Ann's has really upped their game, yo!). The unfortunate reality of living in the East Bay, though, is that all the classes I really want to take are going to require a drive somewhere, so yeah...it's not easy being green. My consolation is that I would've taken the class anyway, and at least I made a conscious effort not to unnecessarily purchase new fabrics.

I found a Professor McGonagall (in a cloak of much nicer velvet than mine) so of course I had to take a picture with her:
