Thursday, July 31, 2014

The Geekiest Baby: A Brain-Stimulating Mobile

Earlier this week, I shared my frustration with gender-ified, bland baby things and did my best to rectify the situation. Well, another pet peeve I have is how baby things tend to be so pastel. It's like somebody took a normal room or item and then turned the color saturation dial waaaay down. This strikes me as silly for a couple of reasons:

1) Babies are dirty (so I hear). If they're going to be spitting up and pooping on things, shouldn't we be going for darker colors and busier patterns to camouflage those suspicious stains? This is exactly why I got a dark gray car: so that it's less obvious that I haven't washed it in over half a year. (Unfortunately, this doesn't work as well for dark clothing, since it just serves to better show off all the cat hair I've got on me.)

2) Babies don't register all those washed-out colors very well. Child development research shows that a baby's visual development is best stimulated by high contrast patterns, specifically with the colors black, white, and red. Of course, by that token, the ideal nursery theme would be Tim Burton's Sweeney Todd or Alice in Wonderland costume wardrobe. Unfortunately, I don't think a murdering barber who promotes cannibalism is the most appropriate role model for a Small Human Being...

Anyway, as I said, SHB's nursery theme is "Enchantment Under the Sea," so rather than spend money on a pastel mobile that couldn't even be bothered to include more than one type of sea animal (although the coordinating bedding *is* awfully cute, I must admit), I figured I could just make my own. There are lots of tutorials out there showing how to make a mobile with varying levels of complexity, and there are templates out there with high-contrast black and white patterns, so with the help of this tutorial, I came up with my own low-budget, under the sea themed mobile. 

Featuring waves, a starfish, a sailboat, bubbles, coral, a generic fish, and a crab with the wrong number of legs...

All dangling from an embroidery hoop!

The shapes were free-handed onto some stash felt and fleece scraps, then I sewed some twill tape to the backs for hanging. I thought about painting the hoop and getting black and white ribbon, but decided that I didn't care enough, so I left the hoop alone and just used leftover wedding ribbon for hanging everything.

It's not as clean and pretty as some of the tutorials, but it's functional (as long as you're not expecting it to play music and twirl around).

The patterned squares can theoretically be switched out for other ones. I don't think I'll be making more, though...


Now that I look at it some more, I find the crab's smile really creepy. 

I WILL HAUNT YOUR DREAMS, SEARCHING ENDLESSLY FOR MY MISSING LEGS. 

Next up: under the sea themed art!

Sunday, July 27, 2014

The Geekiest Baby: Totoro-Themed Bouncer

As Mr. Cation and I have been preparing for SHB's arrival, we've noticed a couple of things:


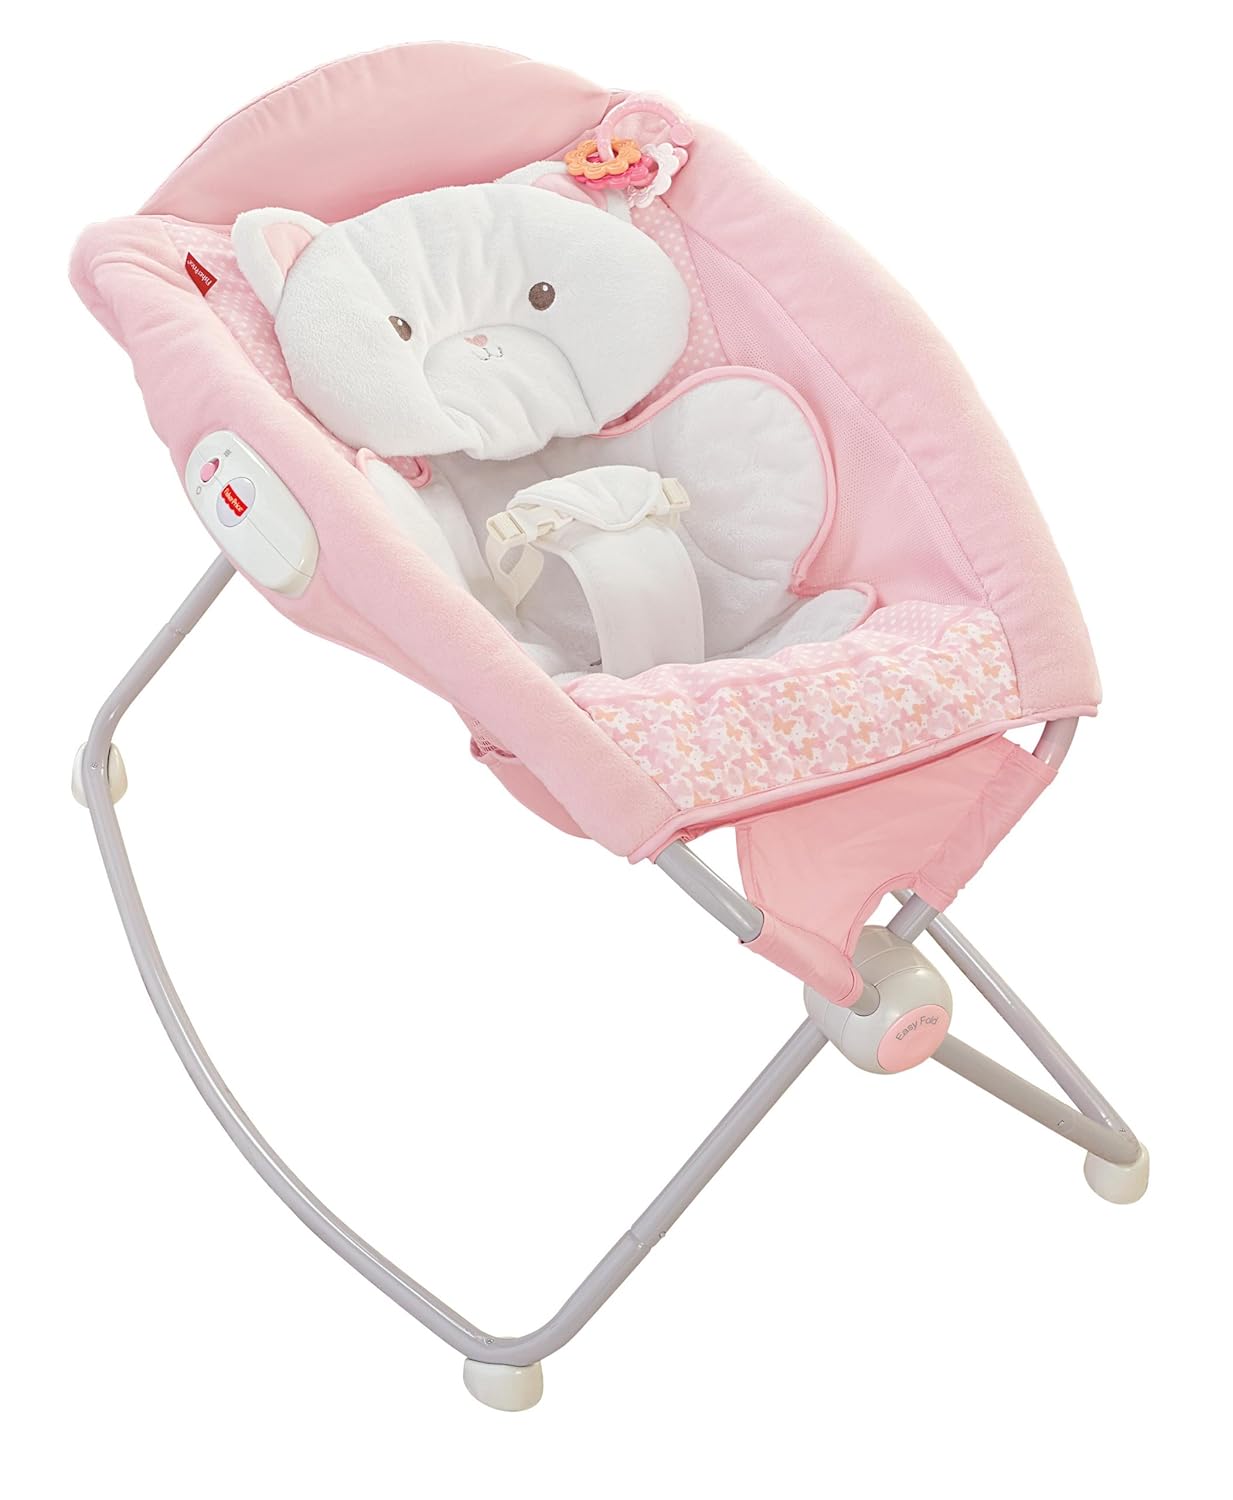
1) Cat-themed baby things are inevitably pink. It's like baby item designers/manufacturers all think cats = girls and dogs = boys. Even if SHB were a girl, I don't like pink that much, nor do I want to financially support the erroneous idea that only females can love cats.* So a cat-themed nursery is out. (While I could make quite a few cat-themed baby things myself, namely the textile-based items, I don't feel like making an entire baby arsenal.)

2) Since we're not going cat-themed, we decided to go with an "under the sea" theme instead, for no reason other than that it seemed gender-neutral and with geek-potential (I mean, how cool are hagfish, blobfish, and anglerfish!) without buying into lots of licensed merchandise (e.g. Star Wars or superheroes). Also, whale-themed baby bath things are both plentiful and ridiculously cute.

2) But unfortunately, baby things are expensive! If we thought wedding planning was bad, baby planning is even worse. Slap the word "wedding" or "baby" on anything and the price goes up. So buying everything new is out of the question, not to mention very consumeristic and unnecessary. I'm trying to make what I can (but I'm also giving myself permission to not feel like I have to make everything just because I can), but some things we are buying used.
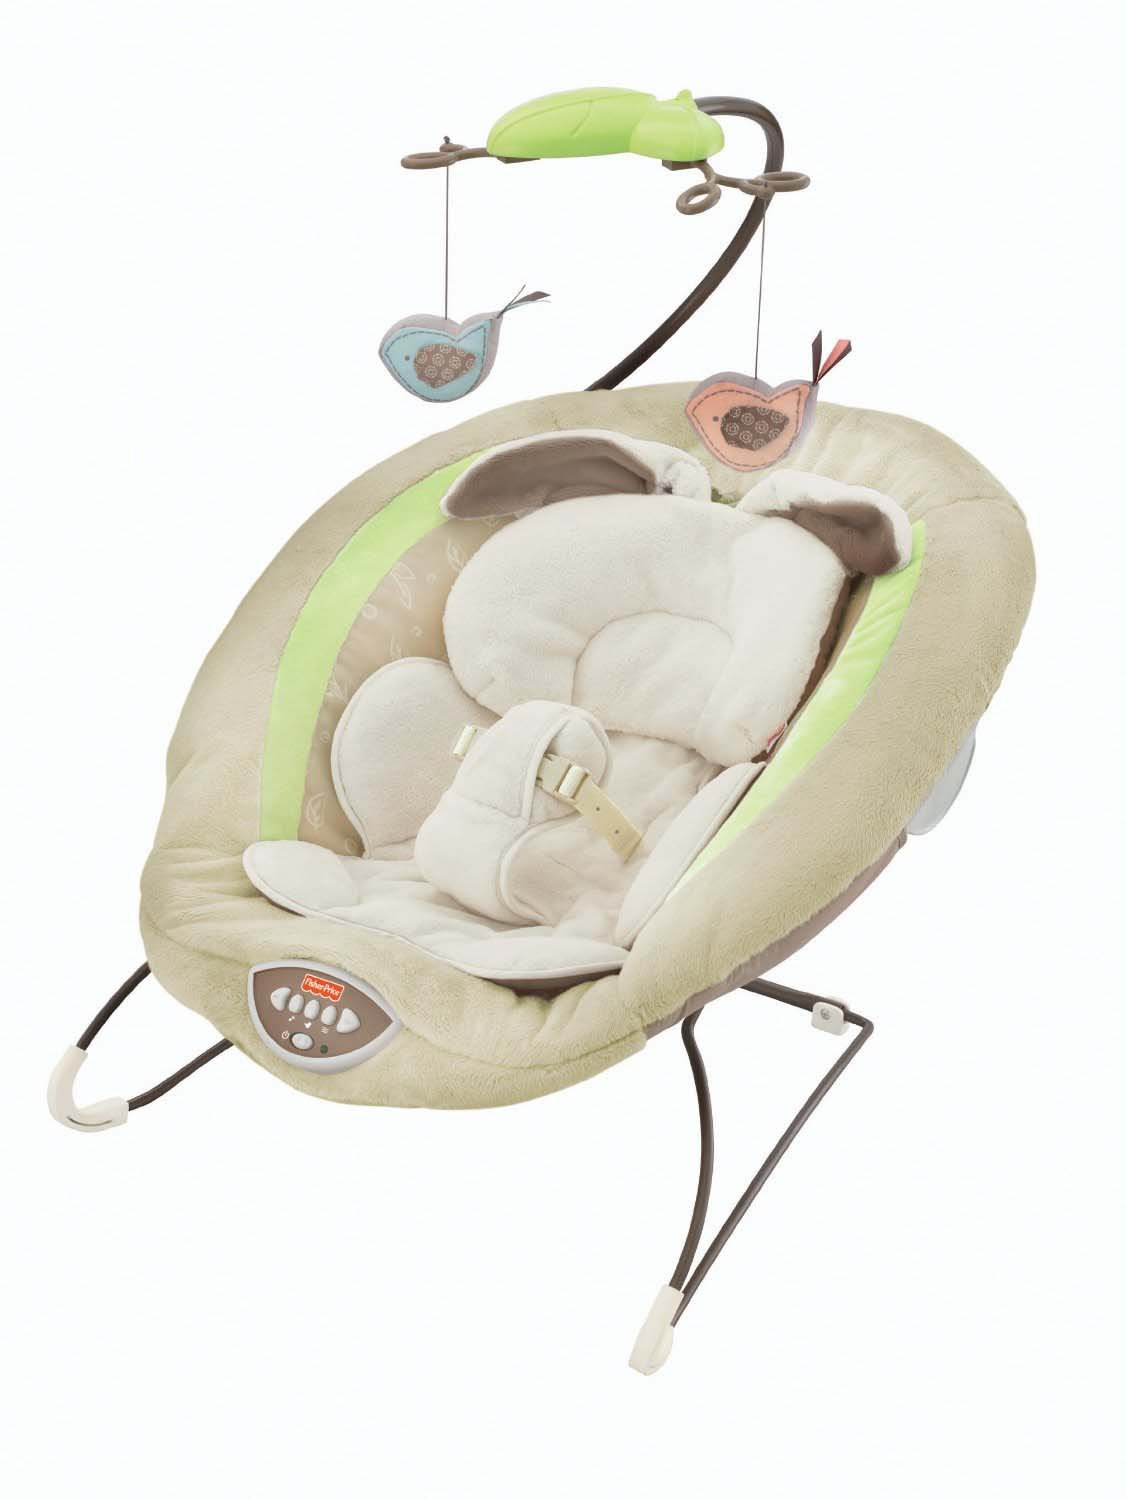
Like this bouncer:

I got a great deal on a used one in good condition, but I was bothered for a really superficial reason: the "Snugabunny" theme. I have no sentimental attachment to bunnies or birds, but even if I could change up the textile portions of the bouncer, there's still that plastic leaf that is decidedly not marine in nature. I know, I know, SHB won't care and it certainly doesn't matter in the long run if all the baby things coordinate...but a tiny part of me still cares! As soon as I brought the bouncer back home, I started wracking my brain trying to think of how I could, if not marine-ify it, at least geek it up some so that it wasn't so...bland. As I thought more about that annoying leaf, though, I was reminded of all the times you see Totoro and his fellow forest spirits holding or wearing leaves.

A quick rummage through the stash, some frenzied measuring and sketching, and a couple of late night sewing sessions later, I had this:


Sometimes I impress even myself. I'm sorry, was that too self-congratulatory? It's the truth, though! I really am quite pleased with myself for figuring out how to make a unique cover that fits with the bouncer's green leaf elements. And the soot sprite dangly things are high-contrast black and white shapes to boot!


It was actually pretty easy to make this Totoro cover, since he's a fairly simple shape oval shape. The trickiest parts were probably trying to decide how I wanted to 1) make the holes for the straps, and 2) how to make the cover fit over the existing cushion.

The main shape is simple enough. I did manage to put the V's on slightly off-center though. Not so consummate after all, I guess. 
I decided on this arrangement on the back so that I could just slip the cover over the existing cushion. I underlined the front piece with some anti-pill fleece so that the lumps from the original cushion would show through the thinner gray fabric, and also to provide some stability for sewing on the facial features.  
Its face from the underside looks a little creepy, doesn't it? Like some weird Sith Lord wearing a hood.

The grosgrain ribbon strap helps it stay on the existing cushion. 
I ended up just making rectangles with a zig-zag stitch and then cutting a slit in the middle (like really huge buttonholes) for the straps to come through. 

The soot sprites seemed like the perfect way to complete the Totoro theme; they were just little circles of black fleece that I cut out with my pinking shears (for the fuzzy sooty outline, you know) and sewed and stuffed.

Ignore the creepy wide-eyed Totoro stare in the background...

I sewed a piece of twill tape to the back so that I could tie the sprites to the plastic arm of the leaf. 

Summary:
Fabric: Less than a quarter of a gray sheet, yellow fleece for underlining, and scraps of cream-colored rayon jersey knit, white fleece, and black fleece
Notions: Steam-A-Seam to fuse the gray V's to the Totoro's tummy, grosgrain ribbon and velcro for the strap in the back
Hours: About seven? I took my time handstitching the facial features, but everything else was quick to do on the machine.
Will you make it again? Not unless I have a really good reason to.
Total cost: Considering that this was all made with stash fabrics leftover from other projects, I'm going to say that this cost less than $5.
Final thoughts: I'm really pleased with how much more personalized this bouncer is now! Mr. Cation suggested that I make a Totoro outfit for SHB and a hoodie for him, then we can do family pictures with this bouncer and Walnut the Catbus (he certainly has the right coloring!).

What's this? Who are you?

I'm not too sure about this guy and his unblinking stare...

Me and my buddy the soot sprite are just gonna hang out on your face, if that's okay with you, Mr. Totoro. I guess you're alright.


This is just the start of what I hope will be the geekiest set of baby things ever. I've been nesting like crazy, so I've got some other cool crafts to show off (if you follow me on Instagram, you've already seen some previews!) in the coming week(s).

A more pinnable image, in case anyone else needs geeky nursery inspiration!


*Apparently, as early as 2008, it was becoming more okay for men to love cats! I'm so glad that Mr. Cation loves Walnut as much as I do. I think men who love cats really are better, and I certainly hope SHB becomes one!

Friday, July 25, 2014

My Neighbor Totoro: Now in Wearable Form!

The first Hayao Miyazaki film I ever saw was Tonari no Totoro, or My Neighbor Totoro. I think I was already in high school at the time, but I was still utterly enchanted by the adorable little soot sprites and forest spirits, the ridiculous catbus, and of course, the giant Totoro. I loved it enough to get (okay, cajole my my mom into getting for me) a giant plushie from Hong Kong that we had to buy a new piece of luggage for in order to transport home. I've always wanted a wearable something with Totoro on it, but the licensed merchandise has always felt too expensive for my budget...but wait! I sew! I guess it was only a matter of time before I matched up the Totoro tummy to the free By Hand London Polly top pattern.

Is that inset panel perfect or what?

Of course, it doesn't hurt that at two months to go, I feel as huge as a certain big-bellied forest spirit...

I know, I know, it's only going to get bigger. 

I have a hard time wrapping my mind around that thought, though...

I decided I wanted some sleeves on this top, so I slapped on the flutter sleeves from Tanit-Isis' Ariadne tunic. I don't know why I love flutter sleeves so much (they're always impractically bulky when stuffed into a cardigan), but I do. I think these nicely complement the flowiness of the top. Obviously I didn't have to finish the armholes with bias binding anymore, and then the neckline is my standard knit neckline finish, and I didn't bother with hemming. And because I was really that lazy, I didn't even bother to actually set in the inset -- I just laid the whole thing under the outer part and topstitched it, and rather haphazardly, I might add. Probably the most time-consuming part of the whole project was determining the size and placement of the little upside-down V's on the inset. I cut out a bunch of sample V's and experimented with what looked right, and then attached the final shapes to the inset with some fusible web.

Confession: if you follow me on IG you know I actually made this top two months ago, but am only just now getting around to blogging it. 
Consummate V's! I said consummate!

Summary:
Fabric: 2/3 yard of light gray rayon jersey from the East Bay Depot for Creative Reuse, a small piece of white rayon jersey for the inset
Notions: Lite Steam-A-Seam 2 for the appliques
Hours: Less than three? I love fast and gratifying projects!
Will you make it again? Pretty sure I will, considering that this is the third Polly top I've made!
Total cost: $1...much better than a $20, mass-produced, non-flattering top!*
Final thoughts: I feel like I should make Walnut a Catbus costume to go with my top. Hah! Who am I kidding, he would hate that. Anyway, I love that this loose, swingy top has taken me from second trimester to third trimester, and there's still room for more growth. The thin fabric makes it a perfect top for the 90 degree weather we're having right now. California's drought really makes for a different backdrop for pictures than the lush green Japanese forest where Totoro can be found!


I've got another Totoro project to show off next, but it's for the SHB this time...stay tuned!

*Have you seen this? Considering that this top is unique, suits my changing body, and expresses my fandom love, I had fun making it, and it was made with cheap fabric on a cheap machine with free patterns...I think sewing my own clothes is definitely worth it.

Wednesday, July 23, 2014

Copying RTW Clothing Using Silk Organza

As I mentioned in my last post, I took two classes this summer at Canada College, one of which was Copying RTW with Lynda Maynard. I wasn't really sure what to expect from this class, especially since I've already copied a couple of my favorite RTW items both by taking them apart, and by using the pin-stabbing method (pretty sure that's not the official name, but that's what I call it). But then, I thought I already had a good idea of what I was doing when I went into Lynda's bustier construction class (because you know, I'd already made up that pattern once), and yet I still learned tons. By now I know that Lynda is full of useful tips and of course she has years of experience, so I went ahead and signed up for the class anyway.

Lynda's method is very different from the more slapdash pin-stabbing method, and just as precise as the deconstructing-a-garment method, except that it doesn't require taking the garment apart! I'll do my best to give a brief overview of the process. She recommended that we start with a striped or plaid woven garment, just to make the process more straightforward. To be honest, there aren't that many RTW woven garments I wear anymore aside from jeans (partly because my shape is constantly changing, and stretchy garments are so much more comfortable, and partly because most of my woven garments even from pre-pregnancy are me-made!), so I decided to try rubbing off one of Mr. Cation's casual button-down shirts. It's originally from G by Guess, and was quite pricey, but it's got some interesting style lines. Most importantly, though, it's plaid, so the grain lines are very easy to follow!

Here's what the original shirt looks like on Mr. Cation. 

Least favorite part: the huge honking piece of embroidery on the back. 

It's important to be able to see the grain lines because the first thing we did was use brightly colored thread to trace the grain lines (and seam lines, if they are hard to see) on each individual piece of the garment. Lynda recommended that for large pattern pieces, (e.g. the center back piece), we put in multiple grain lines for reference points.

I almost didn't need to put in my thread tracing because the plaid makes it so easy to see!
Here's the interesting little front piece that makes this shirt so unique, all thread traced.

After the grain lines are all marked, we measured the distances between them and penciled in the same lines on silk organza pieces that were cut to be about the same size (but slightly bigger) than the individual pattern pieces. It's important to use silk organza because 1) it's see-through, 2) it's flexible but still fairly stable. (One could technically use poly or nylon organza, but those tend to be shiny and harder to work with.) We then pinned the marked-up pieces of silk organza to the garment by matching the grainline thread-markings to the pencil markings. From there, it's just a matter of smoothing the organza over the rest of the pattern piece and pinning the heck out of it.

I'm pinning the silk organza to the bias-cut outer yoke piece here.

In this way, you are mirroring the pattern piece shape with the flexible organza (this is why it's better than trying to spread out the garment on paper and pin it), which theoretically makes it easier to rub off complex garments with weird, curved pieces. Once the organza is pinned to the pattern piece, you use pencil to mark the seam lines and any other places of note, e.g. where pattern pieces join or pleats and darts. When you unpin the organza, the shape of the pattern piece should be all sketched out!

Here's how the front piece and collar pieces turned out when traced onto the silk organza. The solid lines are my grain lines to match the thread tracing, and the dashed lines are my rub off of the seam lines. 

The sleeve, with markings showing where the button tab, sleeve placket, and pleat went. After unpinning the silk organza, we had to go back and measure all the seam line lengths to make sure that we rubbed it off correctly. Then we had to measure all the seams that went together to make sure that they matched. All this work paid off, though, since by the time it came to actually sewing, we were assured of an accurate pattern where all the pieces fit together perfectly!

Mr. Cation's shirt was pretty straightforward to rub off; some people in our class had bias-cut cowl necks, crazy gathered sleeves, lace insertion, and other design elements on their garments. It'll be interesting to apply this method to a more "difficult" piece to see how it works! In the meantime, I transferred the markings on my silk organza pieces to paper, then sewed up a muslin.

And here's what it looks like all laid out. Look at those nice sleeve plackets! It's the first time I've ever done a real tower placket, thanks to the helpful Threads tutorial and pattern. I did manage to sew my first one on inside out, though...

According the Mr. Cation, the fit feels the same (as it should!), although there was a moment of alarm when I presented the muslin to him and he was like, "This isn't going to be the real shirt material, right?!"

Front.
And back.


The whole process was definitely more time-consuming than a pin-stabbing rub off, but the results are incredibly accurate. Lynda's only caveat was that if one is doing a rub-off with stretchy fabric, one has to be very careful not to distort the fabric in any way, and then of course there's the challenge of finding a fashion fabric with the same amount of stretch and drape. Generally, though, I'm pretty excited about this method. There are a lot more details that she went over in class, like how to transfer the darts and such, but apparently you can find all of the same information in Kenneth King's CD book (I'm not being paid to link to him, just passing on the information in case anyone is interested!).  

I'm not sure when I'll get around to actually making this shirt in real fabric, what with school starting in a month and SHB coming the month after that...also, Mr. Cation is incredibly picky about what he wears, so finding an appropriate plaid will be a challenge! Where do all of you ladies who sew for your significant others find good shirting material? 

Thursday, July 17, 2014

My First "Official" Costume Design

Things that bug me:
1) Bloggers who disappear for weeks on end, then suddenly announce that they're pregnant.
2) Bloggers who say they'll do better about updating, then don't.
3) Bloggers who come back after a lengthy absence and post totally unrelated things (i.e. not sewing, if it's a sewing blog).
4) Myself, apparently, since I did/am doing all of the above this year. Here, have a non-sewing-related blog post!


I just finished a couple of intense summer school classes at Canada College: Intro to Costume Design, and Copying RTW Garments. I'll talk about the second one in another post (who knows when that will actually happen!), but I just wanted to quickly share my final assignment from the first class. We were supposed to design a costume for a character from any work of literature, TV show, or movie, complete with an essay about how we arrived at the design, a detailed sketch, and even fabric swatches if applicable. Thankfully, we didn't have to actually make the costume, since mine would have been way more work than I had time for (and also beyond my skill set/budget).

In keeping with my only other real previous costume "design,"the Girl on Fire dress, I decided to go with another Hunger Games character, Annie Cresta. And because I can't stay away from flowy, special occasion dresses, I designed her wedding dress. In Mockingjay, all we get to know is that the dress is green silk and that Cinna designed it for Katniss' victory tour. I took the idea of Cinna-awesomeness+ocean-themed wedding+mercurial, delicate-but-strong character and came up with this:

I sketched this in pencil first, then went over it with my super-fine #005 Micron pen that I haven't used since my anime-fanart-drawing-days in college. Do you know how ridiculously difficult it is to draw something as flowy as chiffon and make the draping look not totally stupid? I can't wait to take fashion illustration classes, but in the meantime I settled for looking at lots of reference pictures online. The color pencil was added at the end. 

Then I had to write a few pages of blather about it all -- my first real essay since graduating from college -- but it was definitely easier to write about character history and fabric choice than say, changing cortisol levels depending on how stressed one is. Here's an excerpt of my expert BS-ing:

The only description we are given of Annie’s wedding dress in the book is that it is green silk. However, we do also know that she chose it from the collection of dresses that the main character wore on a government-sponsored victory tour, and was designed by one of the foremost designers from the capitol. It must, therefore, be quite elaborate despite its use in a secret rebel wedding. We also have clues as to the sea theme of the wedding from the descriptions of the wedding cake, ceremony, and ocean-centered traditions of District 4. Because of all these hints, I chose to design a dress that is luxurious, and yet maintains the simplicity of Annie’s character.
            I chose an ombre teal-green silk chiffon as the main fabric of Annie’s wedding dress. With her fragile beauty and mental state, it seemed appropriate to echo that in the fabric’s ethereal, delicate quality. Its drape and movement are also ideal for simulating the waves of the ocean; because Annie picks this dress out of many other options, there must be something appealing about it, and I imagine that being reminded of her home and natural environment would be comforting on her wedding day. The bodice is ruched chiffon over a structured, boned foundation, representing Annie’s somewhat messy, disorderly outer presentation, but also inner strength in persevering despite the tragedies she has witnessed. Like the ocean she grew up on, the skirt is full and free to move; this symbolizes both her husband’s unconditional acceptance of her despite her shortcomings, and the potential for their new life should the government be successfully overthrown. The frothy white underlayer of the skirt further mimics the foam of the ocean, and small accents like a fishhook rope belt, shell jewelry, and a fishing net fascinator bring the whole ensemble together. 
I know, super embarrassing...I just shared some of the worst writing academic writing ever. But hey, I got an A on my project, thankfully!

For the Copying RTW class, I had to make a rub-off of a woven garment. Seeing as how I'm currently seven months pregnant and have no idea what size I'm going to end up eventually, I settled on making a copy of one of Mr. Cation's casual button-up shirts. I'll post more about the process and what I made soon(-ish)!

Incidentally, I also have three actual finished garment posts all written up, just waiting for pictures. I don't know what it is about being pregnant (oh, try a huge belly, maybe?) that makes me not want to take photos!