Showing posts with label Pants. Show all posts

Saturday, July 9, 2016

"Captain America Goes to the Gym" Shorts

I've been experiencing a serious lack of sewjo ever since I sewed up SHB's Tako Hat (which was over a month ago). I've got a pile of underwear cut out but the thought of assembly-line sewing such boring basics (that nobody will even get to see!) was too boring to stomach. So I signed up for Gillian's sewing dares, hoping for a kick in the pants (shorts?). I think it worked, because her dare for me was to sew something 1) selfish, that 2) I missed from my pre-baby wardrobe. I haven't sewn a pair of pants since before SHB was born, but I didn't want to jump right back in with a fitted pair and have to deal with a fly front. I also only have one pair of woven shorts that fits me right now, and those are white, which is pretty much a no-no if you're running after a sticky-handed toddler all day. I knew I needed something relatively fast and easy to jump start my sewing, so I settled for elastic-waist shorts in a dark color to fit the gap in my wardrobe.


I used the City Gym Shorts pattern from Purl Soho (thanks to Leah of Struggle Sews a Straight Seam for cluing me in to this free pattern's existence!) and some scrap navy fabric leftover from my Han Solo pants. Since I was sewing the night before Independence Day, I figured I would patriotize them by choosing an appropriate color trim. I was going to do either plain red or white, but serendipitously Heather posted the tutorial that Sew Tawdry did for a two-color trim application. Her instructions were the perfect inspiration that I needed to dress up my shorts.

Exposure upped to show the crotch fit, although the actual colors are more accurate in the first collage.

Summary:
Pattern: The free City Gym Shorts by Purl Soho
Fabric: 1/2 yard of navy blue cotton twill from stash
Notions: A little less than a yard of 1" elastic, purchased at a grocery store in Italy, and vintage red and white bias tape inherited from another sewist's stash. I had exactly two inches of tape left at the end, which was good, because they don't make all-cotton bias tape anymore.
Hours: Four, mostly because of fiddling with the trim, then messing up irreparably and having to cover my mistake with a piece of grosgrain ribbon so that it looked like an intentional "label." And then having to unpick the waistband to shorten the elastic because I blindly followed the directions on the pattern without thinking to check the length first on myself.

And then my topstitching went all wonky on my "label," so I had to go back and fix that after SHB went to bed. 

Will you make it again? Yes, because I love the length and ease of these shorts! Although probably not with the fussy trim. I also want to smooth out the "J" of the crotch curve a little bit more, since I still see some pulling there.
Total cost: Free, because stash. Go me!
Final thoughts: I'm pretty sure my dad had gym shorts like this in the 70s, which is a thought that's neither here nor there, but still worth mentioning; it's probably why I find this look so vaguely familiar and slightly repellant? At any rate, I know these look like sporty lounge-at-home shorts, and not going-out shorts, but let's face it, all I'm going to be doing is chasing SHB around at the zoo this summer, so these are fine for that purpose.

This is what was going on in the background while I was taking pictures:
SHB was running around throwing his toy animals on the floor.

Thanks for the #SewingDare, Gillian -- it worked!


***
Okay, so I wrote everything above when I sewed up these red-white-and-blue shorts the night before Independence Day, and then I saw all the horrifying news earlier this week. Even though I had my pictures ready to go on the evening of July 5, I couldn't bring myself to post this entry yet; this was meant to be a patriotic pair of shorts, but I was having a really difficult time with America in general and it felt disingenuous to be posting something so rah-rah. I still don't have anything coherent to say about the tragedies of this week, but then I thought about Captain America: Civil War, and Steve Rogers' faith in people and how he tried his hardest to do what was right, his genuine grief over everyone who died on his watch, and I decided I was okay with making them Captain America shorts. I'd like to think Captain America would be all about #blacklivesmatter; also how dorky is it that I was vaguely comforted by a fictional superhero?

Tuesday, December 8, 2015

That Diagonal Pants Dart!

When I get emails about my blog, 90% of the time they're about one of the following three topics:
  1. I love that ____ that you made! Can you make one for me, or can I buy yours? 
  2. Thank you for making your free dolman-sleeve top pattern available! Or less frequently, thank you for making your free raglan-sleeve top pattern. Here are pictures of my finished garment.
  3. Your pants alterations post is so helpful! But what did you ever do about that back diagonal fisheye dart? I can't find the answer anywhere!

While I try to respond to most emails in a timely fashion, sometimes I forget or am too busy, and then by the time I rediscover the email, it's been months and it's too awkward to reply at that point. So here are my standard answers:
  1. I'm glad you love it; I do too! If it's a sheet dress, there's pretty much a zero percent chance of me finding the same fabric again, so unless you have the fabric in hand, no. If you want mine, no, it's mine. But most importantly, you probably can't afford me, so unless you have at least a hundred dollars at your disposal, no. And even if you can afford it, I may not have time, as I have a day job and a small human being to wrangle.
  2. This is my favorite kind of email. Thank you, thank you, thank you for taking the time to let me know! I love seeing pictures of how it worked for you! 
  3. Ah, now this one deserves more than just a quick one-line reply. And it happens often enough that I feel like I should save myself some time and just put the answer in a blog post for easy access. 
Ironically enough, after I made my other adjustments, I didn't need the diagonal dart anymore. As I mentioned in my post about the finished pants, there was still a little bit of looseness at the back, but it was necessary for sitting ease. When pants are skin tight, there's no room for flesh to shift when one sits, walks, and generally lives life. 

Of course, other people may still need this dart, so I've done my best to illustrate how to alter the back pattern piece. I'm using a tiny pants pattern piece (it fits on a piece of printer paper) to show the steps, so if it looks a little weird, it's because of the scale of cuts I'm able to do on such a small pattern piece.

I've sketched the dart take up here in pencil. 

Cut a diagonal line from the edge of the pattern piece, up the outer edge of the dart, and then a diagonal line back to the edge of the pattern piece. I've sliced it and pulled it slightly to the side here so that you can see where I made the cuts.  

Make a series of horizontal cuts on either side of the stitching line about 1" apart (mine are about 1/4" apart on this tiny pattern piece) so that the stitching line stays intact and the little flaps are free to move on "hinges." This is difficult to explain, and the photo makes it difficult to see some of the cuts...my apologies. 

Once the cuts are all made, you can line up the bottom stitching line and push the stitching line until the outer edge of the dart (which you've cut) now meets the inner edge of the dart. The points on the new stitching line may need to be smoothed out, but you've essentially just removed the dart take up while still keeping the pattern piece flat!  


Hopefully that helps if that alteration is necessary for you. I'm going to put a link to this post on the pants alteration post so that I don't have to keep repeating myself in emails!


Tuesday, November 5, 2013

Lessons I've Learned Regarding Pants Sewing

This is only my last two versions of my skinny pants draft...not pictured are the four that have since been recycled. 

I was going to title this "Final Thoughts on Pants Sewing" but that sounds like I'm done with pants altogether and have Figured It Out, which I most definitely have not! But I thought I'd share with you some of the things I've learned both in class and in the actual process of sewing.

In no particular order (and some of these are repeats of what I've said in various posts here and there):
  • Drafting from measurements is great and all, and it will probably give you a better fit than if you were to sew up your size from a commercial pattern (which is based on a block that may or may not be similarly-shaped), but it is not a miracle. Drafting still makes some assumptions about your body, about how those same thirty inches are distributed, about how your knees do or don't stick out, about your posture, about the angle at which your legs meet your pelvis, or even the amount of ease you prefer. My first draft was made to my measurements, but the drafting guidelines couldn't possibly have known about my swayback, my hyperextended calves, or that my lower legs come out of my knees at a funny angle. I still had to make corrections to my muslin, then transfer those to my draft, only to make another set of changes because the first set of changes affected how other things hung. Fitting is a trial and error process, and unless you are shaped exactly the way the drafting book thinks, you're still going to need to make changes. It's okay, you didn't do anything wrong, and your body is definitely not wrong
  • It's so much easier to see where changes need to be made when you have the balance lines drawn on your muslin. Having horizontal lines at the high hip lets you see when things aren't parallel to the ground, and having vertical lines up the middle helps you adjust things like grainline.
  • When making changes, it's way easier to just wear the muslin and have somebody else do the slashing, spreading, pinning, and seam ripping. Although I more or less managed with previous pairs of pants, it's dang hard trying to turn just your top half around to evaluate wrinkles without moving your bottom half. If you can pair up with a sewing buddy to have a fitting day, it makes life so much easier!
  • When making changes to your muslin, start from the top and work your way down, since the way the crotch fits will affect how the legs hang. If you make a knock-knee adjustment before correcting the crotch depth, you may find the first alteration unnecessary or just plain wrong. 
  • Sometimes the easiest way to tell what adjustments you need is to look at how your RTW pants fit (or don't fit, as the case may be). If the inner thigh area always wears out first/pills the most, that might mean a full inner thigh alteration (see #3 here for how to do that). If you're always getting a wedgie, you might need to slash and spread to lengthen the back rise (see #9). If, like me, you're always getting stuck in dressing rooms when trying on skinny jeans (true story), you might have very full calves...
  • Check your inseams: the front inseam should be about 1/2" longer than the back inseam. By sewing from the bottom up, and keeping the front and back at a 1:1 ratio up until the knee, and then stretching the back inseam to match the front above the knee, you make it so that the fabric will hug the back of your leg more in the curve under your butt. Totally makes sense, but I never would've thought of that on my own!
  • I already said this in the previous post, but it bears repeating -- make a muslin in a comparable fabric! "If you're going to make a paper garment, then go ahead and fit it in paper. But if you're planning to make a fabric garment, fit it in fabric!" This is especially true for pants whose final fashion fabric is going to be significantly different from cotton muslin in stretch, hand and drape. 
  • Of course, it can be hard to find comparable muslin fabric when your final pants are going to be made from stretch denim, so when sewing pants with stretch, baste together the pieces to check for fit before you insert the fly front or do pockets. My flocked brocade had a pretty significant spandex content (when it comes to stretch, even 2% is significant!), so I ended up taking in the side seam by about 1.5" on both front and back, and 1" on the inseam. 
The gray pencil lines are my skinny pants draft, which fit fine in cotton muslin. The light blue color pencil is what I brought it in to after the initial fitting. You can see I also lowered the waist significantly. And look at how flat that curve is, especially compared to these!

  • A lot of commercial pants patterns, and even drafting book guidelines, have a much deeper front crotch curve than is normally found in RTW pants. If things are baggy in the front crotch, flatten out the J by taking out what is essentially a vertical fisheye dart in the paper pattern (see #8 here). That will make the pants fit more like what we're used to.  For example, in my Edisto, Clover,  and Audrey pants, which are all made from commercial patterns, I had some level of bagging/pouchiness in the front crotch area, but in my work gauchos, which were rubbed off of a pair of RTW pants, I didn't have that issue. 
  • Before we made our final pants, our prof had us make a fly front sample set; she divided the process into four steps and we made a little sample for each step. I found it extremely helpful for reference since I can never remember how to do a fly front. Of course, it would've been more helpful if I'd done the samples in the correct direction! The principle is still sound, though...it's way easier to refer to physical samples that you can touch and manipulate than a diagram (or worse, just a list of steps!) in a book. 
These are my fly-front samples. We had to sew up step one four times, step two three times, step three two times, etc. In case you're wondering: 1) Sew up from the bottom of the curve, backstitching at the base of the fly and then basting it shut. Line up the edge of the zipper tape with the CF seam, sew to fly flap only. 2) Flip the zipper over and topstitch the fly piece to the tape. 3) Flip the zipper facedown again and sew it to the other fly flap (don't catch the other pants front...ask me how I know). 4) Flip the whole thing over and topstitch the little J; add a fly guard and bar tacks if you wish. It was tedious to do, but I'm glad in hindsight. 
Completed sample from the front!
  • Our prof also recommended that instead of trying to draft a contour waistband, to just cut a straight rectangle, baste it to the finished pant, and then pin darts in several places to get the right curve. Then you can just transfer the darts to a paper pattern and cut them out to make a curve. 
Now I know why all commercial waistbands don't fit me well...they're not nearly curvy enough! I wouldn't have ever believed this if I hadn't pinned out those darts myself to end up with this. 

  • Lastly, the whole point of a waistband is that it should act like a belt to hold the pants up. To that end, it should usually be about 1/2" smaller than the top of the pants, and the top of the pants should be eased into the waistband. I used to always have a problem with waistbands that were too big, and now I know why!
Finally (okay, I know I said I wouldn't say final, and I just said "lastly," so obviously I am having issues with ending and diction), don't feel bad if it takes a long time to actually make a finished pair of pants! I was sewing like a madwoman very very intense person to get my pants done in nine hours, and our prof even said that she doesn't think a good pair of jeans can be finished in under eight hours, and she's been sewing for 35 years!

Ever since I started sewing pants, I've spent a lot of time staring at people's butts and crotches (surreptitiously, of course) trying to figure out what kind of adjustments they need, if any. Learning to read drag lines and wrinkles can be tricky (and make you seem like a perv?), but it's worth it for a great-fitting pair of pants.

My smirking "I'm secretly staring at the drag lines at your crotch" face. And hey, thank you all so, so much for all your really sweet comments on my last post about these pants! I wore them all day and they were so comfy (and they didn't sag and bag, at least not that I noticed) and I felt so proud knowing that I made them.  

So, what do you think? Have I inspired you to tackle pants? Any enlightening lessons of your own you'd care to share with us?

Monday, November 4, 2013

The Quest for Perfect Pants: Achievement Unlocked!


As you may know, I've been taking classes at Canada College's fashion department this semester, including Pants Drafting with Lynda Maynard. I also had a short one-month Pants Construction class with her, and both of those classes finished up last week. I figured that by learning to draft a pants pattern to perfectly fit me, and then learning the techniques to make those pants, I would finally be able to make a pair of skinny trousers or jeans to my satisfaction. Well, the final project for both classes was supposed to be a pair of pants, which would make sense, but here's the catch: if I were just in the Pants Drafting class, my final garment would need to be perfectly fitted, but not made perfectly; if I were just in the Pants Construction class, my final garment would need to be made perfectly, but not perfectly fitted. Aaaaannnd of course I'm in both, so my final garment needed to be both perfectly fitted and perfectly constructed. Challenge accepted!


I wanted to make a pair of basic black skinny pants that would be nice enough to wear to work. I already have one secondhand pair that I wear every laundry rotation, so I figured I could use another, me-made pair. I made up a skinny pants draft, sewed it up in regular cotton muslin, and was pretty excited...until I sewed it up in a fabric with spandex in it. They were huge!!! As one lady in class said (of her own attempts to sew stretch fabric), it was like a tent meeting the saggy baggy elephant. Lesson learned: sew up your muslin in a comparable fabric. As Lynda later told us in class, "If you're going to make a paper garment, then go ahead and fit it in paper. But if you're planning to make a fabric garment, fit it in fabric!" Thankfully, the fabric I had used was a cheap poly that I had thrifted last year for the express purpose of making a (hopefully) wearable muslin, so it wasn't a huge loss, even if it was a nice emerald color. I pinned and marked it up, transferred my changes to the paper pattern, then went out and bought a different stretch denim for my final project. I may go back and fix the emerald pants at some point, but honestly, it's a pretty nasty poly. 

By the time I buckled down for the actual pants-sewing, it was already 4 p.m. on Sunday afternoon; the last class was Monday evening, but I had work all day Monday. Because of that, I opted not to do a yoke, back pockets, or flat-felling on the inseam...in fact, if it weren't required, I probably wouldn't have done front pockets or a fly front either! Cutting all the pieces went fairly quickly, but for some reason the fly front gave me lots of trouble. Lynda had had us do fly front samples earlier in the class, but they all opened to the left, and I like mine to open from the right, so when I referred back to my samples I kept stitching things on backward or to the wrong side. I probably wasted an hour at least in fiddling with the fly front. I think I'm going to go back and redo a set of samples that open to the right, just so that this doesn't happen again. I never want to have to pick bar tacks out again!

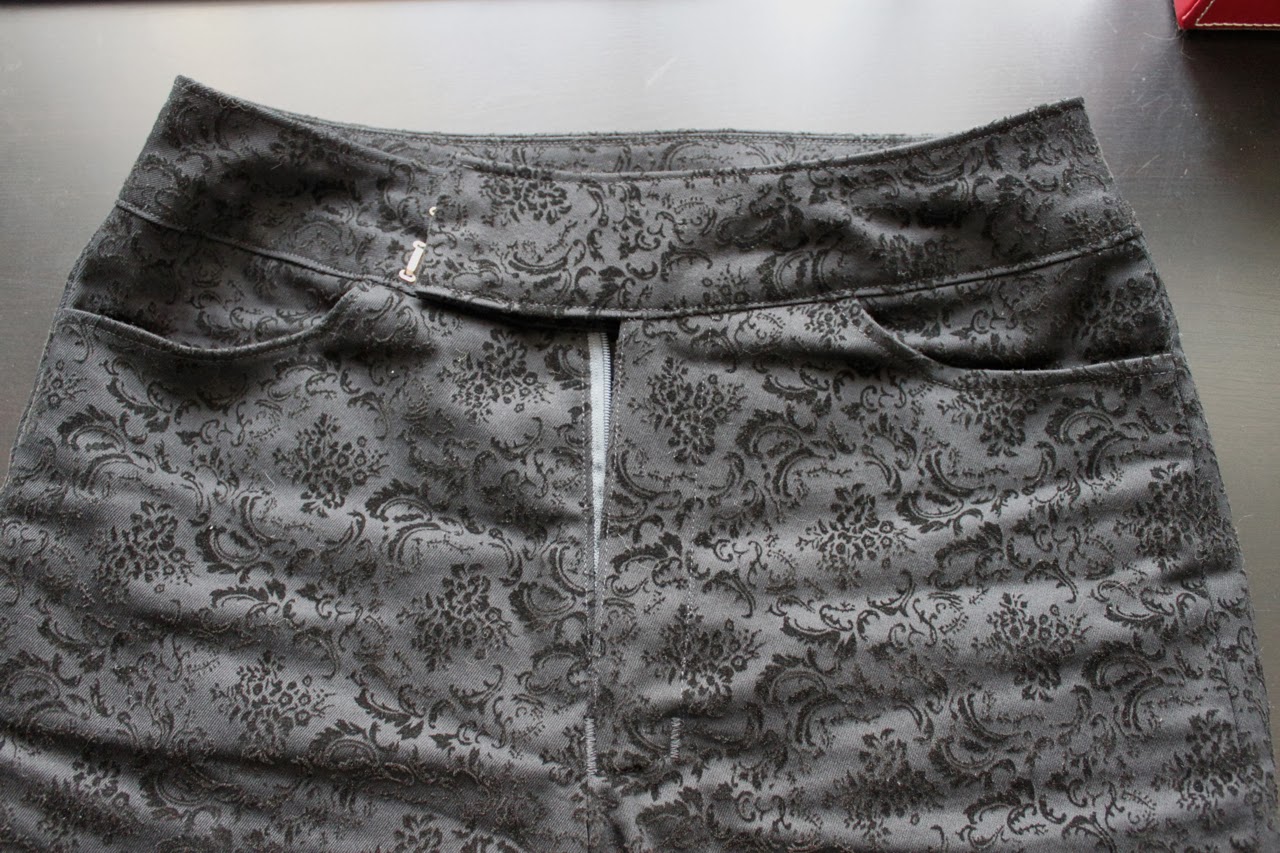
Thankfully, the multiple re-dos don't show on the finished pants. Also, a better look at the flocked brocade pattern.
Pretty insides!

After the fly front fiasco, though, everything else went smoothly. It's amazing how fast sewing pants can go when you don't have to stop and fit with every seam you sew. I did have to stop when I was almost done so that I could draft a contour waistband, and by the time I sewed that on it was past 1 a.m. and I was pretty sure that if I kept going, I would've ended up seam ripping a gash in the pants or some other such nonsense. I went to sleep, woke up early and hemmed the pants before work, then hurriedly sewed on the hooks and eyes in between leaving work and getting to class. It was worth the effort, though, as Lynda pronounced them gorgeous. Even my mom, who's got really high standards for fit and construction because of her seamstress background, conceded that they were impressive when I showed them to her. While I'm usually pretty critical of my own makes, this time I'm inclined to agree with them both!

I cannot emphasize enough how difficult it is to photograph black flocked fabric. All the wrinkles from sitting show, none of the details of the brocade do. I promise you they look a lot better in real life!

Doesn't help that it was also broad daylight...but that was the only time Mr. Cation was available to take photos.

It looks like I somehow photoshopped the brocade out, but it just doesn't want to be photographed!

Slightly better look: the brocade pattern reminds me of BBC Sherlock's wallpaper in 221B.


I was getting all hung up on the wrinkles in the back, but Lynda wisely pointed out that wrinkles under the butt meant sitting ease, and wouldn't you like to be able to sit down? Also, apparently they photoshop out normal wrinkles in ads, making us think that our clothes should all fit with no wrinkles whatsoever. 

Summary:
Fabric: I have to say, Joann's has really beefed up their trendy stretch denims section...this was made from 2 yards of black flocked fabric, 70% cotton, 28% polyester, and 2% Spandex. The pockets were lined with the same stretch fuchsia satin fabric as my pirate coat for a little bit of extra luxury.

I love that there's this secret pop of color!

Notions: Two hooks and bars, a dark gray 7" zipper (I didn't have black and didn't want to drive out to find one), and lots of seam binding. 
Hours: Nine...not bad, right? Of course, that's not counting the innumerable hours of drafting, muslining, fitting, and redrafting over the course of the semester. And if you're looking at my account of Sunday, I took an hour off in there to eat dinner and such.
Will you make it again? Yes! I finally have the perfect pattern for my body, because it was actually drafted and fitted to me! I want to make a pair of bootcut dark wash denim trousers next. 
Total cost: $18. The fabric was 50% off with a coupon, and the hooks and bars and seam binding were pennies because I bought in bulk, and the zipper was probably $0.50. 
Final thoughts: I'm so excited by how real these pants look! I know I was pretty excited about my previous pairs of pants, but there were still issues with each of them. These actually look like something I would buy at say, Banana Republic or Anthropologie. AND OH HEY would you look at these flocked Charlie trousers at Anthropologie?! I just saved $100 yo...as long as you ignore the cost of my time and the class. 

Hahaha I couldn't resist trying to turn this into a fake catalog cover. I mean, it's got all the requirements for an Anthro shoot: random pallet, some succulents, quirky neighborhood with a vaguely rustic feel...

Once again,  I attempt the disinterested model face.

Although I'm too cool (hah!) to show it, I actually seriously love these pants.

Friday, September 20, 2013

Pants Pattern Alterations

Last week in class I tried on the muslin made from the pants sloper, which was drafted up from my measurements. I think it's worth repeating my professor's words of warning: even a sloper drafted to your measurements isn't going to be perfect right off the bat, because the way those numbers are distributed is different on every person. Depending on whether you carry your weight in the front, side, or back, a 40-inch hip measurement could mean several very different things. One's legs could be 25 inches long, but the angle at which they come out of your hip, the amount of padding on one's inner thigh, and even the way one typically stands can all make a standard draft look terrible, even if it's based on actual body measurements. Still, that said, my muslin looked pretty good for a first try -- definitely better than all the vintage 60s pants patterns I've tried in the past!

We all had to take turns changing into our muslins and standing on the tabletops and our professor walked around telling our group members what to pin and cut into to get the fit right. What helped a lot for seeing where to make alterations was having the grainline, high hip, low hip, knee, and calf lines basted in. That way, we could see where things weren't hanging plumb or perfectly parallel to the floor all the way around.

I needed two vertical darts in the front crotch area to get rid of the excess fabric there. 
There's nothing quite so nerve-wracking as knowing that somebody is seam-ripping right by your butt. 

After everyone tried on and fit their muslins, we went over the kinds of pattern adjustments that might be necessary. One of our assignments is to make those adjustments on tiny paper pattern blocks for reference, so I thought you all might like to see mine. I apologize for the blinding yellow background; we were supposed to use a stiff backing and all I had were these binder divider tabs. I think it kind of helps you see where the cuts go, though, right?

#1) Crotch curve corrections: I did the back alteration to correct the mono-butt look. By giving more fabric to the back piece, one avoids having the fabric pulled so tightly across the butt that it becomes unnecessarily flattened. 
#2) If the grainlines angle in toward each other in a V, the above correction is necessary to accommodate the angle at which your legs exit your pelvis. 
#3) Full inner thighs: start with the same alteration as #2 but make several parallel cuts up the inner thigh portion, then pull the top part out so that the gap is almost parallel all the way up the leg. The cut flaps should overlap a little at the top.
#4) Front/back rise shortening: To change the crotch only, and not the side seam length, make a horizontal cut halfway down the crotch curve, leaving a tiny bit if the side seam uncut to use as a hinge. Pivot down to overlap the pieces, then redraw the curve. 

#5) Shortening the crotch depth all around: If there's excess fabric bagging all the way around, or the crotch hangs way below your body like gangsta pants, pin it halfway up the crotch and see how much needs to be removed. Make a horizontal cut all the way across the crotch and overlap (or separate if you need more depth), then redraw the crotch curve.
#6) Knock-knee alteration: If your legs come together at the knee and then curve back out, then you need a longer inseam only. By making a downward slash and using the side seam as a hinge, you keep the side seam the same length while extending the inseam. 
#7: Full abdomen, or as my prof puts it, extra chocolate storage: Cut across the middle of the crotch right under the dart and angle up to the waist at the side seam, then put a slice down the dart. Pull the top piece up and away, then redraw the curve. 
#8) Excess fabric at the crotch: If you can pin out a vertical fisheye dart at the front or back, cut from the side seam and up the inner side of the dart, then back out to the center crotch seam (leave a tiny bit attached to use as a hinge, though). Cut flaps like in #3, then push the pieces in until the hit the outer edge of the dart. The flaps will overlap a little bit in some place and spread out in others. I know this is a little hard to explain/see on the diagram, but this method of alteration seriously blew my mind, it was so amazing. I've always wondered how to translate the 3D changes to a flat pattern, and now I know!
#9) Lengthen back rise: If your pants are snugging up too much under the butt and giving you a wedgie, lengthen the back rise by making a few horizontal cuts across the crotch (keeping the side seam attached as a hinge), and spread them out. If the side seam dents inward too much, you may need to redraw the hip curve.
#10) Hyperextended calf alteration: My prof says she sees this most in people who have danced or done gymnastics, but the bulge of the calf hitches up the lower leg in the back. Cut a slash up the grainline, past the knee, and then make two symmetrical cuts angling up toward the side seam. Using the side seam as a hinge, rotate the two sides outward. It will look flared on paper, but on the body it will hang straight. 
#11) Waist alteration: Instead of just adding/subtracting at the side seams, which is what I had been doing previously, the proper way to add or take away inches at the waist circumference is to make a diagonal slash from the waist down to the side seam, then use that as the hinge point to spread or overlap the appropriate amount.

For all of these slash-and-spread moves, we literally cut and spread the muslins while the people were still wearing them, which let us adjust until there were no more wrinkles; this also let us measure exactly how much to spread the pattern pieces. It was an...intimate...experience for all involved, and thank goodness it was only ladies in the class. I wish I could show you what some of those slashed-and-spread bits looked like for real, but obviously I'm not going to post other people's butt pictures here! You'll have to look at my slashed-and-spread hyperextended calf alteration and imagine it on abdomens and such.

Look at how many inches they had to add in with an additional strip of muslin! The prof said she hadn't had to do one in a very long time, so I guess this is proof that I really do have burly calves?
You can see the diagonal fish-eye-esque darts under the butt, the hyper-extended calf cut, and the ripped open CB seam so as to avoid the mono-butt look. Yup, I had blue skivvies on that day.

I made three of my four adjustments (I couldn't figure out that diagonal dart, so I'll have to ask the prof about that one. ETA: answer is here) and redrew my sloper, so we'll see next week how it translates into a second muslin!

Oh, and for those who were wondering, the drafting book we're using is Building Patterns: The Architecture of Women's Clothing, by Suzy Furrer.

Monday, September 9, 2013

A Look at Some Curves


You guys, I am so bad at this sewing + blogging + two kinds of school business! I haven't sewn anything since my Slytherin bolero, but I have thought an awful lot about protein structure and fibers. I've also finished drafting my first pants sloper for class, but have yet to sew it up. Even so, it's already been interesting comparing its shape to some of my pants patterns and RTW pants.

My initial draft, based on the pants block that the prof explained in class.  
Traced and ready to cut out in muslin! She wants us to mark (and baste on our muslins) the grainline, high and low hip, crotch, thigh, knee, and calf lines so that we can check for perpendicularity/parallelism to the floor when we do our fittings next week. I'm actually really excited to see if this is why I have all sorts of weird twisting at the inner leg on most of my pants! Also, I never knew that the back inseam is supposed to be 1/2" shorter than the front inseam, to accommodate the stretch of the bias section at the top. 

McCall's 6610 was my first "real" pair of me-made pants, but I did a lot of taking in at the legs and center back. I was never really happy with the crotch fit, and now that I compare the curve on the pattern and the teacher-approved draft, I can see why.

Look at how much more curved the McCall's pattern is!
The back curve is comparable, although I took out quite a bit in the center back seam on the McCall's pattern (said alteration is not reflected here), and not at the side seam, as it seems I should've done, at least according to the sloper. 

I also tried comparing it to the Colette Clovers pattern, and now it totally makes sense why I had to make all the adjustments that I did!

Slightly more curved at the front crotch, but the big difference is in where the legs fall. The Clovers are shifted toward the inseam. The hip is a little curvier, but not obviously so. 
Oops, I didn't line this up correctly. Still, you can see that the back crotch curve of the Clovers is much more "L" than my draft's "J" shape. But oh my goodness gracious great hips balls of fire, would you take a look at that extreme hip curve in the side seam! It's no wonder that they looked like vintage jodhpurs when I first sewed them up.

According to my professor, the usual baggy-crotch problem is the pronounced "J" shape on the front crotch curve. If you think about how a body fits into the pants, the scoop of the J is where your body sits. As she said, unless you're a man, you don't have a lot of errr...junk...to put into that J-scoop. My torso connects to my legs in a straight-ish line, so when I had the excess curve in my Clovers and McCall's 6610s, that led to awkward pooching where my legs connect to my torso, because nothing was filling in that scoop.

Here's my silly drawing to illustrate what I mean. The black line is the front crotch curve going down into the inseam, and the fleshy-colored bit is illustrating a body. When the curve is too J-shaped (as in the middle and on the right), there's all that space between the body and the fabric. Unless you're a man. My prof actually told us that when drafting pants for a dude, you need to find out which side he umm, prefers...and then make that side larger/more scooped to accommodate...things. This was an all-female class, so some people actually didn't understand what she was talking about at first. 

So, we'll see what this sloper looks like when I actually sew it up! It'll be interesting to see how the theories pan out in real life, but I'm inclined to think that my prof is correct about those curves, because 1) she's got years of fitting experience, and 2) I checked all my favorite RTW pants and the front crotch curves are all very flat, hardly curved at all. I'm really, really hoping to get some good pants out of this class!

And now that I've mentioned the word "crotch" a bajillion times, let's watch as my search keywords have a field day!