Showing posts with label Bedsheets. Show all posts

Tuesday, March 30, 2021

Eowyn, Shieldmaiden of Rohan

If there were awards for "The Movie (Series) That Spawned the Most Cosplayers/Costumers," I'm pretty sure that Peter Jackson's Lord of the Rings trilogy would be a strong contender. Goodness knows, it was instrumental in getting me started on my own costume-making journey! I remember when we first heard that FotR was coming out, I made "elven" capes for my best friend and another friend to wear to the movie. Because I was a poor college student who had no idea what I was doing, I bought a couple yards each of two different colors of the wispiest acetate lining fabric, then sewed two half-circle capes with unfinished, fraying seams, the rippliest, most uneven hem in the world, and I was so proud. 

But these capes made it to NZ, to the actual filming location
of the Nazgul riding past the hobbits hiding under tree roots!

In the years since then, I've made myself a number of Middle Earth-related costumes: a green Eowyn dress (from sheets), a hobbit maiden (from sheets), a Galadriel dress (not from sheets), an Eye of Sauron/Barad-dur headdress (from a balloon), a Party King Thranduil costume (that Lee Pace then tweeted!), a Smaug fancy dress outfit, and a Denethor + Pippin look with my daughter, and that's not even counting all the costumes for other people or Middle Earth crafts I've done. But the unifying theme for all of these costumes was a lack of screen-accuracy. Don't get me wrong, most of them were certainly recognizable as their characters (except maybe Smaug), but my modus operandi is very suited to community theater costuming: get the idea across as cheaply as possible, and assume that the audience will be standing several feet back. Also, using recycled/thrifted/secondhand materials means that finding screen accurate fabrics is nigh impossible. 

But since this is the Year of the Ring, I wanted to make one of my dream cosplays, Eowyn's camp dress, as close to screen-accurate as possible, while still keeping to my not-new-fabrics pledge as much as I reasonably could. 

From the invaluable Costumer's Guide.

I started with the inner layer, her cream-colored "chemise." I reused the bodice of a toile I made for my pirate coat as my base, since the unbleached muslin worked color-wise. For the neckline that would show above the brown bodice, I used a cream-colored jacquard with swirls that I had leftover from a millinery class. I then treated that fashion fabric layer like a facing but flipped it to the outside instead of the inside, effectively finishing the neckline edge, then zigzagged the raw edge down since it won't be visible. Rather than sewing the tiny tuck lines, I opted to keep things simple and just sewed parallel lines in gold thread. I think it works fine visually while saving myself the annoyance of trying to actually make such tiny tucks and keep them even.

It fits better on me than Cecily.

How many shortcuts can you spot in this picture? ;)


The sleeves were essentially really long bell sleeves with a slit cut up the center to the elbow (see this diagram, except my slit went up higher and the overall triangle shape had a wider base) that I narrow hemmed by machine. I made them out of cream-colored crinkle cotton that I inherited from a friend's stash. For the braided ties, I ended up purchasing new trim from Jo-Ann Fabrics, but they only had bright white so I had to coffee-dye them. I accidentally left them in the coffee too long, so they're darker than I would like, but oh well. The cream-colored underskirt is a half-circle skirt made from, surprise surprise, a thrifted cream-colored sheet. The opening for this whole underlayer closes with hooks and thread loops down the front. 


Here you can see how dark the braid turned out, as well as how nicely lettucey the crinkle cotton hem is. 

For Eowyn's brown bodice and corselet, I used a thrifted dark brown cotton sateen sheet from my stash (basically if I'm at the thrift store getting kids' clothes and I see a solid colored cotton sateen sheet in good condition, I'll buy it for costuming purposes) as the fashion fabric. The bodice from Simplicity 4940 (now sadly OOP) was a good starting point, although I had to draft my own cap sleeves. For the bodice neckline and corselet trim, I toyed with the idea of custom embroidery, but ended up going the easier route of machine-sewing a line of decorative stitching and then hand-sewing gold braid to dark brown bias tape, which I then used to finish the edges of said garments. The cap sleeves had the same decorative machine stitch + gold braid combo and were self-lined, then the armhole was finished with bias tape. 

Dark brown bodice, made with Simplicity 4940. 


Close up of the trim. 

Inside: I lined it with more sheeting and used black bias tape to finish the armhole.
You can also see my hand stitches at the neckline securing the braid.  


The corselet was drafted according to the instructions on Koshkathecat's absolutely invaluable costuming page; I first used those instructions for my Bellatrix corselet and mentally bookmarked it for the day when I would actually make Eowyn, and now I have! I cut one layer from cotton canvas and boned it with zip ties, then cut two more layers: from the dark brown sateen, and from quilt batting remnants. I quilted these last two layers together to get the distinctive diamond pattern, then basted all of it together and finished it with the trim pieces. I was so glad to have borrowed a tabletop grommeter from AJ of Confused Kitty Sewing, which made the whole last step so much easier than hammering everything in by hand! I did have to purchase brown rattail cord for the lacing as well. 

I'm so pleased with how the quilting came out! 

Secret secrets revealed to you: I had to add a little bias tape patch at the top of the back opening so as to wedge in a tiny piece of (ziptie) boning since my original piece wasn't long enough, and I'd already sewed on all the trim. 

All the pieces together!

The (slightly lighter) brown outer skirt was again made from a thrifted sheet, in a half-circle using my TNT pattern, Simplicity 5006. Seriously, I use that skirt pattern for EVERYTHING, from Mulan to Ursula to Weaver Girl to theater costumes. Then it was just a matter of scouting an appropriate location; Coyote Hills Regional Park, with its eponymous hills and giant mounds of rocks, was absolutely perfect. My photographer, @captured.by.shirelle, did an absolutely fantastic job of capturing the whole mood and look of Eowyn, White Lady of Rohan, "fairest lady of a house of queens...standing straight and proud, shapely as a lily...as if wrought by elf-wrights out of steel."


Summary 

Pattern: Simplicity 4940 for the outer bodice, Simplicity 5006 for the skirts, self-drafted for the sleeves, chemise bodice, and corselet

Fabric: Two twin-sized cotton sateen sheets for the skirts, half of another one for the outer bodice and corselet. Also 2 yards of 60" crinkle cotton for the sleeves, and half a yard of muslin for the chemise bodice, remnants of rayon jacquard for the neckline of the chemise, and remnants of cotton quilt batting for the corselet.

Notions:  Seven yards of gold braid, four yards of white braid, five yards of brown rattail, three packs of dark brown bias tape, a handful of brass grommets, a separating zipper, and several hooks.

Techniques: Uhh...self-quilted fabric using a walking foot? Does that count as a technique?

Hours: Well, I started working on this last December, then took a break to finish up Weaver Girl, so all in all I'd say it was two months of my kind of work hours, which is to say an hour here or there after kids are asleep, if I don't have other work to do for school. There was also so much hand-sewing of trim that I did in five minute snatches while kids were playing-but-not-arguing-yet, so it's really hard to say. I want to say at least 35 hours based on rough estimates of how much time similar pieces took pre-kids. 

Total cost: $65, but that includes $20 worth of gold pens for the flag, and then all the new trim I had to buy was pretty costly even with coupons. The main fabrics, though, cost less than $10. 

Final thoughts: I've always loved strong female warrior characters, from Mulan to Alanna of Trebond to Aerin Firehair, so it was pretty much a given that I was going to love Eowyn the first time I came across her. It's just a nice bonus that her costumes in the movie were brilliant. Eowyn is also extra meaningful to me because of where I was in life when I first read LOTR. Growing up, it was always drilled into me that going into STEM was the only acceptable career path, and my passion for art and making things was not something to be celebrated or pursued seriously. When I got to college, for the first time I was away from home and somewhat free to make my own choices; I switched from a biology major to an art major just as The Two Towers came out, and I was struck by her fear of being caged, her desire to make her own path, one that was different from what was expected of her, and ultimately her seizing the opportunity for glory in battle as Dernhelm. I saw her act of secret rebellion as akin my decision to choose my own major, but unlike Eowyn I did not kill a foul dwimmerlaik. Instead, I saw that a huge public research university was probably not the best place to get an art degree if I wanted to actually learn skills (and not just do weird avant-garde pieces), so I switched back to biology. I did, however, decide to be a science teacher instead of a researcher, which ultimately meant that I had the opportunity to get my theater costuming feet wet via high school drama productions. Later, once I became a more seasoned teacher and didn't have to spend every waking hour thinking about lesson prep or grading, I was able to make time for actual sewing, drafting, and costuming classes at a local community college. In a not dissimilar arc, Eowyn was able to make peace with her role and place in society and chose to be a healer. Both of us found a compromise in our lives that eventually brought peace and joy, not a feeling of being caged. All this to say, making and wearing this Eowyn costume was a dream come true, and a fitting conclusion(ish beginning to a new story). 


Oh! And the flag of Rohan! That was a ridiculous process of experimentation that I documented on my IG highlight, should you care to see all the wibbling I did about making it (and the rest of Eowyn). Tl;dr if you don't want to watch the story: I did an Elmer's glue resist in the outline of the Rohirric horse on a pillowcase, then painted it with watered down acrylic paint and used various gold paint pens to outline the horse. I used vintage bias tape to secure the flag to a spear (made from foam, duct tape, and a wooden dowel) leftover from a drama production. I hadn't even really planned to make it, but when I was planning for the photo shoot I realized that I didn't have a sword and I really need some kind of prop to hold or else I don't know what to do with my hands...I'm so glad it turned out as well as it did!


Wednesday, November 25, 2020

Why yes, I do buckle all my own swashes!

Er, swash all my own buckles? Either way, I'm just happy to have finally made the fantastic pirate coat I've always wanted! 


I bought these red and gold damask curtains at a thrift store years ago and knew that I wanted to make them into some kind of fabulous floor length coat. I also knew that my skills then weren't quite up to the task, so I put them in my stash and waited. After making a shapeless coat that basically only had three pattern pieces in the Beginning Tailoring class at CaƱada College last winter, I was ready to move onto something more complicated. I figured that this would be the perfect chance to have the guidance of an expert while making my dream coat. Unfortunately, coronavirus had other plans for the world, and it turned out that instead of working alongside classmates with an instructor at the giant cutting tables at the college, I was going to be googling a lot of things and essentially learning to tailor on my own. Thank goodness for YouTube (cue the Schuyler sisters singing "How lucky we are to be alive right now!"). 


I really appreciated that this class made us document every step of our work; usually I just sort of make things up as I go along and then attempt to recall how long it took and what I did. It's ironic that even though I'm a science teacher and meticulous details are supposed to be my thing, I tend to be more loosey-goosey in my sewing. Anyway, our professor required us to write up a list of steps, then document all the time we spent on each step. We also had to do a sketch (beforehand, so that we could check how well our final garment matched up...as opposed to my usual method, which is to make the garment first and then sketch what it looks like), write up a list of all materials and costs, and even record the sewing machine settings and thread type/color. 


The first step our professor required was a paper fitting, just to make sure there weren't any glaring issues with our patterns. Since mine was a frankenpattern of three different Big 4 patterns, I begrudgingly did this step (even though I thought it was silly in the previous tailoring class), then moved on quickly to the muslin. I know I'm very fortunate to be almost exactly the measurements of a Big 4 size 10 in the torso, so there wasn't much I needed to change. I made my typical pattern corrections: wider shoulders, longer sleeves, SBA, swayback adjustment, narrow back...but I wish I'd narrowed the waist and back a little more, since it's not as fitted as I would like, even though it is meant to be outerwear. 


We are required to make one hand-padstitched collar for this class. Normally we would get to see our professor demo this in class, but instead I watched Bernadette Banner's video tutorial featuring Royal Black Couture to learn how to do this. It took a little bit of doing to get used to the rhythm of all the diagonal stitches, and my stitches still aren't the neatest, but after steaming it I'm really pleased with how well it holds its shape. 


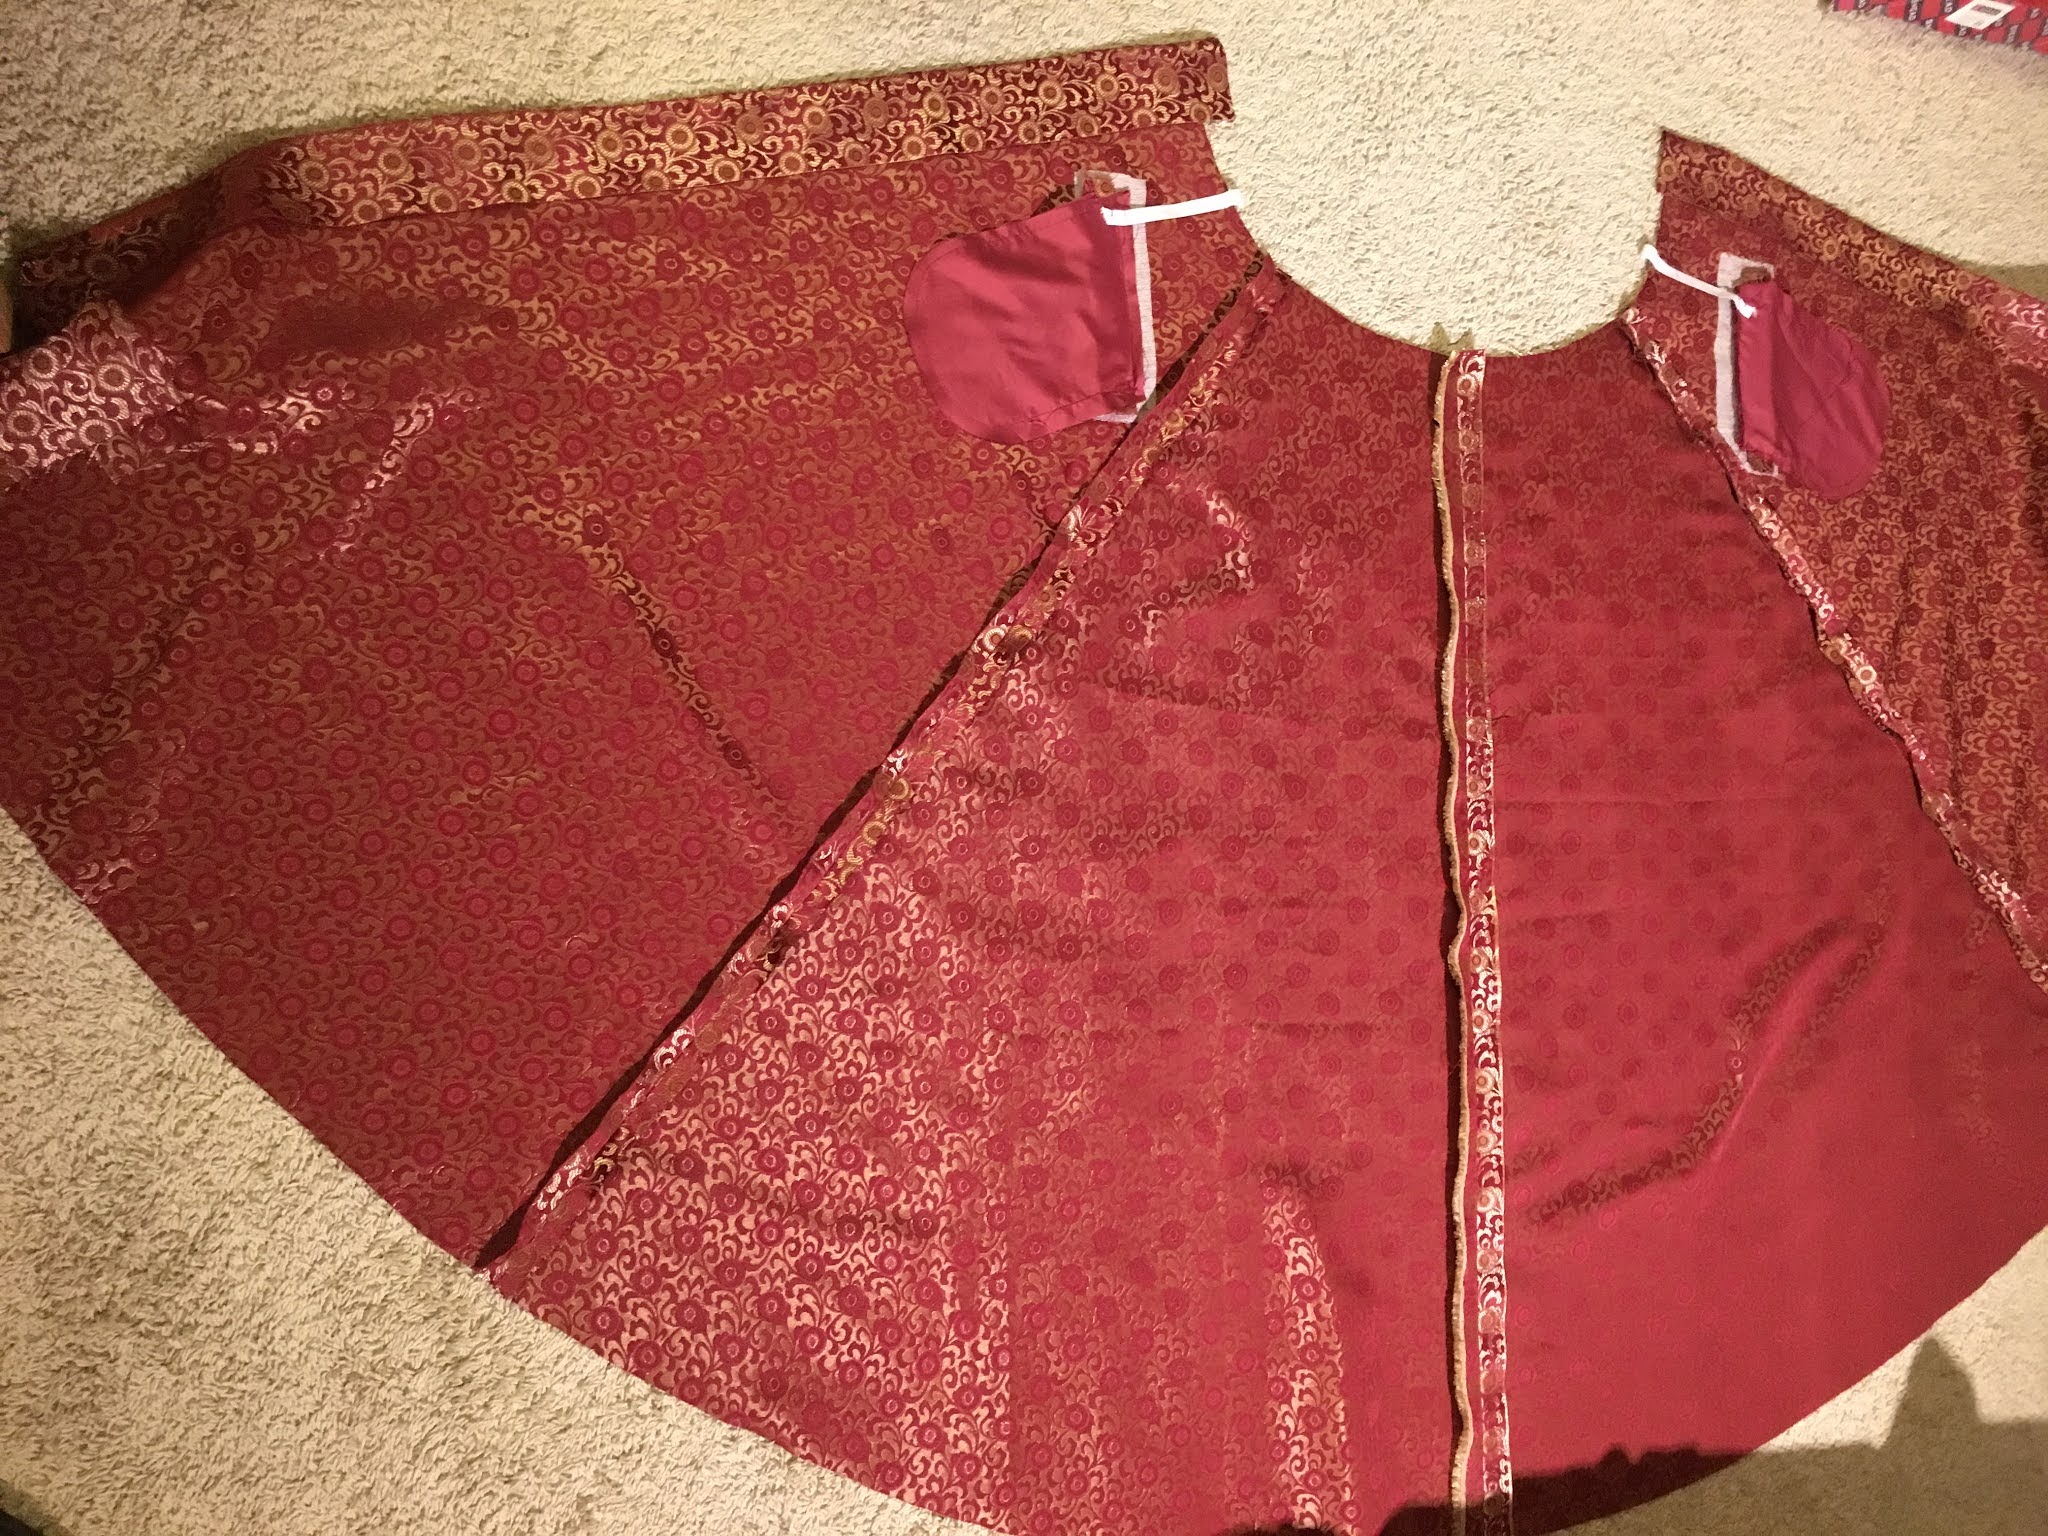
It's really incredible how much goes into making a structured coat or jacket. I used fusible Armo-Weft interfacing on all my fashion fabric pieces to add some body to the floppy curtain fabric, and this also helped prevent some of the fraying that this weave is prone to. In order to help the garment hang better and strengthen the back during movement, I added a back stay. And since this is a pirate coat, what better fabric to use than this (100% cotton, tightly woven and washed multiple times) map-print bed sheet? Secret treasure maps hidden in one's clothing for the win! In the front, I cut out a piece of horsehair canvas and basted on a couple layers of batting to make a chest piece. This fills in the hollow that can occur between the shoulder, arm, lapel, and bust area and helps the whole garment lie more smoothly. To help stabilize the edge of the lapel, I also hand-stitched 1/4" wide cotton twill tape butting up against the stitching line. In hindsight, I'm not sure that this was necessary since my lapel isn't cut on the bias (the way a typical blazer lapel would be), and the whole thing was topstitched anyway. 


I used to only set in sleeves with the two-rows-of-gathering-stitches method, but that never worked really well for me and I always got weird puckers. This time, I tried the method of gathering the sleeve cap with a piece of stretched-out fleece, and it worked beautifully! The thickness of the fleece keeps the fashion fabric from making actual puckers, and then once it's set in, you can just push the fleece into the sleeve cap to act as a sleeve head instead of having to sew one in by hand. SO NEAT. I love all-in-one steps. Gertie's video demonstrates the whole process here, but instead of using mohair or lambswool, I just used a strip of scrap polar fleece, which is obviously cheaper and easier to find. After setting in the sleeve, I also put in a handmade shoulder pad (just three layers of thin cotton batting basted together). I remember the first time our professor talked about shoulder pads, I was so skeptical; I just kept thinking of the massive 1980s shoulder pads. The nice thing about handmade ones, though, is you can use as many layers of batting as you want to make it thinner or thicker, and it really does help the whole garment hang more nicely. Consider me a shoulder pad convert!


For the skirt of the coat, I waffled a bit about whether I really wanted to make it floor-length. A floor-length half-circle skirted coat would definitely allow for the most dramatic flouncing and swanning about, but it would also be impractical and take forever to hem by hand. But then I realized that I had enough fabric to make it floor length, so in the interest of not leaving a bunch of unnecessary extra fabric in the stash, I decided to just go for the floor length version. To visually break up the expanse of red and gold fabric, I put some welt pockets with flaps in. The last time I made a pirate coat, my pocket flaps were fake, and I regret not having functional pockets. Not making the same mistake this time! Since I had a waist seam, I decided to go for another trick I learned from Bernadette Banner: I added a twill tape stay from the top of the pocket bag to the waist seam. This will help support the pocket and keep it from sagging when I put things in. 


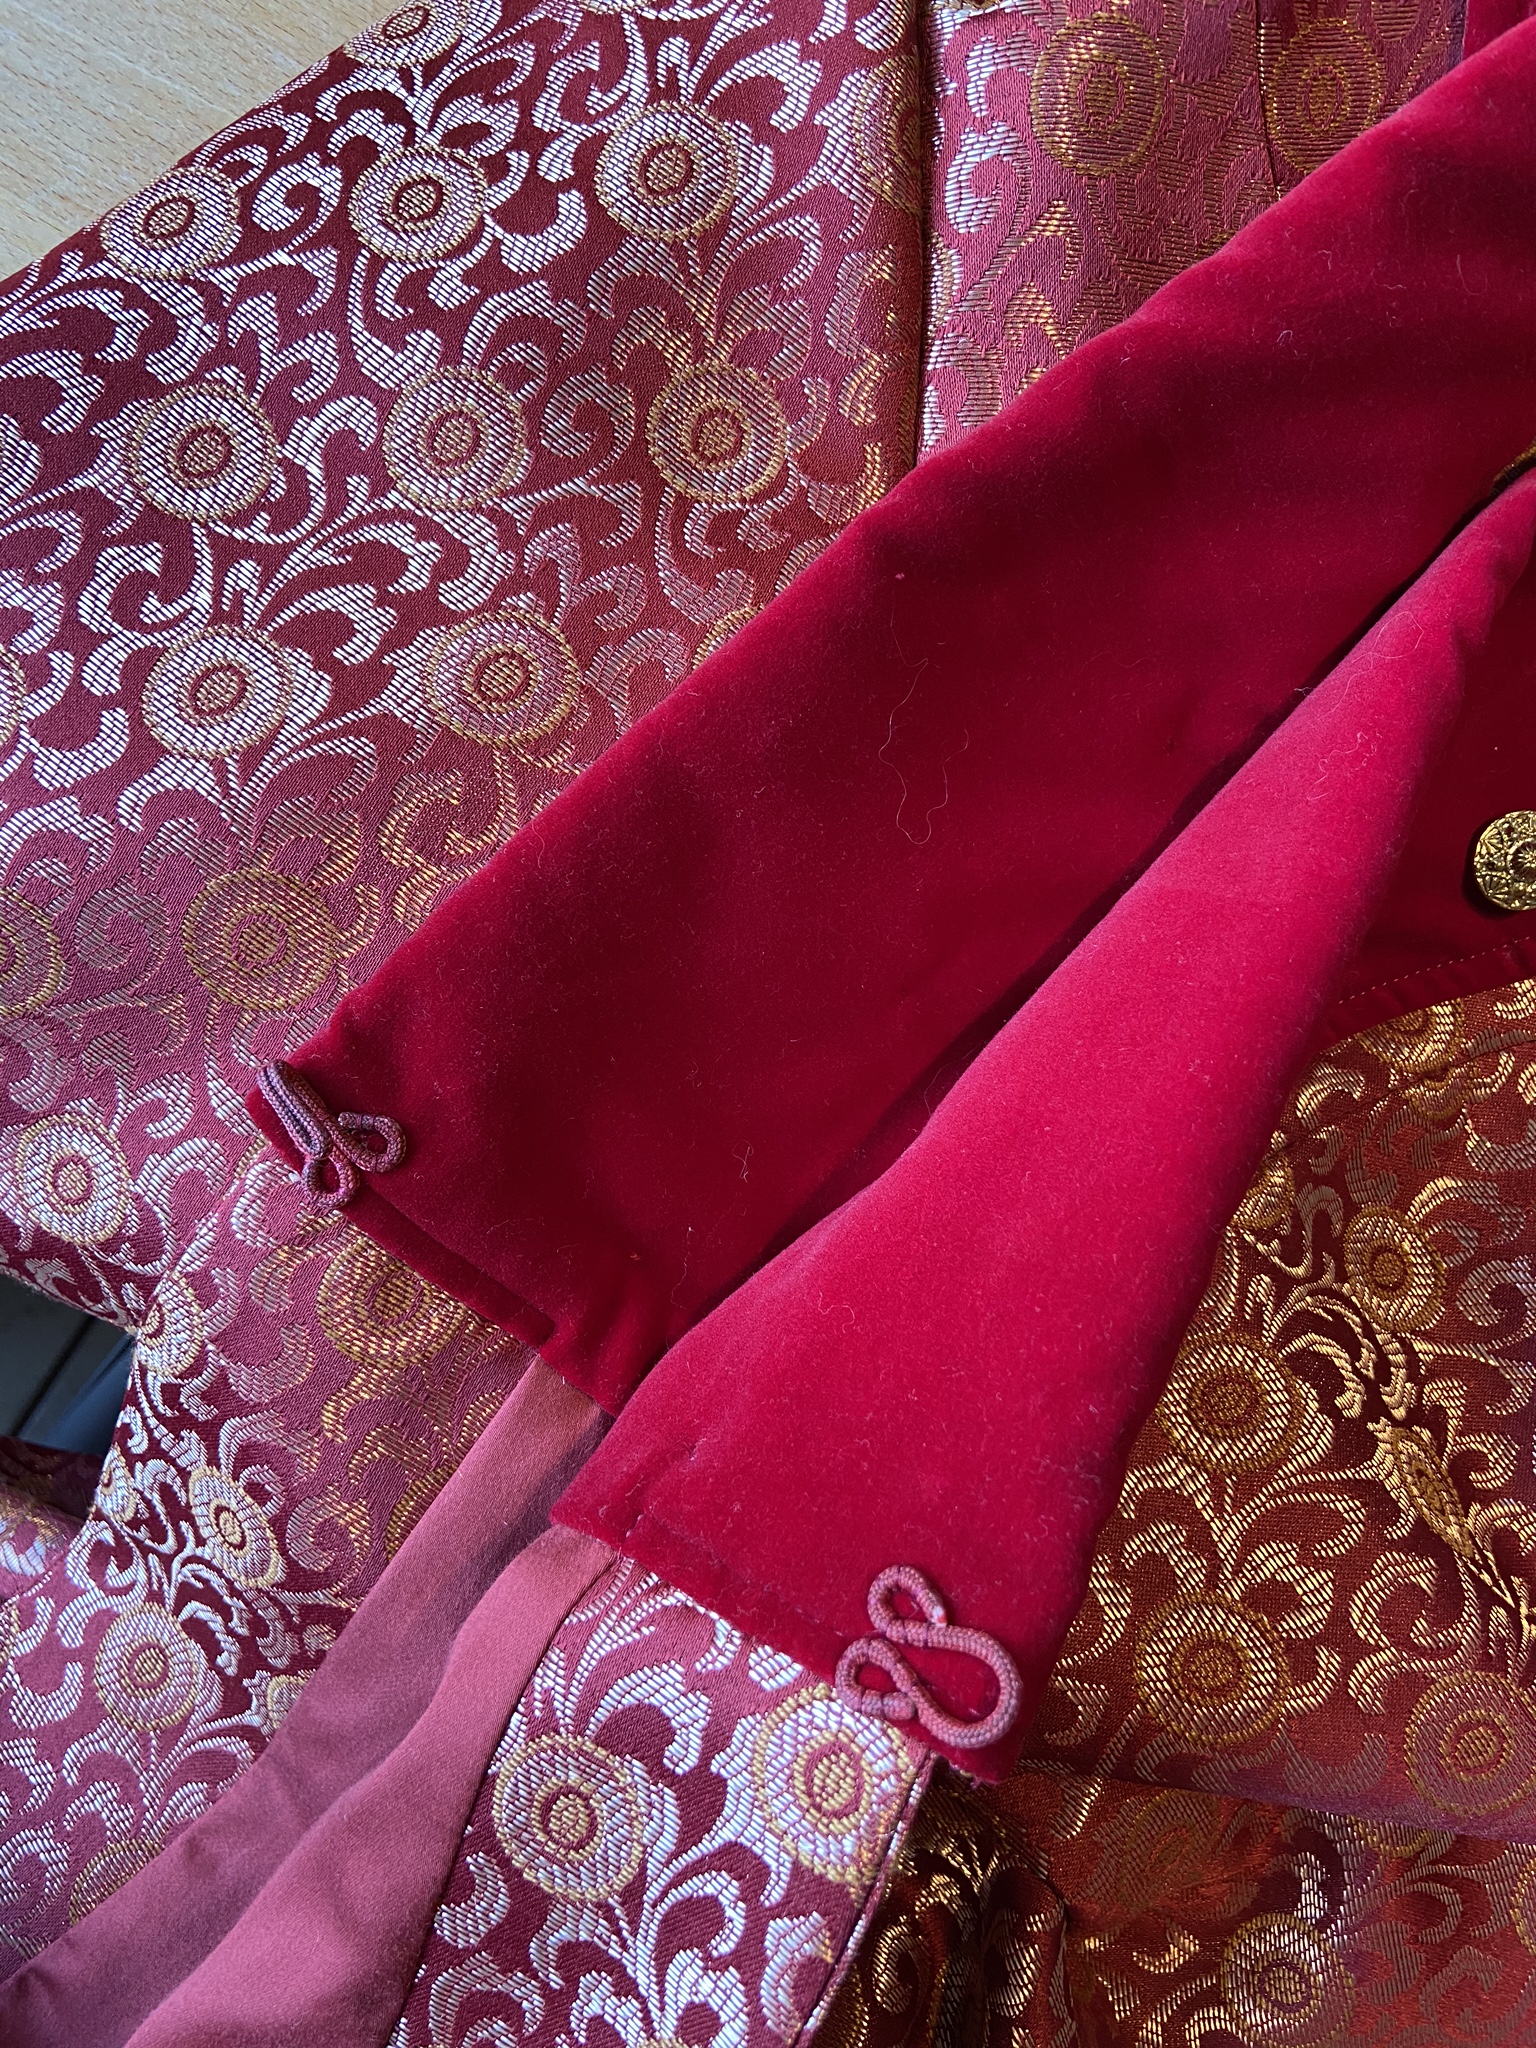
The rest of the construction was pretty straightforward, if tedious. Lots of topstitching to help hold the velveteen facing, upper collar, cuffs, and pocket flaps in place, since I didn't want to press it too much, then all the hand sewing: I catch-stitched the hem of the skirt and sleeves, then slipstitched the lining to create a jump hem. 


I had originally entertained ideas of having the front lapel be "reversible," so that it could flip closed to be a double breasted coat, or stay buttoned back to show the velveteen facing. I even took a hand-sewn buttonhole class with that in mind, but in the end my samples were still too messy and the idea of doing twelve of them was just...no. Besides, I like the contrast of the red velveteen; without that showing, the front of the coat is just too much damask and the collar and cuffs look a little out of place. So rather than make ugly buttonholes, I just permanently sewed on the buttons. To close the coat, I just used a giant hook and eye. Joann's only carried white ones, so I used a combination of red Sharpie and brown fabric marker to color it dark red to (somewhat) match the fabric. 


Summary:
Pattern: I used the collar from Simplicity 2333, the cuffed sleeve from Butterick 6602, and the skirt from McCalls 6819, then frankenpatterned the last two together to make a shoulder-princess-seam bodice, that I then extended past the center front so that it could flip back to make the lapel. The slant welt pocket with a flap was modeled after the one in this very helpful Waffle Patterns tutorial, but just rotated to be more horizontal than vertical. 
Fabric: The main fashion fabric was curtains that I thrifted at least four years ago, a surprisingly nice 60/40 poly-cotton red and gold damask. Once I picked apart the seams, I ended up with three 40"x88" panels. The red cotton velveteen (I used about 1/3 yard) was from the college's free shelf, a place where students can pick up other people's destashed fabrics. The lining was two different secondhand sheets; the torso was a microfiber with a faint swirl pattern, and the skirt was a cotton sateen. 
Notions: Armo-Weft fusible interfacing from The Sewing Place, then the cotton twill tape, horsehair canvas, and metal buttons were all already in my stash. 
Total cost: $20 for the curtains + $4 for the sheet + $18 for the interfacing (but with lots leftover) + $6 for the patterns + $5 for the bulk bag of buttons ages ago + $3 for thread = $53 total. Of course, once you factor in the 57 hours, even if I paid myself a measly only-slightly-more-than-CA-minimum-wage $15/hr, this coat is worth almost $1000. And this is why bespoke clothing made at a living wage is so expensive. Good thing sewing is my superpower?
Would you make this again? No, because I don't need two pirate coats. TBH, I'm not sure I needed *one* pirate coat, but hey, it's 2020, treat yo'self. 
First worn: Just to take pictures, because we aren't going anywhere, since, you know, global pandemic. 
Final thoughts: When I think back to when I first started sewing, I was pretty much allergic to anything involving hand-sewing and would avoid it at all costs. Thankfully, I got over that, and now I actually enjoy the process of slowly and methodically catching mere threads at a time as I invisibly stitch hems. That, and the whole fussy tailoring process, was actually really fun and you can't argue with the results. I can see how people get addicted to tailoring and/or jacket-making. Unfortunately, I don't see myself indulging in this process too often, as I have too many demands on my time and projects on my bucket list to allow for such slow sewing. Still, I'm really glad to have finally checked off one of those projects on the list, as well as moved some fabrics out of the stash!


When I had Mr. Cation take pictures for me, I of course had to wear my over-the-top tricorn with the coat, since it's all trimmed in red and gold. Then, to my chagrin, he said that the hat+coat combo made me look just like Captain Morgan. I had no idea that he was even a thing, but once I got over the fact that I accidentally cosplayed a cheap rum mascot, I of course had to do a pose with my foot up on one of our barrel planters. 


Saturday, May 2, 2020

Slytherin Gibson Girl Undergarments

There are certain tenets of historical costuming that everyone knows, like always put on your shoes before your corset, or don't choose polyester to make your ren faire outfit unless you want to pass out from heat exhaustion. Probably the most important one, though, is to always get your undergarments squared away, including the corset or stays, before making the pretty stuff that goes on top. Which is why, when I decided to make a Slytherin Gibson girl outfit, I started with the shirtwaist and then backtracked to the undergarments without ever having made or acquired an appropriate S-bend corset. And when I say undergarments, I really mean middle garments, because I made a corset cover, petticoat, and bum pad, not a chemise and drawers. Can it really even be called a corset cover if it's not covering a corset? Well, you know what they say: you gotta know what the rules are so you can break them, or some such nonsense.

Case in point: you're supposed to sketch your goal look before making the outfit so that you know what you're aiming for. I drew this after I made everything because I forgot that it was required for my assignment. 


In Canada College fashion department classes, besides the regular homework and the final outfit (of which the shirtwaist is the top half), we usually have to also turn in a lab garment. This is just another full outfit (covering an entire dress form, so a top and a skirt, or a dress) that demonstrates the skills we are learning, so we have to include the quarter- and full-scale patterns with the garments to show how we manipulated the basic sloper. At first, I had grand plans to make a tailored jacket to go on top, but that would 1) not be a complete outfit covering the dress form, and 2) take more time than I have to do it well. I think I'm going to save that for when I take Advanced Tailoring at some point in the future. In the interest of making a related but faster/easier lab garment, I decided to make a corset cover (basically, a sleeveless top that goes over the corset to disguise the hard lines of its edges) and a petticoat.

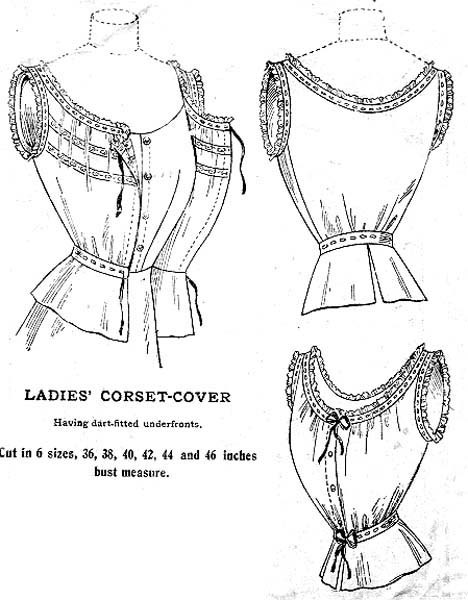
From here. 


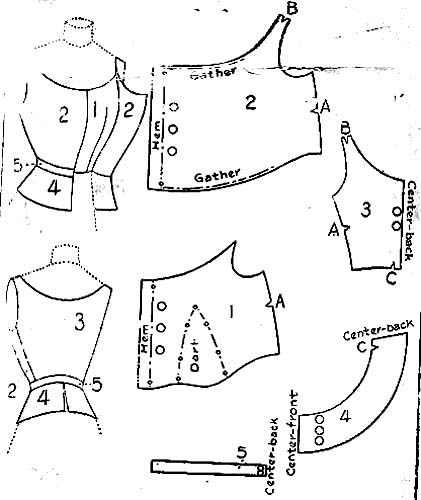
I'm so glad that there are a lot of images floating around Pinterest that show pattern pieces or drafts for how to make a corset cover; that made it easy to manipulate the sloper to "match" the historical pieces. I also looked at a lot of extant corset covers (thank you to the Met for allowing me to just search "corset cover" and not the usual generic "undergarments" because that really made it a lot easier than having to sort through thousands of other kinds of undergarments) to get an idea for what kinds of variations were permissible. You know, so that I could then ignore them and do my usual "ehh, that's close enough" thing. I shifted the bust dart to the waist and then converted that dart to gathers, and converted the back darts to gathering at the neckline. The peplum was made by putting together the top sections of the skirt sloper to take out the darts, almost like making a skirt yoke, so as to keep it low profile when tucked into the petticoat.

Quarter-scale pattern work.
The finished corset cover. 

The back! Compare to this one from The Met, which is looser. 


The front closes with buttons, plus a hook and bar at the waist and a ribbon at the top. I decided to go Bernadette Banner and make hand-worked buttonholes...and let's just say that it's a good thing these will be under the shirtwaist. I still enjoyed the process more than making machine buttonholes, though, so it was still a net positive.


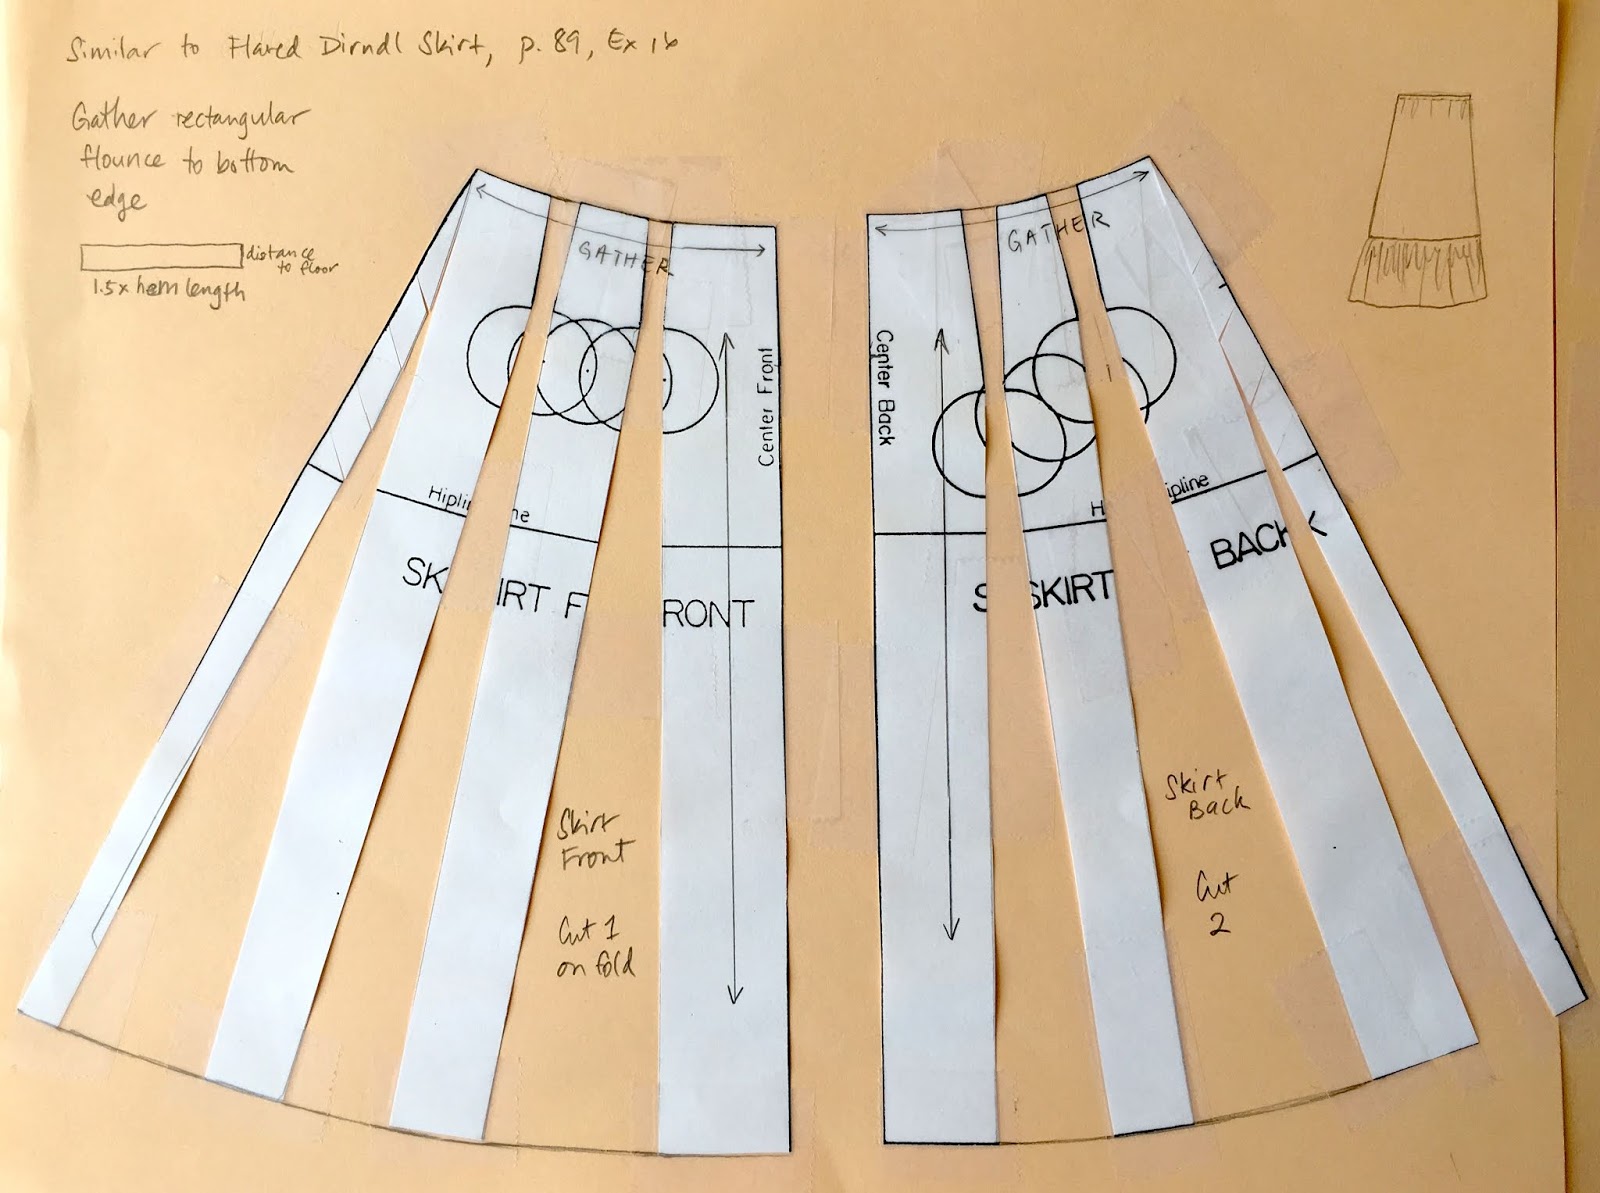
For the petticoat, I referenced the excellent material collected on Sew Historically and ended up doing what were basically curved trapezoids that gathered at the waist with a drawstring, with the ruffle being just a long rectangle gathered to the hem of the trapezoids. Ideally I would have had lace at the ruffle seam, and probably some tucks to help hold out the ruffle more, but in the interest of time, I left it plain.

I'm glad the historically accurate finish for the waist is so simple: slap on some bias tape to make a casing, and no need to even add a placket or closure to the opening.
I used the rolled-hem foot on my machine to finish all the yards of hem. 


Since I don't have an S-bend corset, nor do I plan on getting one just for this ridiculous little project, it was imperative that I have a bustle pad to help get closer to the right silhouette. I just sketched out a little curved semi-circle shape like the one in this historical patent, cut it out of muslin and then stuffed it with Costco bear innards (one of my students gave one to SHB#1 without my prior knowledge/consent, so I've been slowly deflating it every time I need stuffing) and sewed on a piece of twill tape for a waist tie. Once again, Bernadette Banner's video was very helpful, even if I mostly didn't do what she did.


My hair has gotten ridiculously long (I haven't cut it since getting pregnant with SHB#2, which was three years ago, so it's down to the small of my back) so I figured I would give the Gibson girl hairstyle a try. I used the black pudding plushie I made nine years ago as a hair rat, then used oh, a hundred or so bobby pins to secure my hair over it. I think it worked fairly well for a spur of the moment hairstyle!

Of course, I realized *after* I did my hair that I was wearing a t-shirt and not a button-up shirt. Rather than take it off over my head to change, I had to awkwardly shimmy it off over my hips. Good thing it's just an old work shirt from Mr. Cation, so it doesn't matter that the neck hole got all stretched out! 

So here's what it all looked like together:

Oh hai, I'm the Chinese Camille Clifford knock-off. 

My hair was falling down in the back. Looks like a hundred bobby pins wasn't enough. 

Nice rounding out of the bum area provided by the little bustle pad!

And why are all these pictures so awkwardly cropped? Because the small human beings were entranced by Mommy's funny hair and clothes and were hovering around.


Summary

Pattern: Self-drafted, based on historical pattern pieces/drafting directions

Fabric: For the corset cover, I used a leftover piece of thrifted white cotton sateen sheet (the rest of the sheet went to a Princess Leia costume for a friend). I dyed it with coffee to get it match the lace. The petticoat is a (unfortunately) polyester microfiber sheet in a pale mint green that somebody gave me "because you like sewing with sheets, right?" I used it because it fits the Slytherin color scheme, and all my other sheets were too patterned or earmarked for other projects already.

Notions: Three very anachronistic clear buttons for the corset cover, and a hook for the waist closure. I ran out of bars so I made a thread bar for the first time! The lace for the top is from a vintage fair I went to eight years ago, so I'm glad I finally got a chance to use it. The bias tape for the petticoat drawstring casing is from my school librarian's neighbor's destash, and the drawstring itself is cut off of an old bathrobe.

Hours: A couple hours for drafting, a couple for cutting out, 1.5 hours for sewing the petticoat, and probably four for the corset cover. Total: let's just say 14.

How accurate is it? The corset cover should be made with thinner fabric and probably should have a drawstring at the waist, too. The petticoat should probably be made with stiffer fabric and have more lace, tucks, and ruffles.

Total cost: The fabrics were all stash, given to me, or leftover from other projects, so I'm going to say $5 when counting the little bit of lace, cotton sheet, and buttons. And once again, I didn't buy anything new!

Final thoughts: The corset cover is a little tight in the armscye and bust area, so I'm thinking of going in and adding a little triangular wedge at the side seam. Again, we're theoretically not designing garments for ourselves, but for a mannequin, so I'm not surprised, but I would like it to be a little more comfortable to wear. I think once I do that and get a blousier fit, I'll be pretty pleased with the overall "ooh, I'm in my historical undahwears!" look though!


Old-timey filter!